Tools to Help Document Azure Resource Groups

Sometimes is a good to go back an review any fundamental concepts. This way you can refresh and improve your skill sets. It’s true that practice makes perfect!

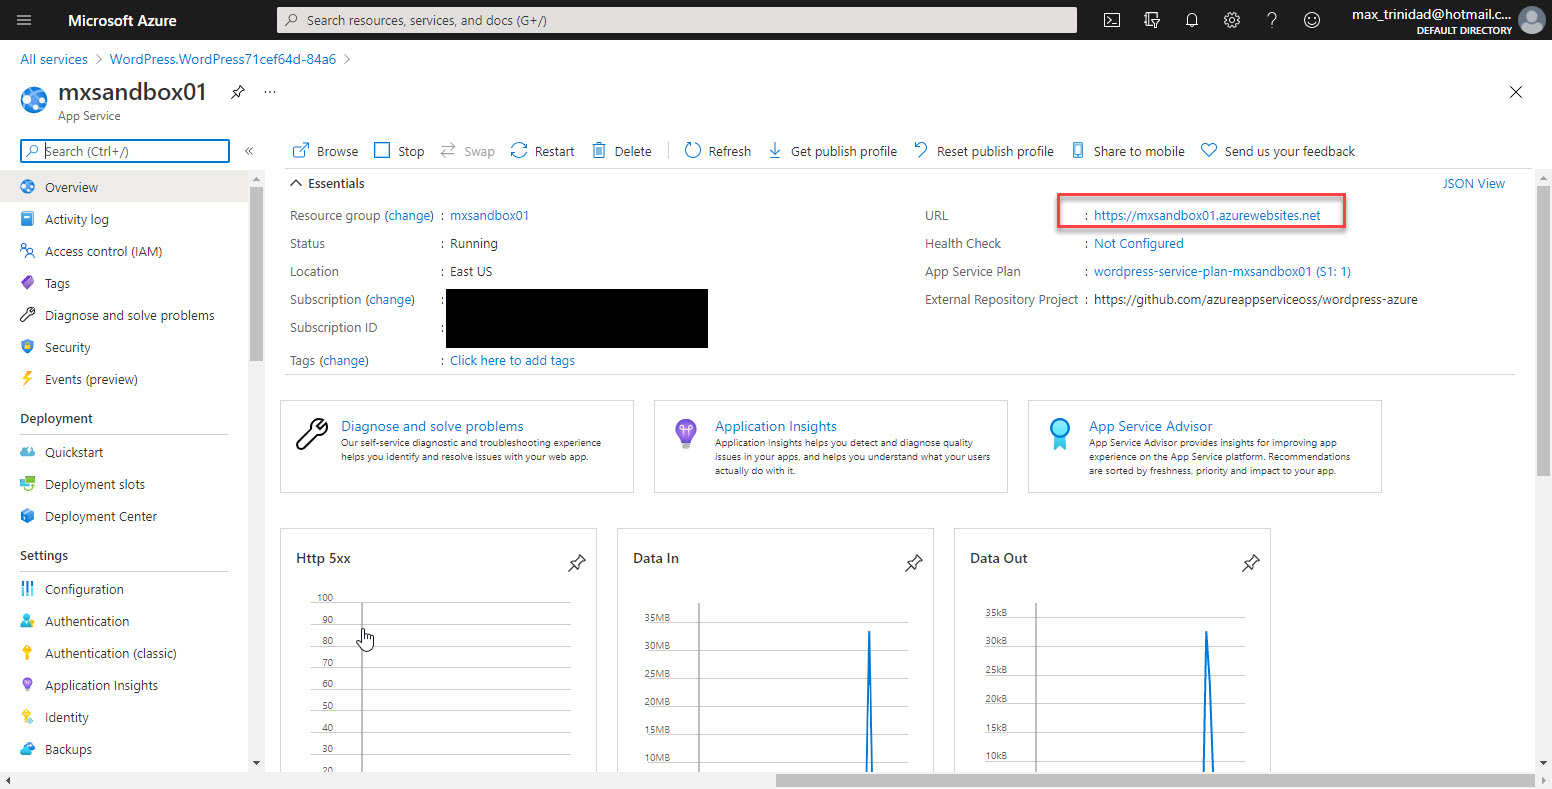
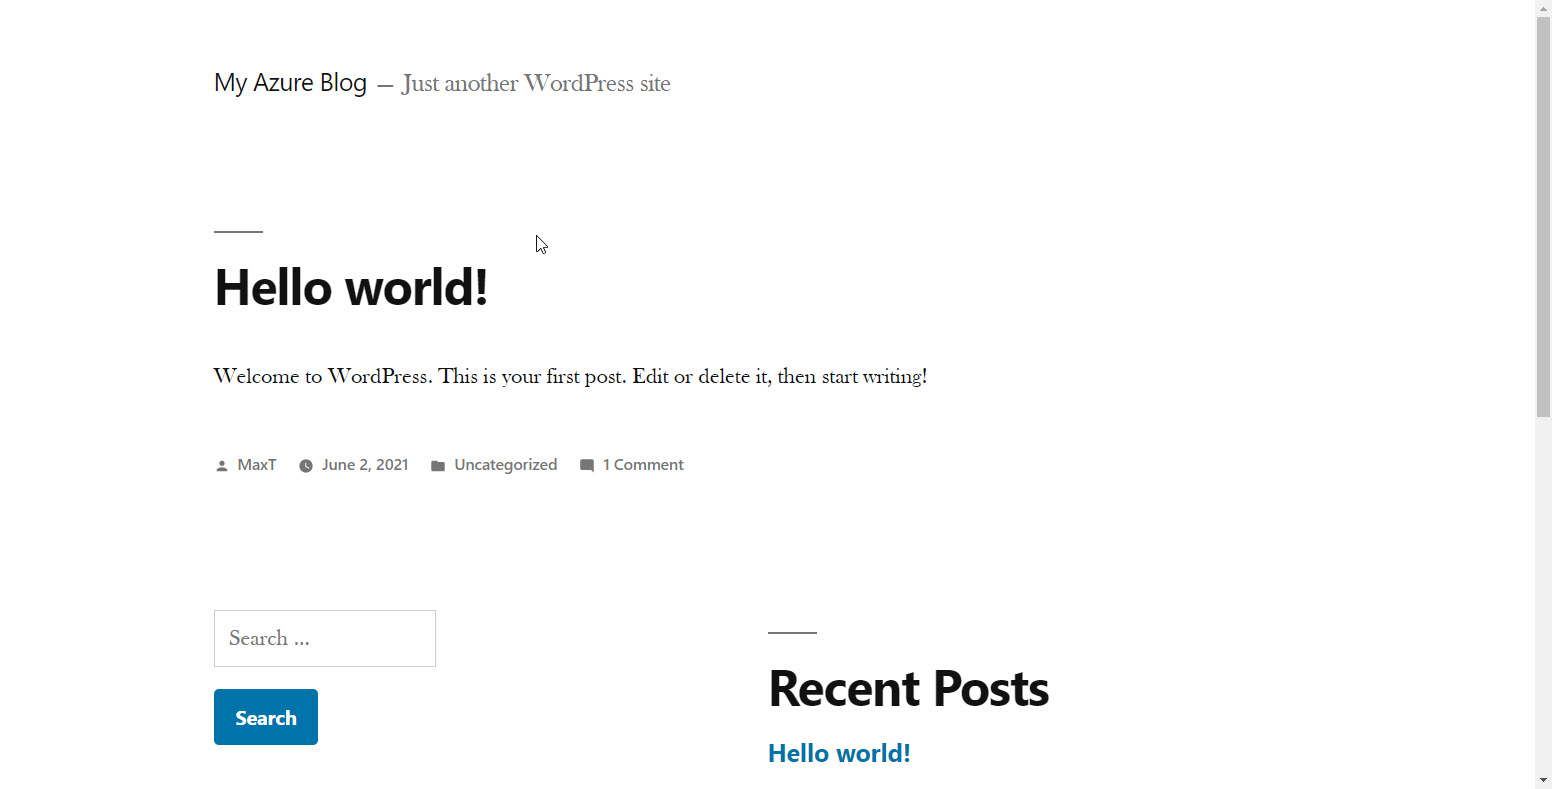
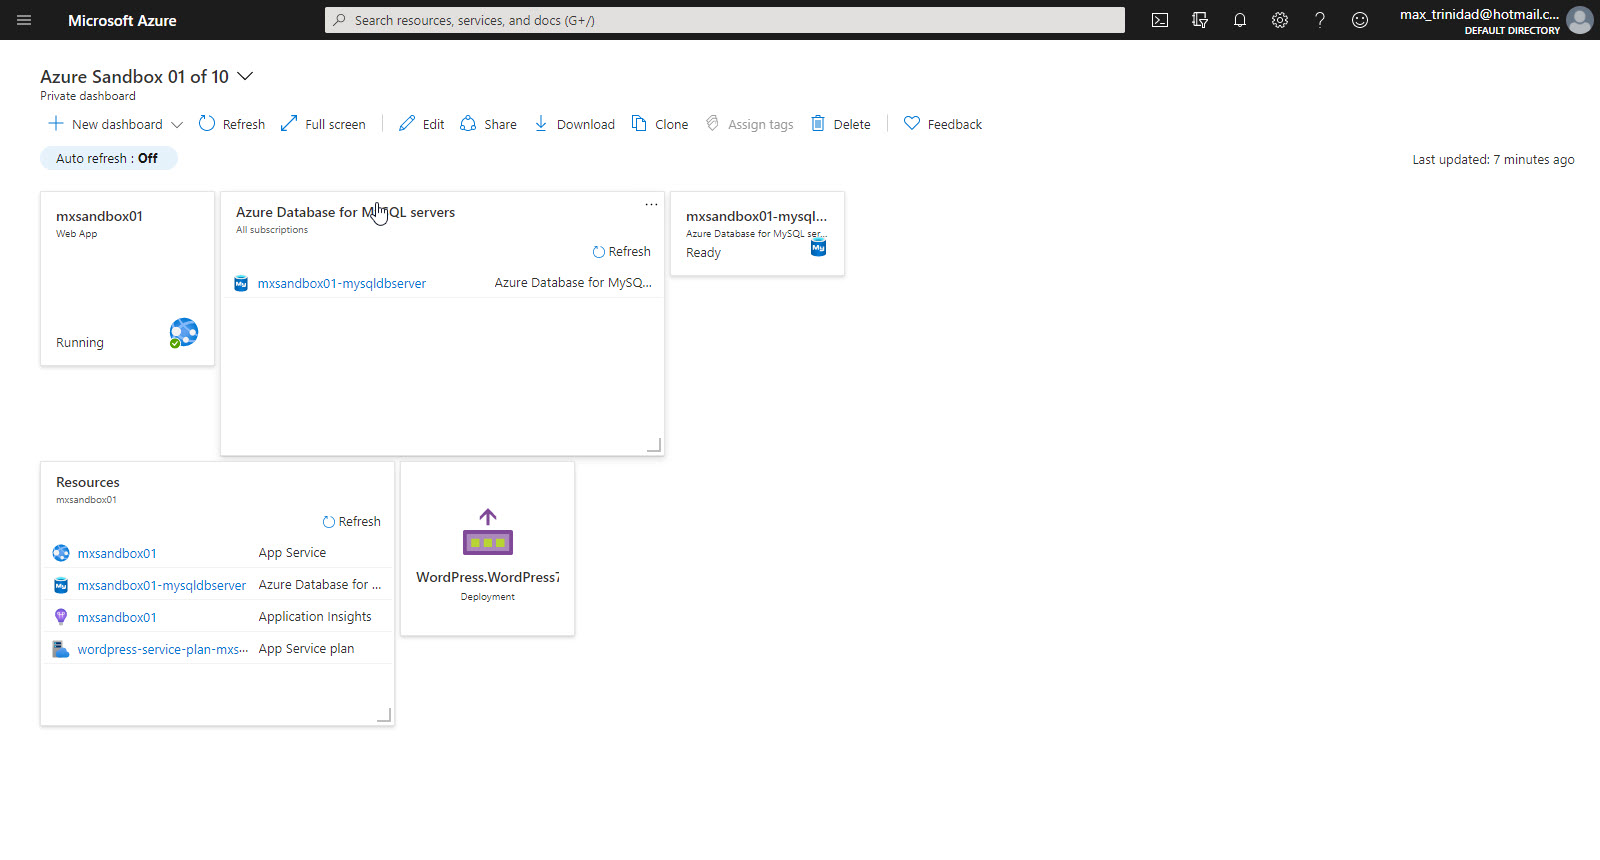
So, while reviewing the Microsoft Docs “Azure Architecture Fundamentals” . Here it discuss the use of Dashboards you can customized and organized your Azure resources. This course will help you setup a sandbox environment, so you can build a WordPress web application.


I went ahead to create my dashboard  documenting this exercise. Just keeping it simple!

For more information click on Azure Dashboard. You can create up to 100 ‘Private’ dashboards per user.

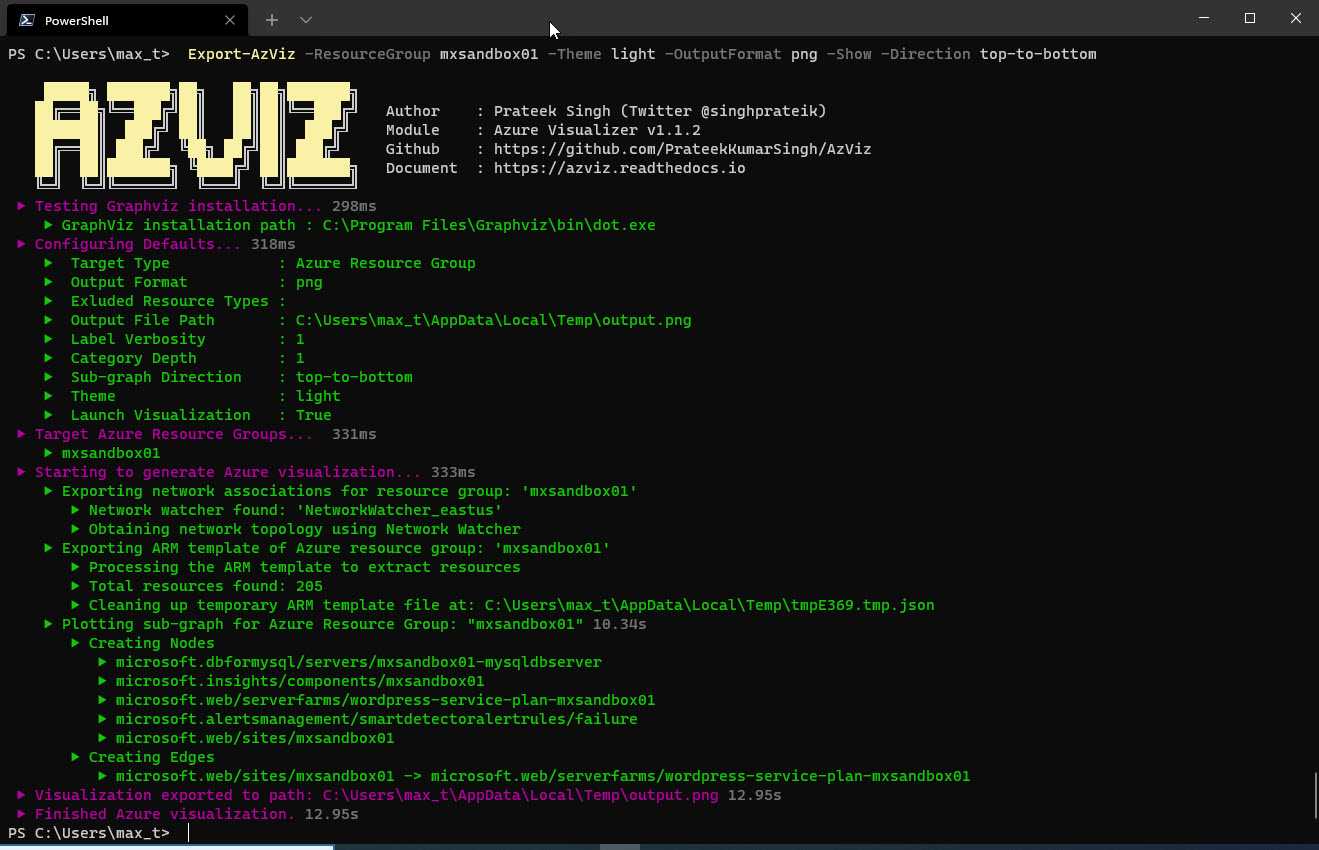
The next tool has recently got some attention: AzViz PowerShell module. This is module has the ability to generate a visual representation of your Azure Resources.

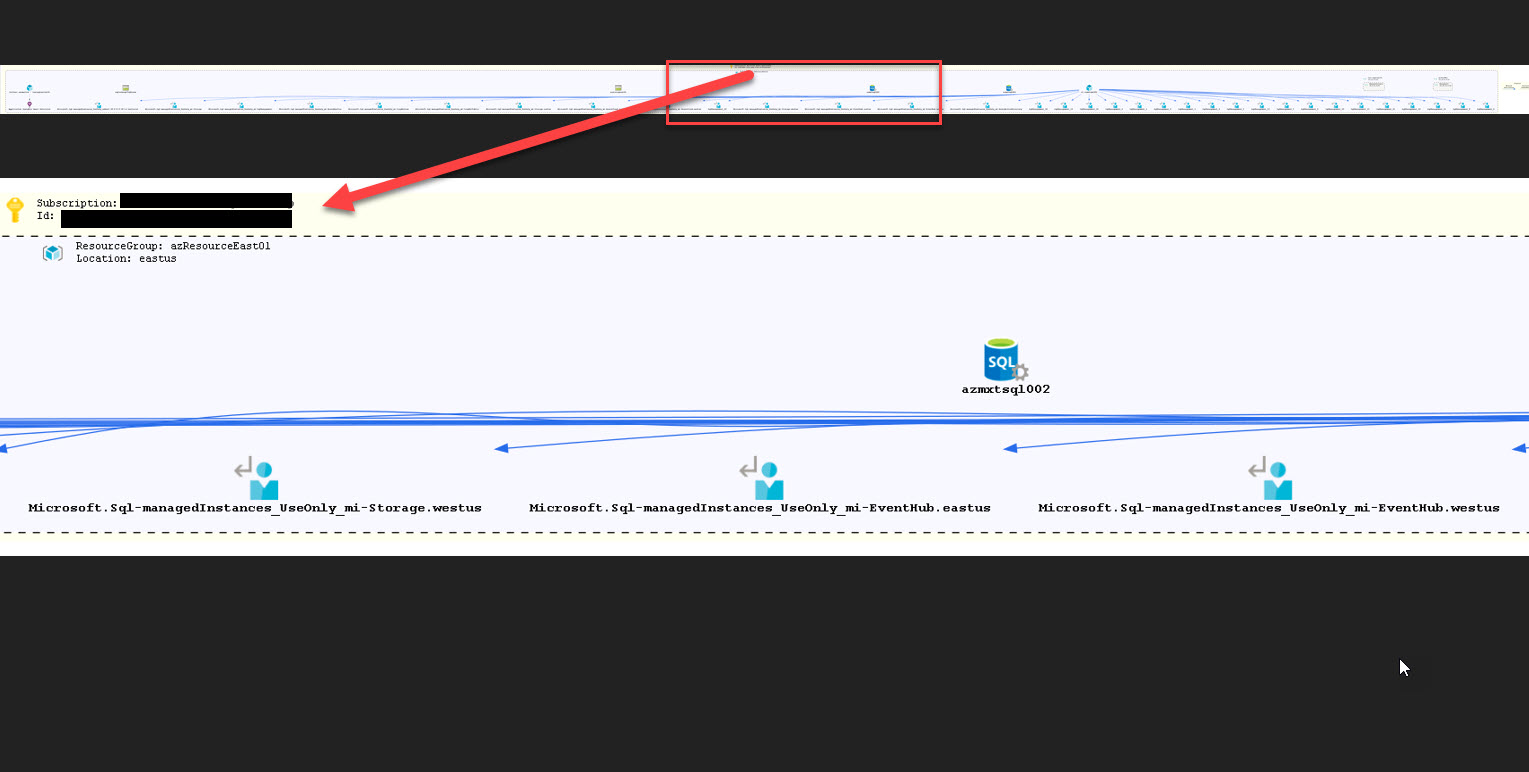
What was Great about this PowerShell module? For some time, I’ve created many sample demo resource assets within my subscription. This module show me the mess I have with my Azure assets in the cloud. See below image.

This is great tool for documenting your Azure Resources Group with a single one-liner help you create the the an image file of your Azure Resources Group assets.

## - AzViz example, after connecting to your Azure Subscription:
Import-Module AzViz
Export-AzViz -ResourceGroup 'your-azresourcegrp' -Theme light -OutputFormat png -Show -Direction top-to-bottom

Note: Keep in mind, you’ll need to manually rename the output.png file.

As you can see, much better picture presentation compare to the messy one.

This module will can be installed from the PowerShell Gallery, and any issues reported in Github.

As you can see, these tool not only help you to document, but also manage and organize your workloads.

Go Ahead and Try it!

Handling SQL Server Connection strings with PowerShell Secret Management

Finally, I came up with a practical example using the Powershell Secret Management module for storing SQL credentials. This is an excellent way of keeping your SQL connection strings information out of your scripting code. This way we just have it stored in our Vault.

Where do I start?

To install the Powershell Secret Management module, execute the following series of one-liners in a PowerShell prompt to install the latest version from the PowerShell Gallery:

Note: This module has finally reached GA (Generally Available) status.

## - install from the PowerShell Gallery both: SecretManagement, and SecretStore modules:
Install-Module Microsoft.PowerShell.SecretManagement, Microsoft.PowerShell.SecretStore

## - Register the vault with a given name:
Register-SecretVault -Name SecretStore -ModuleName Microsoft.PowerShell.SecretStore -DefaultVault

Now, we got the default “SecretStore” vault created. The vault password will ask once you start adding secrets.

The following cmdlets make it easy to manage your vault:

## - Module: Microsoft.PowerShell.SecretManagement
Get-Secret
Get-SecretInfo
Get-SecretVault
Register-SecretVault
Remove-Secret
Set-Secret
Test-SecretVault
Unregister-SecretVault

## - Microsoft.PowerShell.SecretStore
Get-SecretStoreConfiguration
Reset-SecretStore
Set-SecretStoreConfiguration
Set-SecretStorePassword
Unlock-SecretStore

Note: By-Design. There can only be one vault available.

Take your time to learn these commands.

Let the fun begin

Let’s cut down to the chase and see how this works. I’m going to proceed to create my secret SQL Server connection string values.

Keep in mind, secrets management supports five types of objects: byte[], String, SecureString, PSCredential, and Hashtable. By DEFAULT, the secret will be stored as a ‘SecureString‘ object.

Be creative! Why not store my connection string(s) as a hash table object containing my credential information in the following way:

## - Create hashtable object containing the SQL Connection String:
[hashtable]$MysqlCred01 = @{SqlName = "localhost,1445";Sqlusr = "sa"; SqlPwd = '$MyPwd01!';};

## - This is to veryfy the hashtable object was Properly created:
$MysqlCred01.GetType();
$MysqlCred01
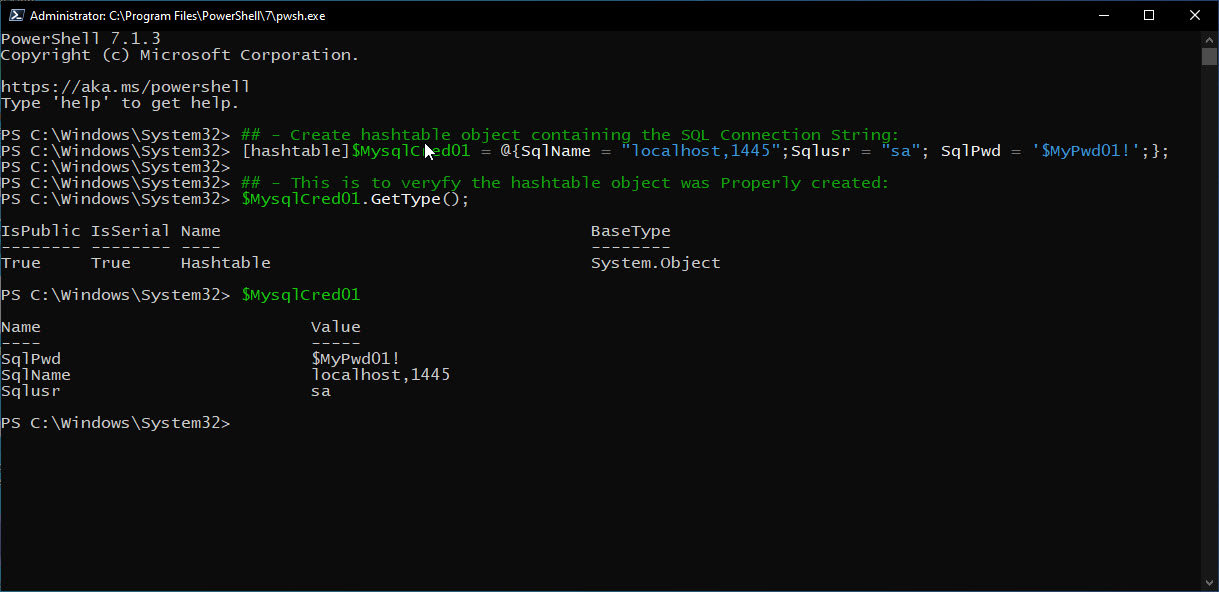
Next after creating the hashtable object, is to save it in the vault with the following command “Set-Secret“:

## - Storing the secret in the vault:
Set-Secret -name MysqlCred01 -secret $MysqlCred01
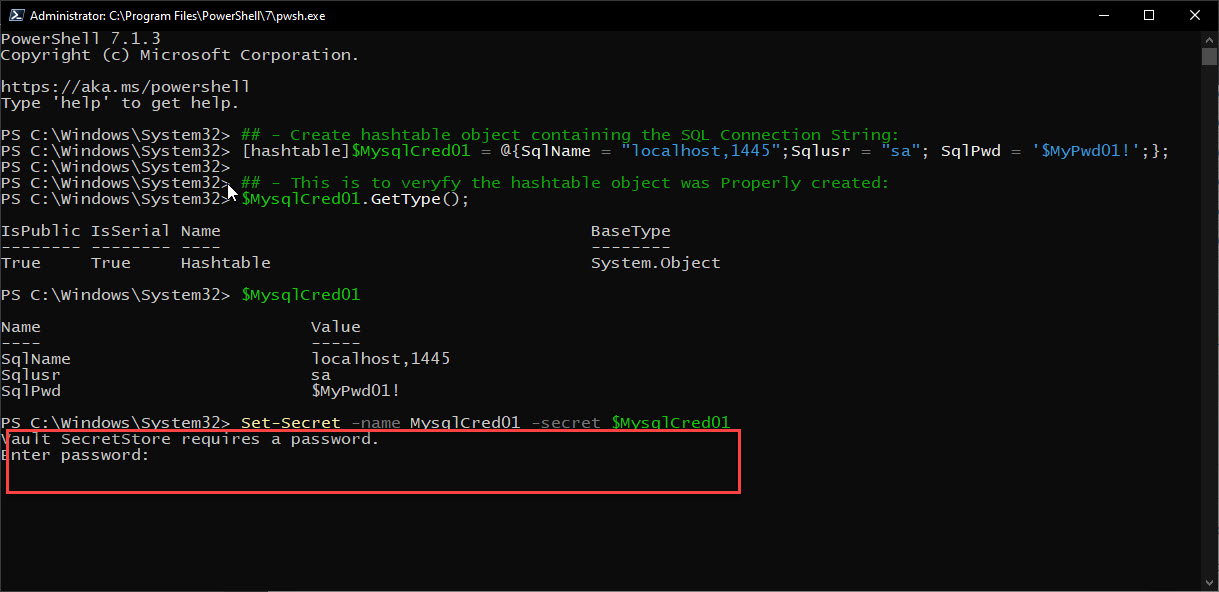
Note: the first time you store a secret value to the vault, you’ll be prompted for a password.

As you save more secrets, use the following command “Get-SecretInfo” to list what you have in the vault:

## Displaying all stored secrets:
Get-SecretInfo
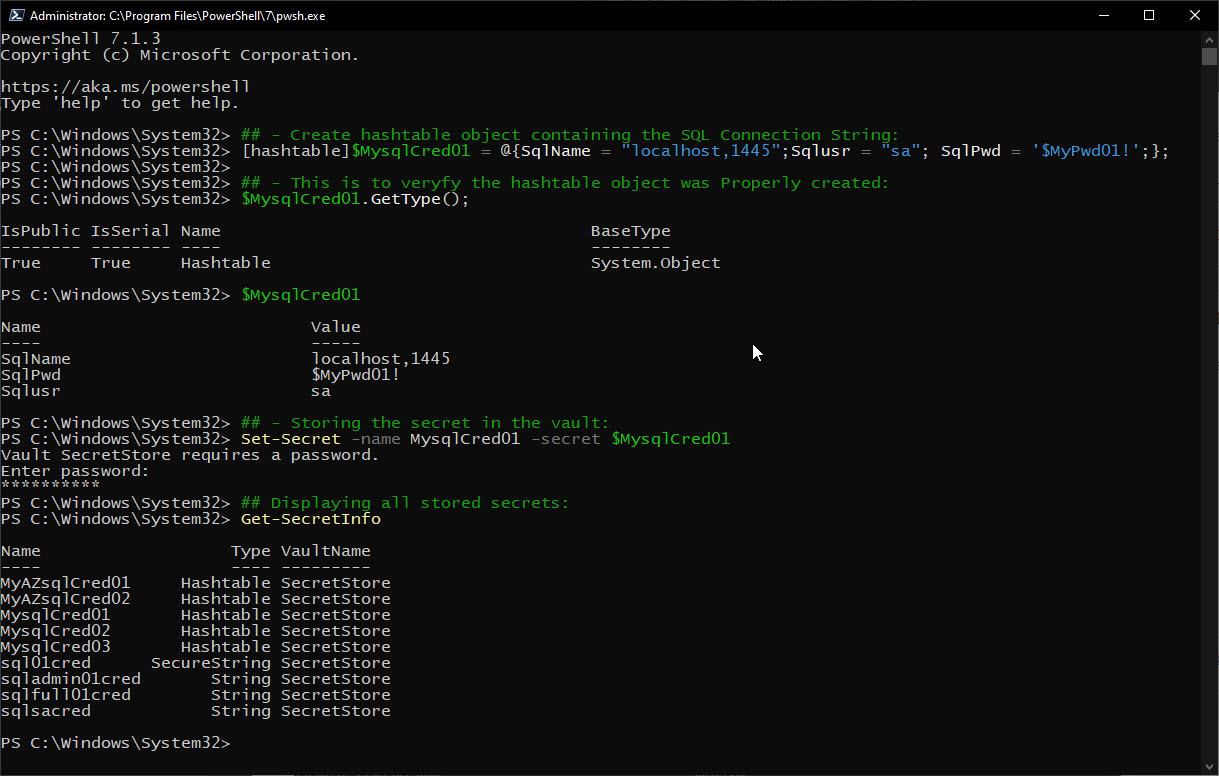
Now, to get your secret from the vault and use it in PowerShell:

## - Pulling the secret out of the vault into PowerShell variable as plain text:
$MysqlhashCred01 = Get-secret -name MysqlCred01 -asplaintext

## - Accessing hash table values:
$MysqlhashCred01.SqlName
$MysqlhashCred01.Sqlusr
$MysqlhashCred01.SqlPwd

You will notice that eventually, your access will time-out locking you out of the vault. Here’s you use the following command “Unlock-SecretStore” to temporarily unlock the vault:

## - Unlocking the vault to access your secrets providing the vault password:
Unlock-SecretStore -Password '$yourpwd!'

Now, the “Unlock-SecretStore” command is useful for script automation. when you want the script to quickly access the vault. You’ll need to do the following:

## - Unlocking the vault for automation:
Unlock-SecretStore -Password $(ConvertTo-SecureString -String '$yourpwd!' -AsPlainText);
Get-SecretInfo

This way SecretStore vault will not prompt for a password.

Implementing Secret in a GUI Application

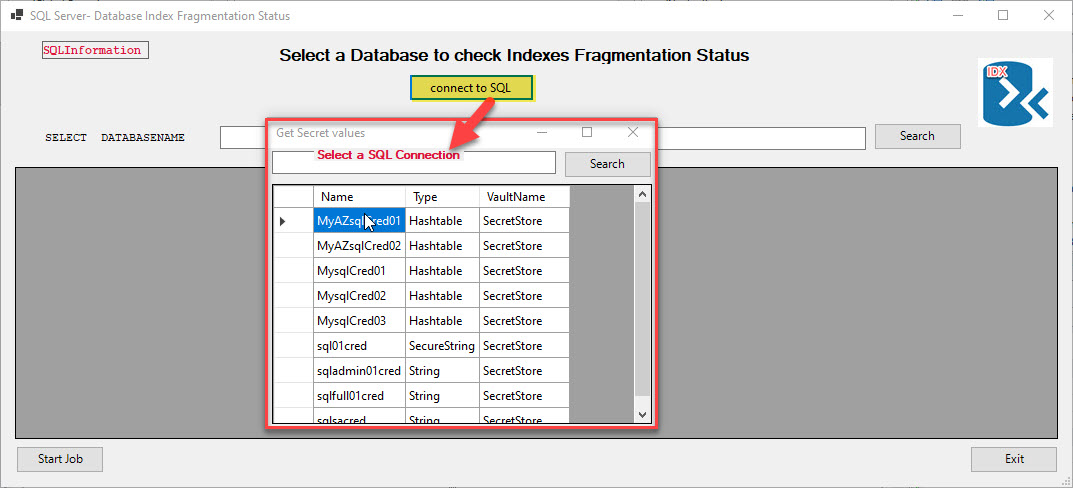
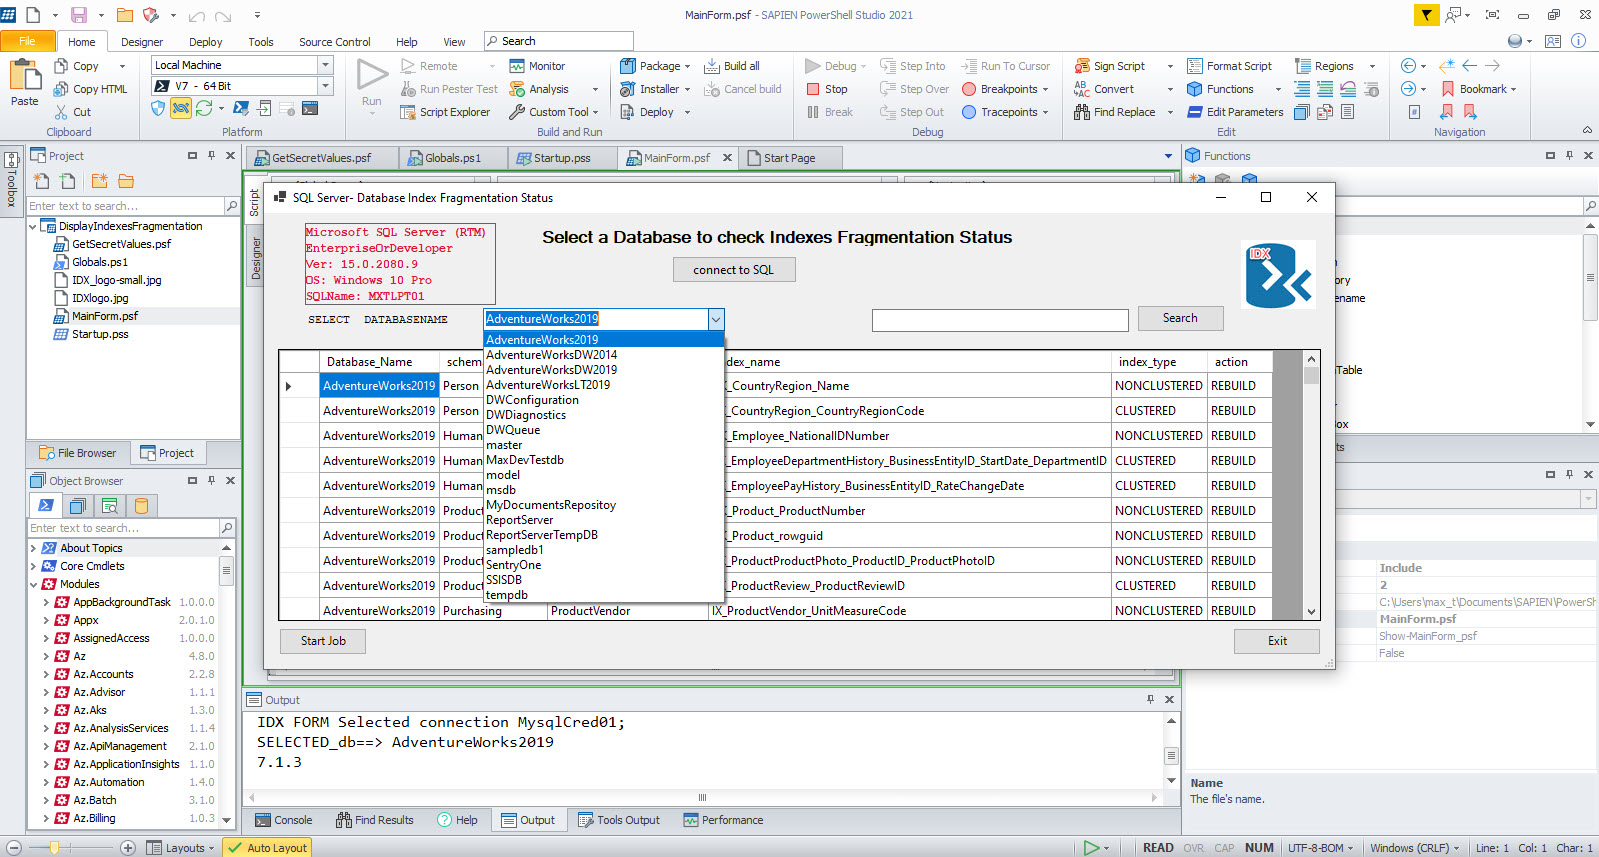
Here’s an example of implementing secret in one of my SAPIEN PowerShell Studio GUI applications that check for SQL Server Database Index Fragmentation.
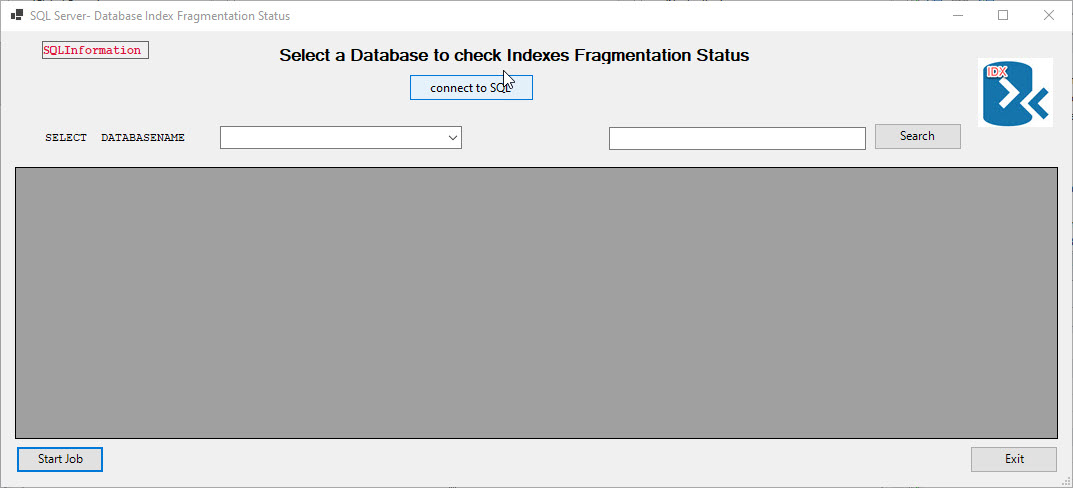
This is a multi-form Window application that where you can select a connection string stored in your SecretStore vault. then you can select the Database and click on the “Start-Job” button to list the status of Database index fragmentation. In this sample application, I can connect to both my local SQL Server and 2 of my Azure SQL Databases.
If you work with PowerShell, both SAPIEN’s Primalscript and PowerShell Studio is a good tool to have for any Administrators and DevOps. Try them out!

For more information

1. Secret Management Blog post.

2. Secret Management in Github. (Post any bugs and/or feedback here)

3. SecretStore in Github. (Post any bugs and/or feedback here)

Have a GREAT SQL PowerShell Day! This is the way!
Getting Ready for PowerShell 7.1 (GA)

This November, PowerShell 7.1 (GA) will become available, as well as PowerShell 7.2 Preview version. And it will come with some interesting features.
If you want more information on these upcoming releases, check out the following two videos:

* Taking your automation to the next level with PowerShell 7

* PowerShell Unplugged – Challenge Edition

Both videos will give you enough information about the history and what’s coming in PowerShell 7.1.
I guarantee that you won’t be disappointed.

But wait! There’s more. Don’t forget to check out any of the existing modules found in the PowerShell Gallery, such as:

* Microsoft.PowerShell.SecretManagement and Microsoft.PowerShell.SecretStore

* Microsoft.PowerShell.GraphicalTools and Microsoft.PowerShell.ConsoleGuiTools

* Microsoft.PowerShell.UnixCompleters

Remember, PowerShell has become the cross-platform automation tool of choice for Windows, Linux, and macOS.
It’s never too late to get on the PowerShell bandwagon!

Installing PowerShell 7 in Ubuntu 20.04

Everyone knows, that sometime soon, Microsoft will support the PowerShell installation in Ubuntu 20.04. But, in the meantime, there’s another way. And, this also applies to WSL (Windows Subsystem for Linux) Ubuntu 20.04.

It is the way!

First, you must follow the instructions for installing .NET Core for Ubuntu 20.04 from the Microsoft Documentation: https://docs.microsoft.com/en-us/dotnet/core/install/linux-ubuntu#2004-

Basically, the following commands will install both the .NET Core SDK and the Runtime components:

## Install the SDK

wget https://packages.microsoft.com/config/ubuntu/20.04/packages-microsoft-prod.deb -O packages-microsoft-prod.deb
sudo dpkg -i packages-microsoft-prod.deb

sudo apt-get update; \
sudo apt-get install -y apt-transport-https && \
sudo apt-get update && \
sudo apt-get install -y dotnet-sdk-3.1

## Install Runtime

sudo apt-get update; \
sudo apt-get install -y apt-transport-https && \
sudo apt-get update && \
sudo apt-get install -y aspnetcore-runtime-3.1

sudo apt-get install -y dotnet-runtime-3.1

So, after the .NET Core gets installed, then proceed to install the “.NET Global” tool:

## - Install .NET Interactive:
dotnet tool install --global Microsoft.dotnet-interactive

## Install PowerShell Global:
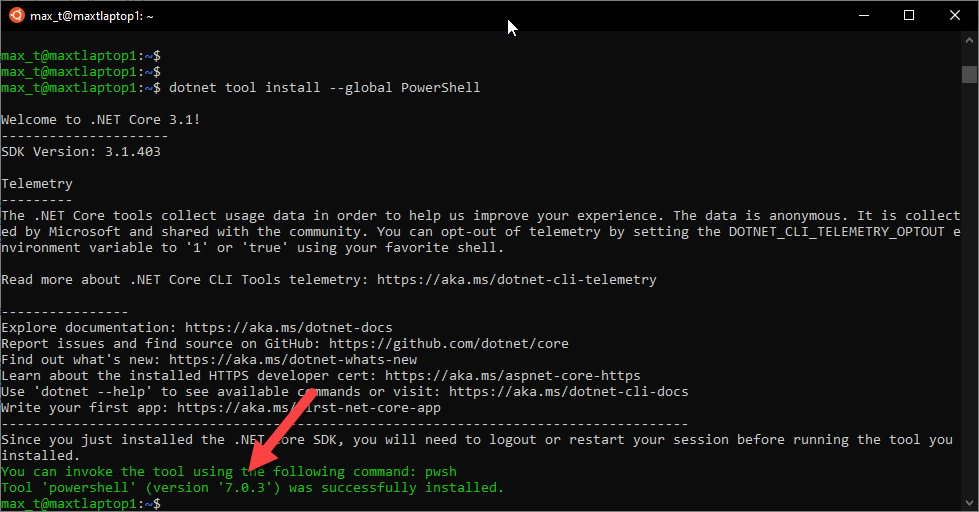
dotnet tool install --global PowerShell

Almost there! There’s one more step we need to do. If you try executing PowerShell, the system can’t find the program.

To resolve the issue of PowerShell not found, we need to add the path to the .NET Global Tools components so that PowerShell can start.

In my case, I open my VIM editor using “sudo” so I can modify the “~/.bashrc” file.

## Add .NET Tools path in Bashrc
$ sudo vim ~/.bashrc
## - Add path to .NET Tools:
export PATH=$PATH:~/.dotnet/tools
:wq

## - Refresh session after updating bashrc:
$ source ~/.bashrc

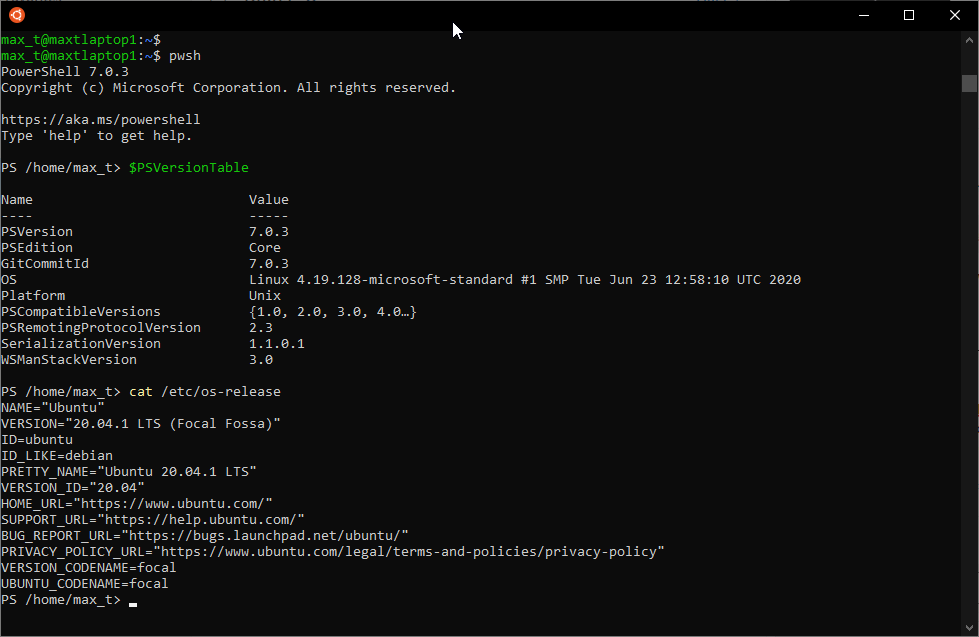
At this point, now you can start using PowerShell 7 in Ubuntu 20.04.

But, how to update PowerShell?

Simple! The following two commands will update .NET Tools when the update becomes available:

dotnet tool update -g --add-source "https://dotnet.myget.org/F/dotnet-try/api/v3/index.json" Microsoft.dotnet-interactive
dotnet tool update -g powershell

And, the following command will confirm the latest version of both the .NET Tools installed in the system:

dotnet tool list --global

Now, go ahead and have fun with PowerShell.

Happy PowerShelling!!

Available in the Microsoft Store – PowerShell Preview

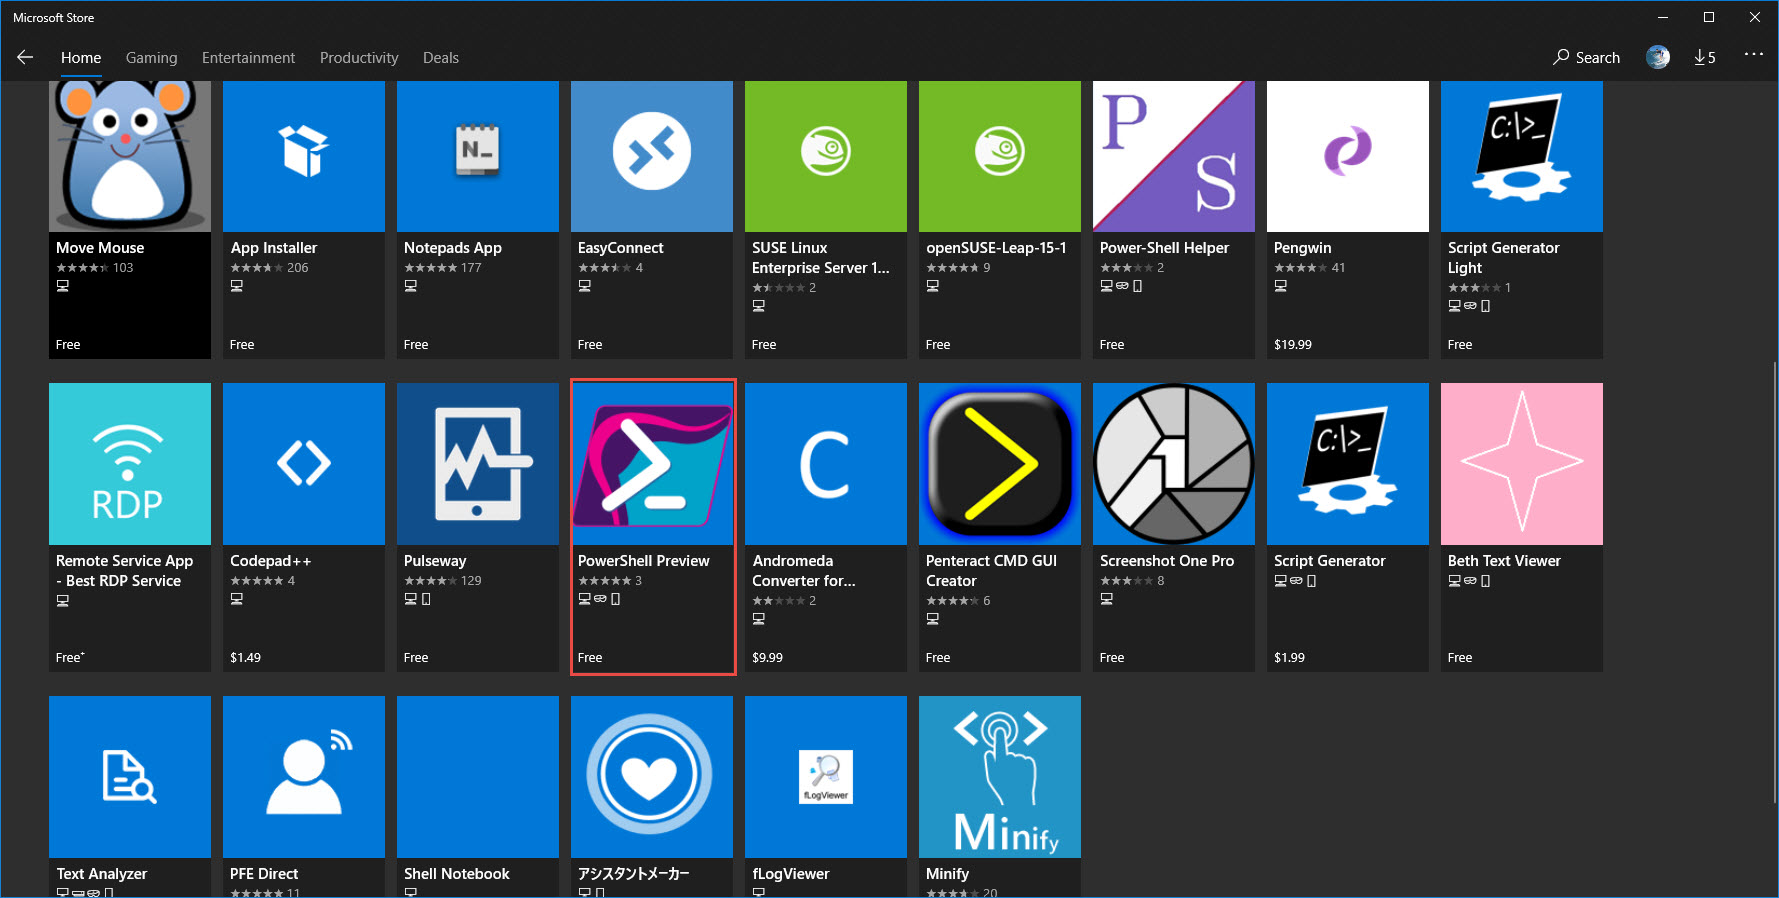
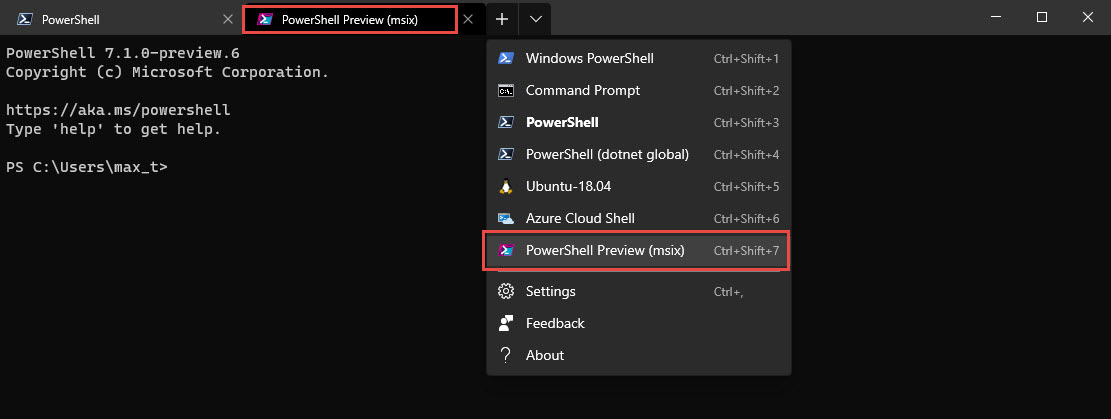
Yes! If you haven’t noticed by now, PowerShell Preview is available for download from the Microsoft Store.
Just do a search for “PowerShell

It just takes less than a minute to install.

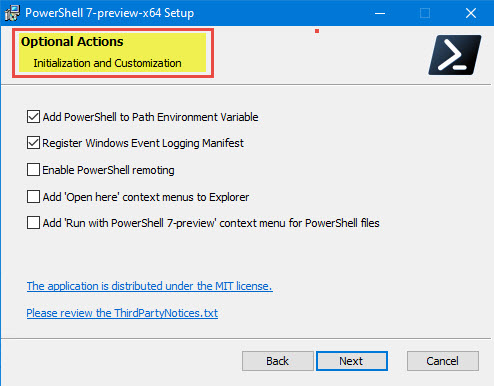
One thing you’ll miss from installing Powershell Preview using the MSI installation! That is, setting the additional options.

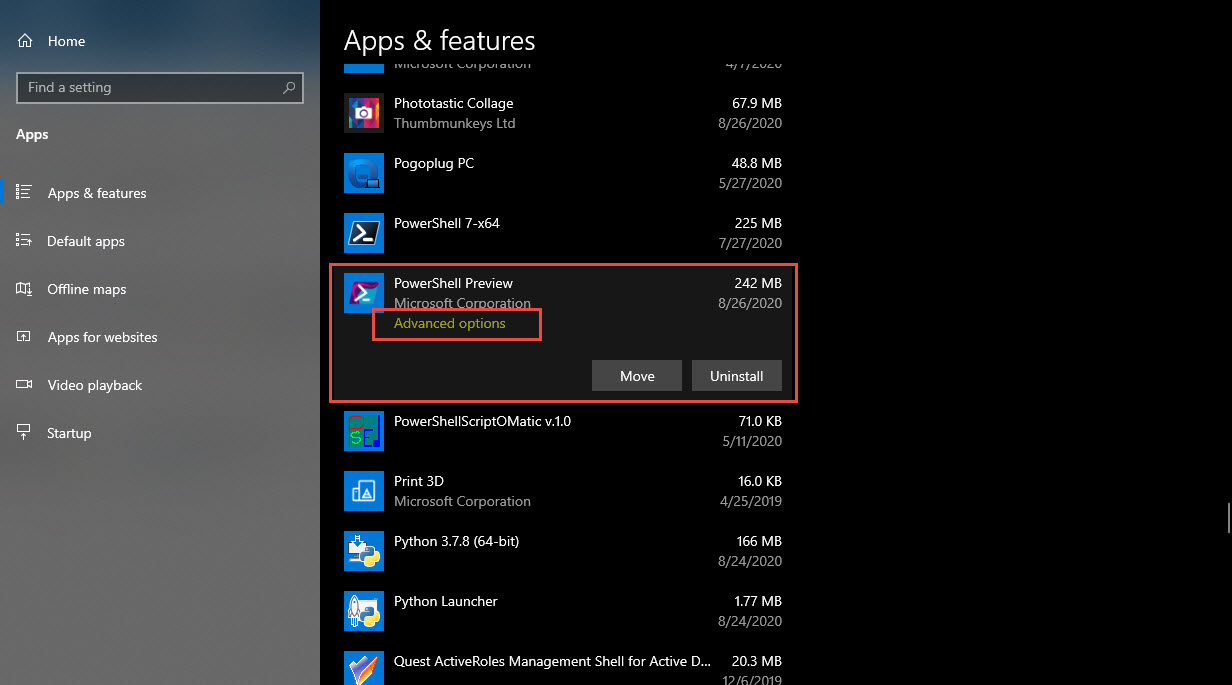
After the installation from the Microsoft Store, the PowerShell Preview application settings can be found under the Windows 10 Settings “Apps & features” section.

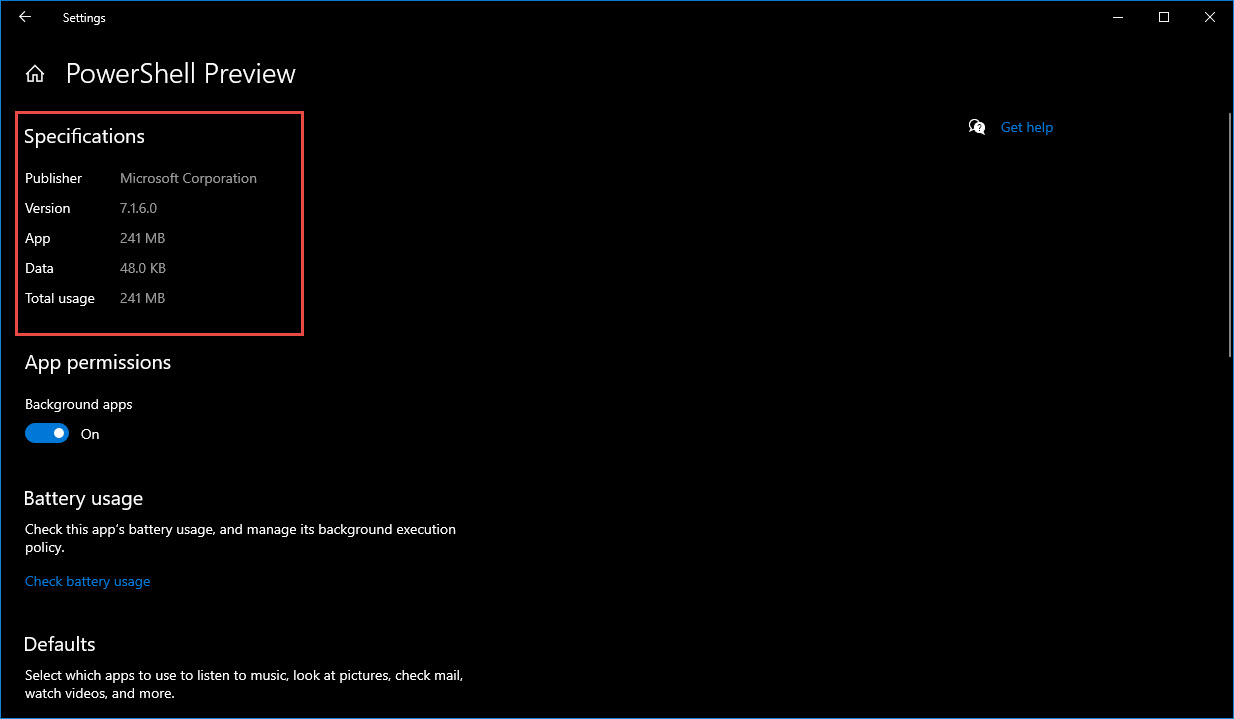
Then, click on the “Advanced options” to see additional information or make any changes to the application.

Now, the next time there’s an update to the PowerShell Preview, Windows 10 will take care of it automatically.

Happy PowerShelling!

Creating the PowerShell User Profile in Linux

In WSL, as on any Linux distribution, there’s no PowerShell User Profile file(“Microsoft.PowerShell_Profile.ps1“). So, it needs to be created manually.

Creating the profile folder

This profile is stored in the user home configuration folder “~/.config/powershell” folder.

But, the “powershell” folder doesn’t exist, it needs to be created in the configuration folder:

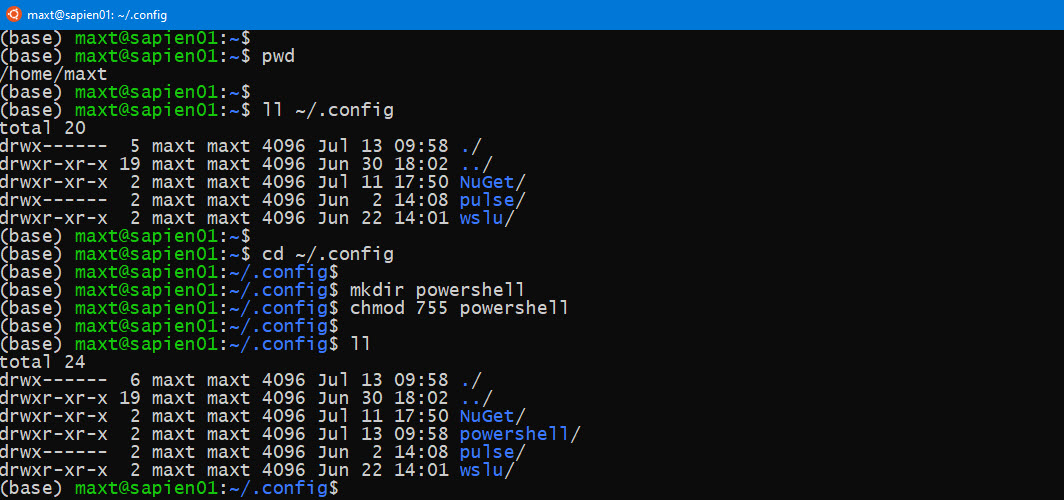
From the bash prompt, follow these steps:

1. Make sure you are in the user home folder:

pwd
cd /home/yourUserFolder

2. Verify the PowerShell folder doesn’t exist:

ls ~/.config

3. Change to the configuration folder:

cd ~/.config

3. Create the “powershell” folder, and assign permissions:

cd ~/.config
mkdir powershell
chmod 755
ll

Creating Microsoft.PowerShell_profile file

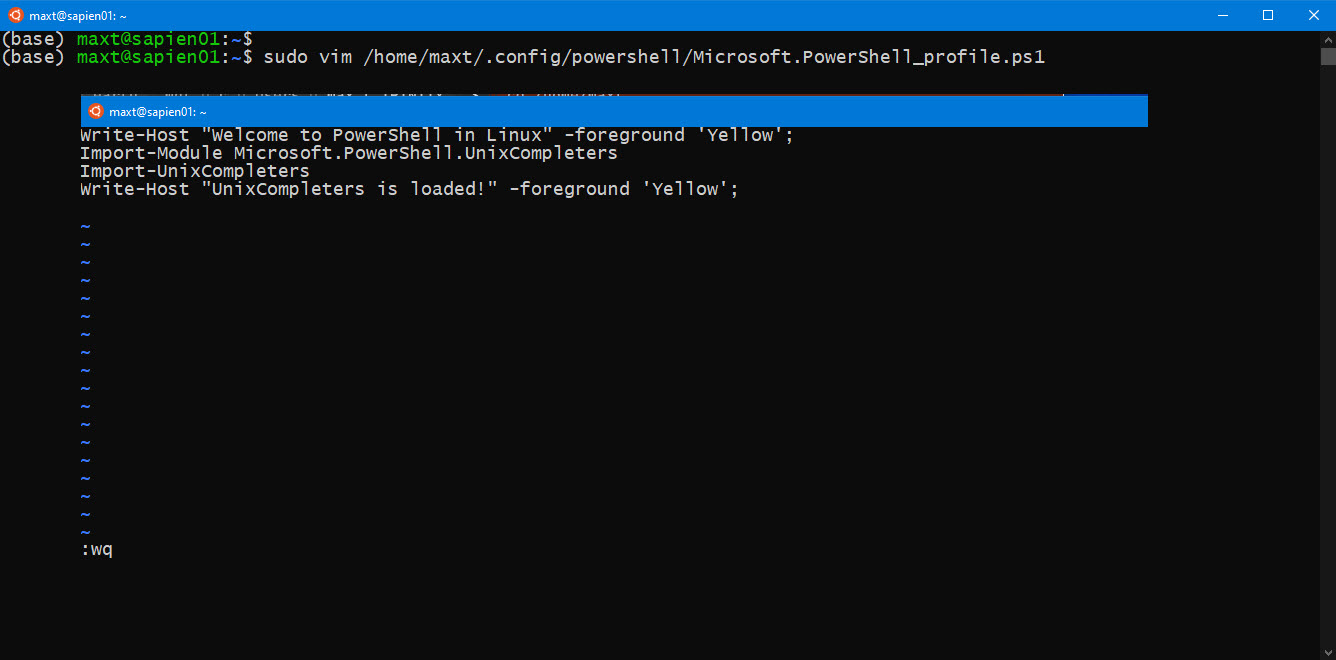
1. Using your Linux editor, create the Microsoft.PowerShell_Profile.ps1 file, and add code to the file: (Below using “vim” editor)

sudo vim /home/yourUserFolder/.config/powershell/Microsoft.PowerShell_profile.ps1
-> Write-Host "Welcome to PowerShell in Linux" -foreground 'Yellow';
-> Import-Module Microsoft.PowerShell.UnixCompleters
-> Import-UnixCompleters
-> Write-Host "UnixCompleters is loaded!" -foreground 'Yellow';

5. When done, save changes and exit “vim’ editor by typing:

:wq

Testing the PowerShell Profile

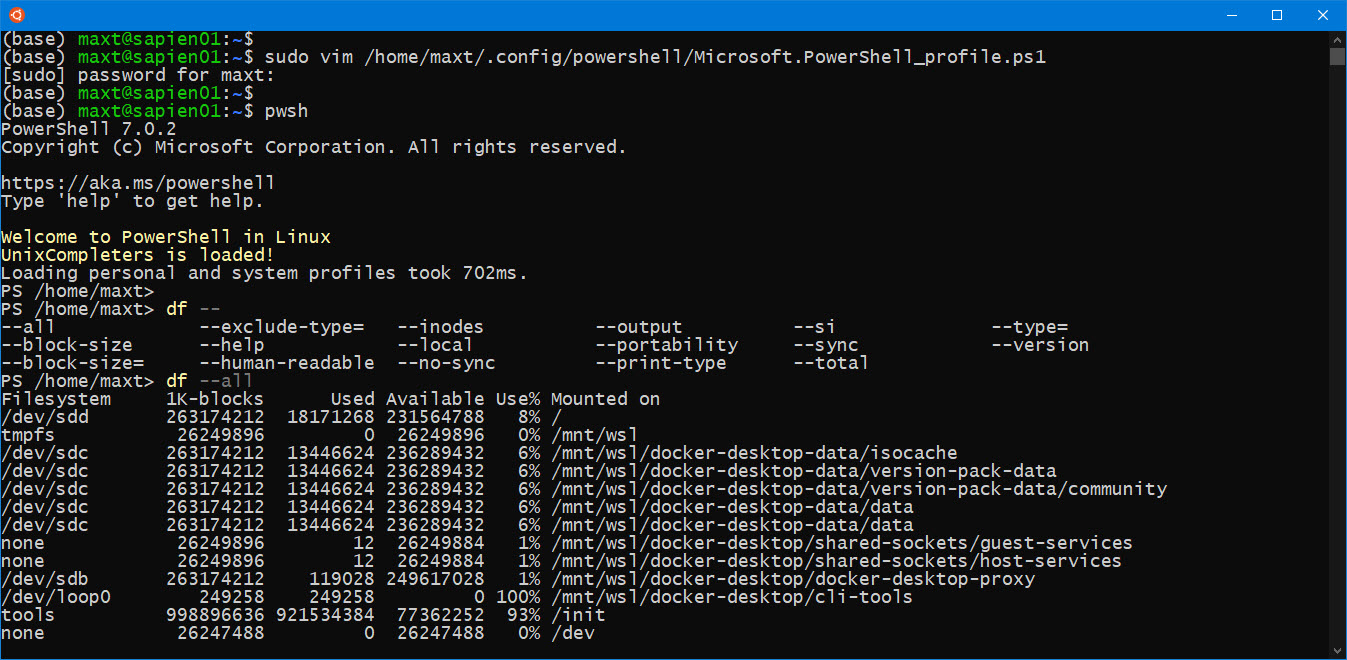
Open PowerShell and the “Welcome to PowerShell in Linux” with any other text will be displayed. At the same time, anything else in the profile will be executed.

Now, you can add more commands to the file when needed.

Keep on PowerShelling!

Getting Started – UnixCompleters Module for PowerShell in Linux

Yes! This module has been around for a while and it’s a great helper for completing bash commands in PowerShell.

Get it from the PowerShell Gallery: Microsoft.PowerShell.UnixCompleters

Installing the module

To install the UnixCompleted module manually execute the following command:

Install-Module -Name Microsoft.PowerShell.UnixCompleters

This module includes the following cmdlets:

Import-UnixCompleters
Remove-UnixCompleters
Set-UnixCompleter

Then, import the module by typing:

Import-Module Microsoft.PowerShell.UnixCompleters

Follow by running the cmdlet “Import-UnixCompleters” to load the module:

Import-UnixCompleters

Now, let’s use the ‘df‘ Linux command, which displays the amount of disk space available, to test this module:

df --

After typing the double-dash, press the tab key twice. The list of parameters will show at the bottom of the command.

Implementation

You can have this module to be loaded from your “PowerShell User Profile” which should be located in the user’s home configuration folder: /home/username/.config/powershell/Microsoft.PowerShell_profile.ps1. Remember! The “PowerShell User Profile” needs to be created manually.

Keep PowerShelling!!