I’ve been recently posting about getting SQL Server Management Objects (SMO) Framework to work in PowerShell Core in both Windows and Linux Systems. So, here’s the revised blog post as the method has kept improving. This way you can start creating some cross-platform SMO PowerShell Core scripts in your environments.
It will works the following way:
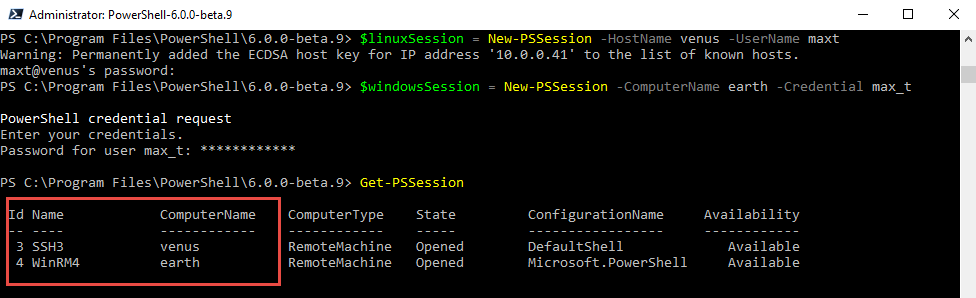
1. Windows connecting to Windows SQL Server.
2. Windows connecting to Linux SQL Server.
3. Linux connecting to Linux SQL Server.
4. *Linux connecting to Windows SQL Server.
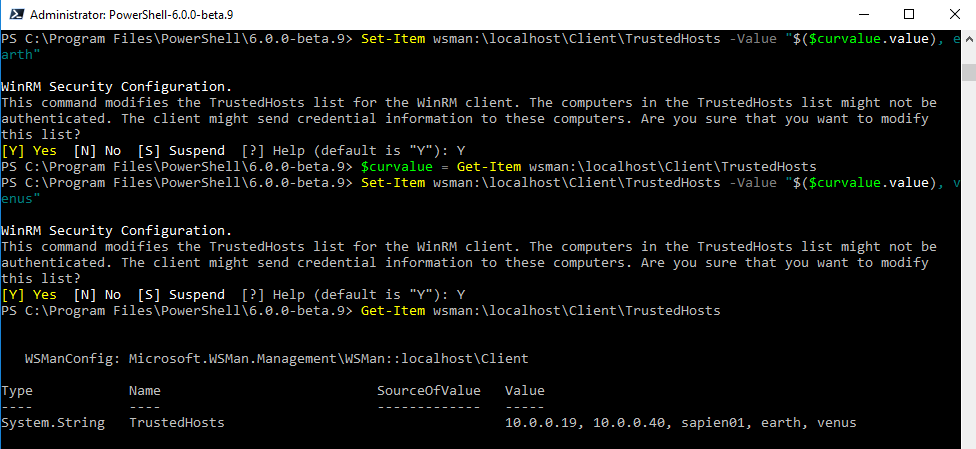
*Note: Any issues with firewall connecting from Linux to Windows, can be solved by creating the inbound rule for Linux in Windows Firewall.
How to get the SMO for PowerShell Core?
It’s easy! You can get it from NuGet Gallery using PowerShell Core Console. Just make sure you open PowerShell Core as an Administrator to avoid any installation issues.
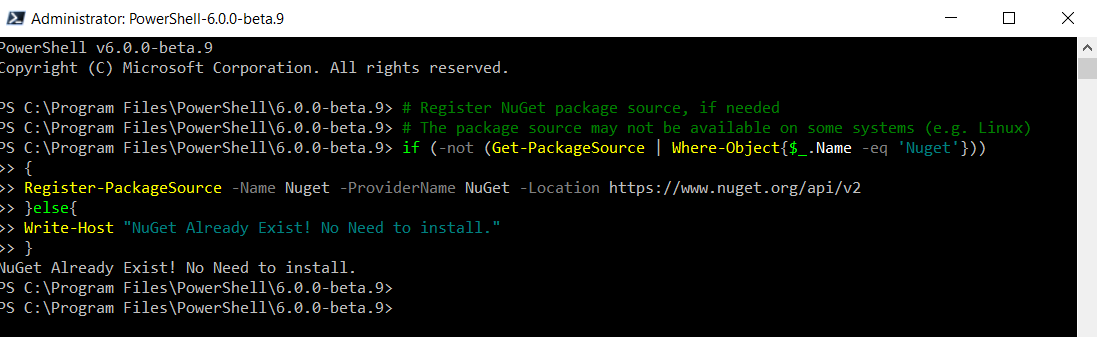
You could use the following one-liners to find and install the recent SMO package. The following “if-else” code snippet can execute in either Windows or Linux PowerShell Core console.
[sourcecode language=”powershell”]
# Register NuGet package source, if needed
# The package source may not be available on some systems (e.g. Linux)
if (-not (Get-PackageSource | Where-Object{$_.Name -eq ‘Nuget’}))
{
Register-PackageSource -Name Nuget -ProviderName NuGet -Location https://www.nuget.org/api/v2
}else{
Write-Host “NuGet Already Exist! No Need to install.”
}
[/sourcecode]
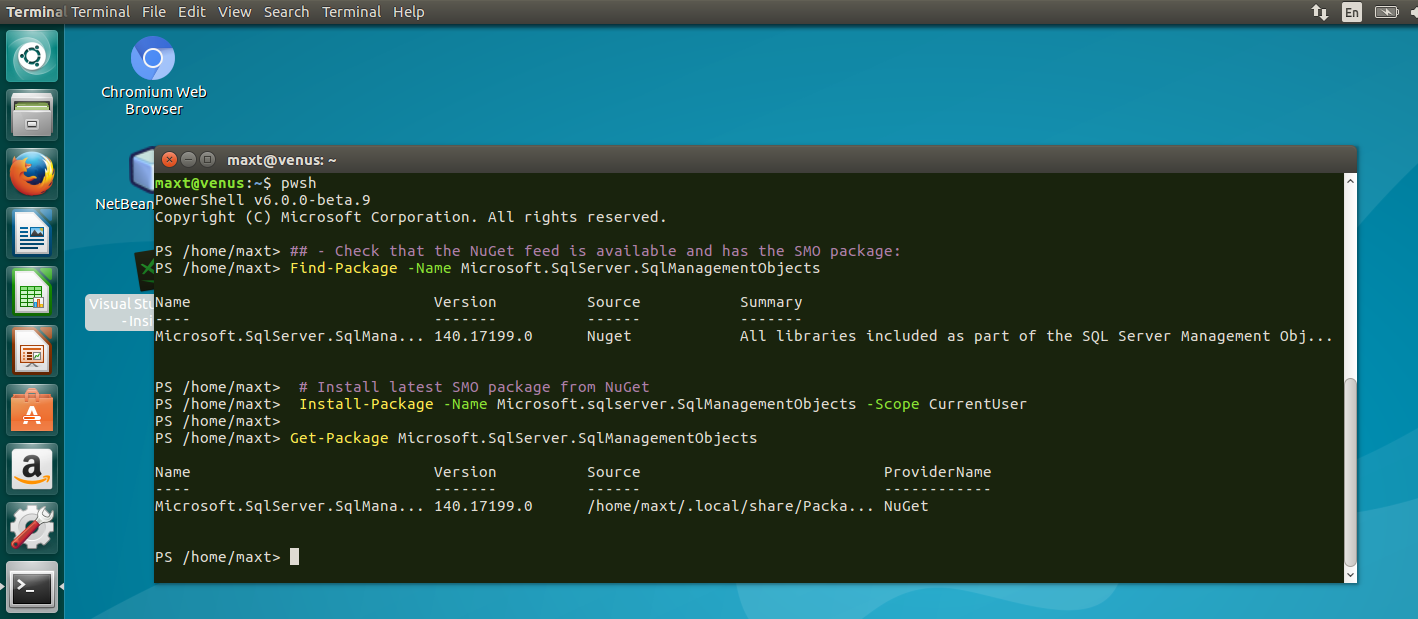
Installing SMO from NuGet Gallery
After we verified NuGet Package Management is already installed in our system, then we can proceed in Find/Install “SQL Server Management Objects (SMO) Framework“. The current version is “140.17199.0”.
Execute the following one-liner by using the Find-Package to make sure is available. Then, do the install-package command
[sourcecode language=”powershell”]
## – Check that the NuGet feed is available and has the SMO package:
Find-Package -Name Microsoft.SqlServer.SqlManagementObjects
## – Install latest SMO package from NuGet:
Install-Package -Name Microsoft.sqlserver.SqlManagementObjects -Scope CurrentUser
## – Next Line Confirmed Installation:
Get-Package Microsoft.SqlServer.SqlManagementObjects
[/sourcecode]
As of today (November 6th, 2017), the current version of Microsoft.SqlServer.SqlManagementObjects is 140.17199.0. And, it can be installed on either Windows and Linux systems from NuGet.
For more NuGet information about the SMO package, click on the following link: https://www.nuget.org/packages/Microsoft.SqlServer.SqlManagementObjects
Locating SMO Assemblies and connect to SQL Server
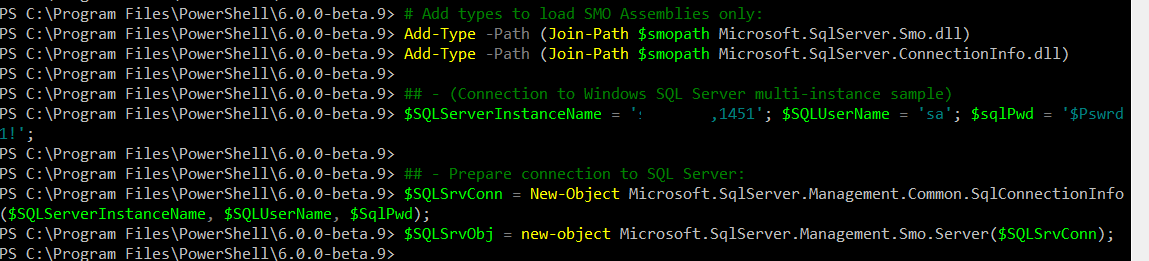
In order to use SMO in PowerShell, we need to know where they are installed. The next one-liner gets the NuGet location to build the path of the SMO installed assemblies.
[sourcecode language=”powershell”]
## – Help find and save the location of the SMO dll’s in a PowerShell variable:
$smopath = Join-Path ((Get-Package Microsoft.SqlServer.SqlManagementObjects).Source `
| Split-Path) (Join-Path lib netcoreapp2.0)
[/sourcecode]
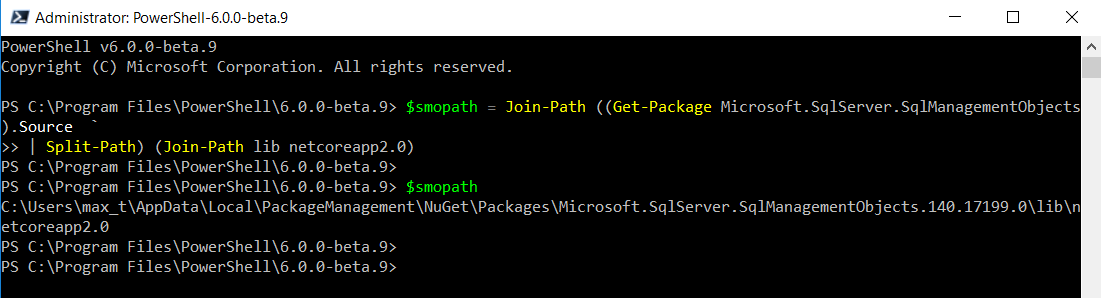
The SMO path is saved. We are ready to load the needed SMO assemblies, to connect and work with SQL Server. The code snippet below will load the SMO assemblies, connect to SQL Server providing necessary credentials:
[sourcecode language=”powershell”]
# Add types to load SMO Assemblies only:
Add-Type -Path (Join-Path $smopath Microsoft.SqlServer.Smo.dll)
Add-Type -Path (Join-Path $smopath Microsoft.SqlServer.ConnectionInfo.dll)
## – Prepare connection and credential strings for SQL Server:
## – (Connection to Linux SQL Server single instance sample)
$SQLServerInstanceName = ‘lxSql00’; $SQLUserName = ‘sa’; $sqlPwd = ‘$Pswrd1!’;
## – (Connection to Windows SQL Server multi-instance sample)
$SQLServerInstanceName = ‘winSql01,1450’; $SQLUserName = ‘sa’; $sqlPwd = ‘$Pswrd1!’;
## – Prepare connection passing credentials to SQL Server:
$SQLSrvConn = New-Object Microsoft.SqlServer.Management.Common.SqlConnectionInfo($SQLServerInstanceName, $SQLUserName, $SqlPwd);
$SQLSrvObj = new-object Microsoft.SqlServer.Management.Smo.Server($SQLSrvConn);
[/sourcecode]
In the previous code sample, I included some variance in providing the SQl Server instance for cross-platform use:
1. In Linux, either using the “SqlServername” or, “IP-Address“.
2. In Windows, either using the “SqlServerName“, or “IP-Address“, or in the case of mutliple instance “SqlServerName,Port“.
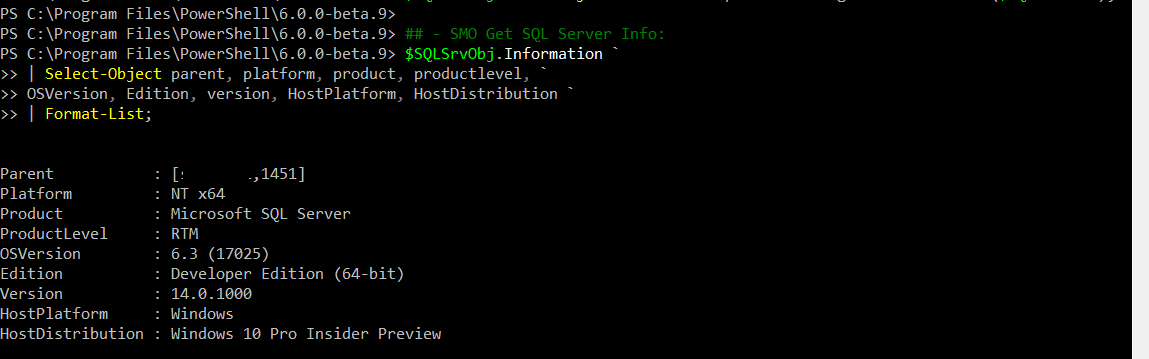
Now that the SMO connection to the SQL Server has been established, then we can continue to explore our options using .NET SMO Framework. The Code snippet below shows how to display some of the SQL Server SMO information .NET properties:
[sourcecode language=”powershell”]
## – SMO Get SQL Server Info:
$SQLSrvObj.Information `
| Select-Object parent, platform, product, productlevel, `
OSVersion, Edition, version, HostPlatform, HostDistribution `
| Format-List;
## – End of Code
[/sourcecode]
More SMO Options…
There are additioanl sources providing SMO dll’s:
1.NuGet SMO: https://www.nuget.org/packages/Microsoft.SqlServer.SqlManagementObjects/#
2.GitHub SQLToolService: https://github.com/Microsoft/sqltoolsservice
3.Installing SQL Server mssql-scripter(Python-based): https://github.com/Microsoft/sql-xplat-cli
I’ve been using GitHub “SqlToolsService” for some time now and it works closs-platform. At the same time, I’ve been keeping it up-to-date:
https://github.com/Microsoft/sqltoolsservice/releases
Conclusion
I dare to say! Using .NET SQL Server Management Objects (SMO) Framework, let you be flexible adding control over your scripting. Keep in mind, this is well documented in Microsoft MSDN site: https://docs.microsoft.com/en-us/sql/relational-databases/server-management-objects-smo/sql-server-management-objects-smo-programming-guide
My number one choice is to use NuGet Package Management. Although, you can play around with the GitHub SqlToolsService version as it gets frequent updates. The trick in using the GitHub version, is to add the path to where the Dll’s are stored and you’re good to go.
Just Dare to Experiment! Keep learning PowerShell!
Special Thanks to Microsoft: Matteo Taveggia and David Shiflet for providing me with Nuget PowerShell code piece. I just change it a little!