Getting Ready for PowerShell 7.1 (GA)

This November, PowerShell 7.1 (GA) will become available, as well as PowerShell 7.2 Preview version. And it will come with some interesting features.
If you want more information on these upcoming releases, check out the following two videos:

* Taking your automation to the next level with PowerShell 7

* PowerShell Unplugged – Challenge Edition

Both videos will give you enough information about the history and what’s coming in PowerShell 7.1.
I guarantee that you won’t be disappointed.

But wait! There’s more. Don’t forget to check out any of the existing modules found in the PowerShell Gallery, such as:

* Microsoft.PowerShell.SecretManagement and Microsoft.PowerShell.SecretStore

* Microsoft.PowerShell.GraphicalTools and Microsoft.PowerShell.ConsoleGuiTools

* Microsoft.PowerShell.UnixCompleters

Remember, PowerShell has become the cross-platform automation tool of choice for Windows, Linux, and macOS.
It’s never too late to get on the PowerShell bandwagon!

Installing PowerShell 7 in Ubuntu 20.04

Everyone knows, that sometime soon, Microsoft will support the PowerShell installation in Ubuntu 20.04. But, in the meantime, there’s another way. And, this also applies to WSL (Windows Subsystem for Linux) Ubuntu 20.04.

It is the way!

First, you must follow the instructions for installing .NET Core for Ubuntu 20.04 from the Microsoft Documentation: https://docs.microsoft.com/en-us/dotnet/core/install/linux-ubuntu#2004-

Basically, the following commands will install both the .NET Core SDK and the Runtime components:

## Install the SDK

wget https://packages.microsoft.com/config/ubuntu/20.04/packages-microsoft-prod.deb -O packages-microsoft-prod.deb
sudo dpkg -i packages-microsoft-prod.deb

sudo apt-get update; \
sudo apt-get install -y apt-transport-https && \
sudo apt-get update && \
sudo apt-get install -y dotnet-sdk-3.1

## Install Runtime

sudo apt-get update; \
sudo apt-get install -y apt-transport-https && \
sudo apt-get update && \
sudo apt-get install -y aspnetcore-runtime-3.1

sudo apt-get install -y dotnet-runtime-3.1

So, after the .NET Core gets installed, then proceed to install the “.NET Global” tool:

## - Install .NET Interactive:
dotnet tool install --global Microsoft.dotnet-interactive

## Install PowerShell Global:
dotnet tool install --global PowerShell

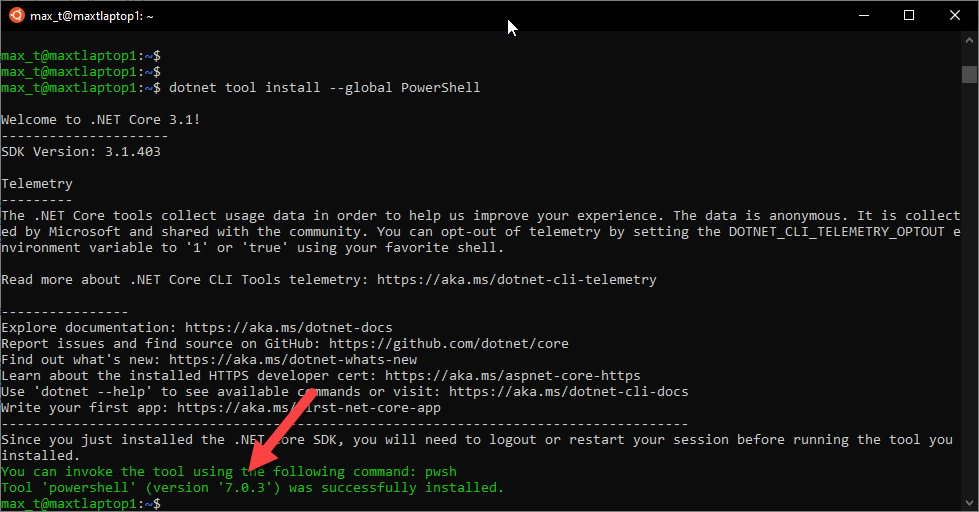
Almost there! There’s one more step we need to do. If you try executing PowerShell, the system can’t find the program.

To resolve the issue of PowerShell not found, we need to add the path to the .NET Global Tools components so that PowerShell can start.

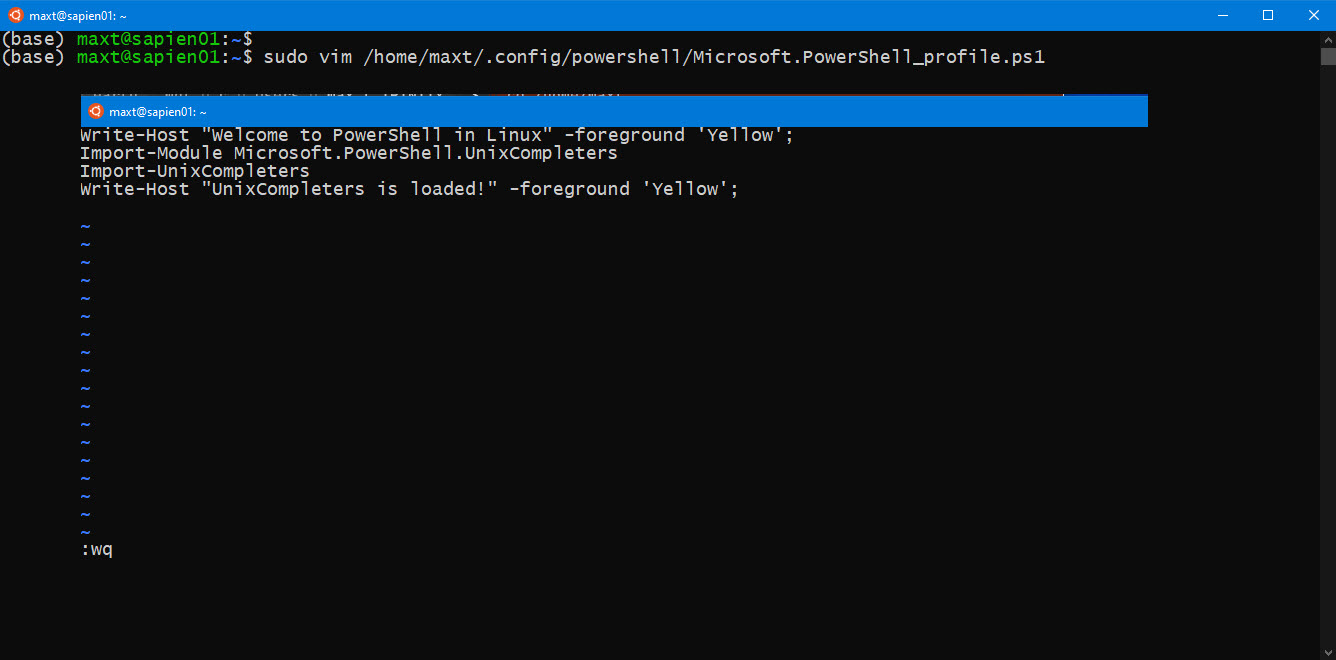
In my case, I open my VIM editor using “sudo” so I can modify the “~/.bashrc” file.

## Add .NET Tools path in Bashrc
$ sudo vim ~/.bashrc
## - Add path to .NET Tools:
export PATH=$PATH:~/.dotnet/tools
:wq

## - Refresh session after updating bashrc:
$ source ~/.bashrc

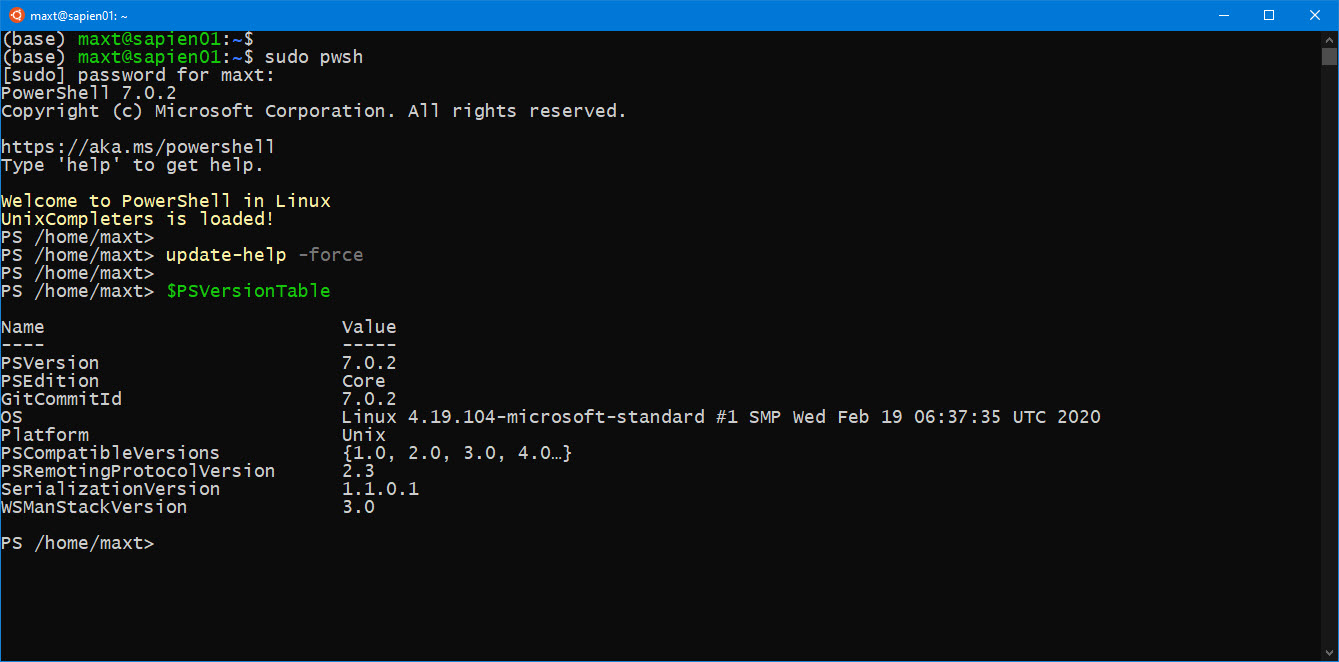
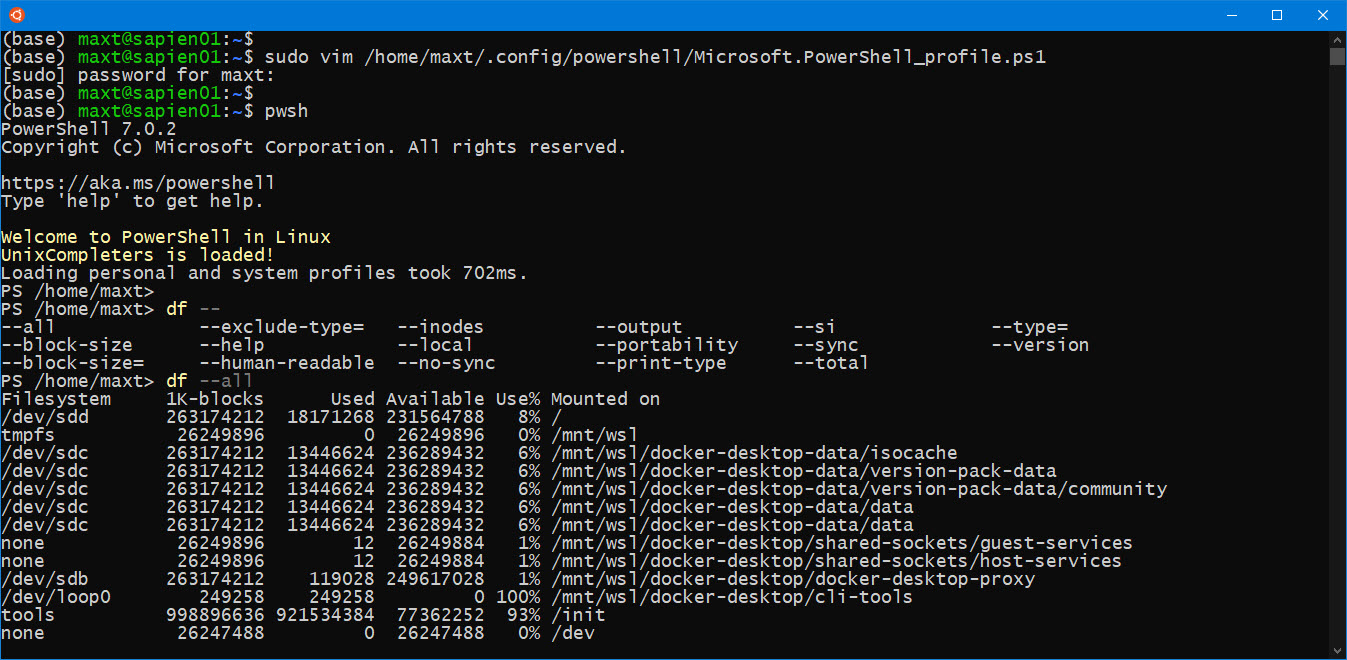
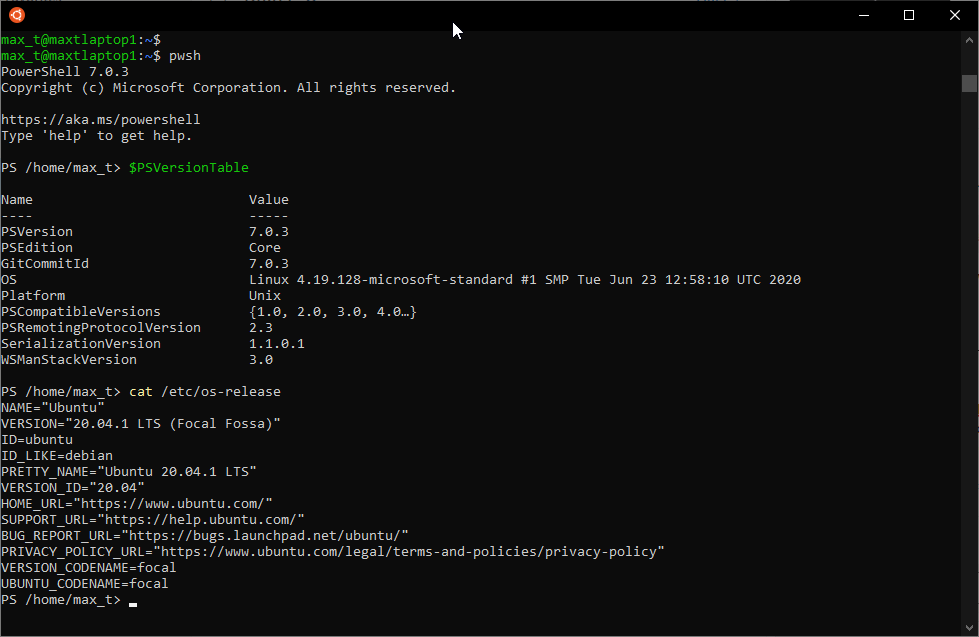
At this point, now you can start using PowerShell 7 in Ubuntu 20.04.

But, how to update PowerShell?

Simple! The following two commands will update .NET Tools when the update becomes available:

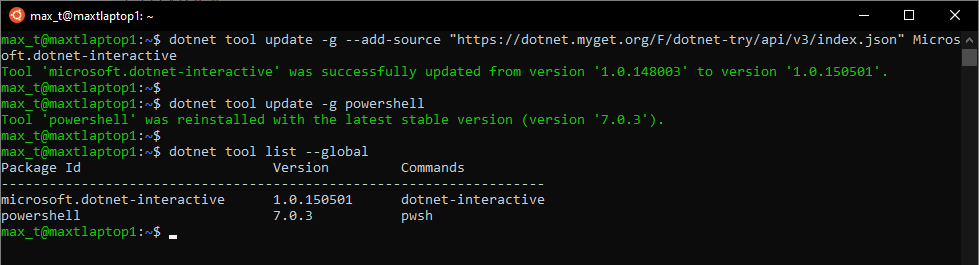
dotnet tool update -g --add-source "https://dotnet.myget.org/F/dotnet-try/api/v3/index.json" Microsoft.dotnet-interactive
dotnet tool update -g powershell

And, the following command will confirm the latest version of both the .NET Tools installed in the system:

dotnet tool list --global

Now, go ahead and have fun with PowerShell.

Happy PowerShelling!!

WSL 2 – PowerShell Update-Help cmdlet is not working

Just recently I discovered, when executing the Update-Help cmdlet in WSL 2, that it doesn’t do anything.

Behavior: Run with no progress bar and no error messages at the end of the process. 

I have reported in the PowerShell Github repository and it will be addressed to the proper product group. This is on Windows 10 Version 2004, including Windows 10 Insider edition.

There are two workarounds to this issue:

Workaround #1

The workaround is shown below, thanks to Aditya Patwardhan (Microsoft PowerShell Developer) who provide the hint.

There are two Linux Bash environment variables that need to be updated: LANG and LC_ALL.

Check the current values using the echo command and, in my case, it shows:

## Current values:
(base) maxt@sapien01:~$ echo $LANG
C.UTF-8
(base) maxt@sapien01:~$ echo $LC_ALL
-EMPTY-
(base) maxt@sapien01:~$

Use the following “export” commands to change their values to be “en_US.UTF-8“:

(base) maxt@sapien01:~$
(base) maxt@sapien01:~$ export LC_ALL='en_US.UTF-8'
(base) maxt@sapien01:~$ export LANG='en_US.UTF-8'
(base) maxt@sapien01:~$
(base) maxt@sapien01:~$ echo $LC_ALL
en_US.UTF-8
(base) maxt@sapien01:~$ echo $LANG
en_US.UTF-8
(base) maxt@sapien01:~$

This will fix the issue temporarily during your WSL session, and the Update-Help will work properly.

For now, it may be needed to add these “export …” lines to the “~/.bashrc” file until the fix is available.

Workaround #2

Simply use the “Update-Help” specifying the UIculture:

Update-Help -uiculture en-us

That’s it!!

Keep PowerShelling!

Creating the PowerShell User Profile in Linux

In WSL, as on any Linux distribution, there’s no PowerShell User Profile file(“Microsoft.PowerShell_Profile.ps1“). So, it needs to be created manually.

Creating the profile folder

This profile is stored in the user home configuration folder “~/.config/powershell” folder.

But, the “powershell” folder doesn’t exist, it needs to be created in the configuration folder:

From the bash prompt, follow these steps:

1. Make sure you are in the user home folder:

pwd
cd /home/yourUserFolder

2. Verify the PowerShell folder doesn’t exist:

ls ~/.config

3. Change to the configuration folder:

cd ~/.config

3. Create the “powershell” folder, and assign permissions:

cd ~/.config
mkdir powershell
chmod 755
ll

Creating Microsoft.PowerShell_profile file

1. Using your Linux editor, create the Microsoft.PowerShell_Profile.ps1 file, and add code to the file: (Below using “vim” editor)

sudo vim /home/yourUserFolder/.config/powershell/Microsoft.PowerShell_profile.ps1
-> Write-Host "Welcome to PowerShell in Linux" -foreground 'Yellow';
-> Import-Module Microsoft.PowerShell.UnixCompleters
-> Import-UnixCompleters
-> Write-Host "UnixCompleters is loaded!" -foreground 'Yellow';

5. When done, save changes and exit “vim’ editor by typing:

:wq

Testing the PowerShell Profile

Open PowerShell and the “Welcome to PowerShell in Linux” with any other text will be displayed. At the same time, anything else in the profile will be executed.

Now, you can add more commands to the file when needed.

Keep on PowerShelling!

Getting Started – UnixCompleters Module for PowerShell in Linux

Yes! This module has been around for a while and it’s a great helper for completing bash commands in PowerShell.

Get it from the PowerShell Gallery: Microsoft.PowerShell.UnixCompleters

Installing the module

To install the UnixCompleted module manually execute the following command:

Install-Module -Name Microsoft.PowerShell.UnixCompleters

This module includes the following cmdlets:

Import-UnixCompleters
Remove-UnixCompleters
Set-UnixCompleter

Then, import the module by typing:

Import-Module Microsoft.PowerShell.UnixCompleters

Follow by running the cmdlet “Import-UnixCompleters” to load the module:

Import-UnixCompleters

Now, let’s use the ‘df‘ Linux command, which displays the amount of disk space available, to test this module:

df --

After typing the double-dash, press the tab key twice. The list of parameters will show at the bottom of the command.

Implementation

You can have this module to be loaded from your “PowerShell User Profile” which should be located in the user’s home configuration folder: /home/username/.config/powershell/Microsoft.PowerShell_profile.ps1. Remember! The “PowerShell User Profile” needs to be created manually.

Keep PowerShelling!!