On my previous blog “PowerShell – Working with Python and SQL Server“, I show how to install Python 3.5 so we can be build python scripts to connecting to SQL Server and use them with PowerShell.
Now, since the release of SQL Server 2017 and the integration of Anaconda (ie. Python 3.6), we need to know what it takes to successfully install Anaconda on your developer system(s) both Windows and Linux.

Installing Anaconda in Windows
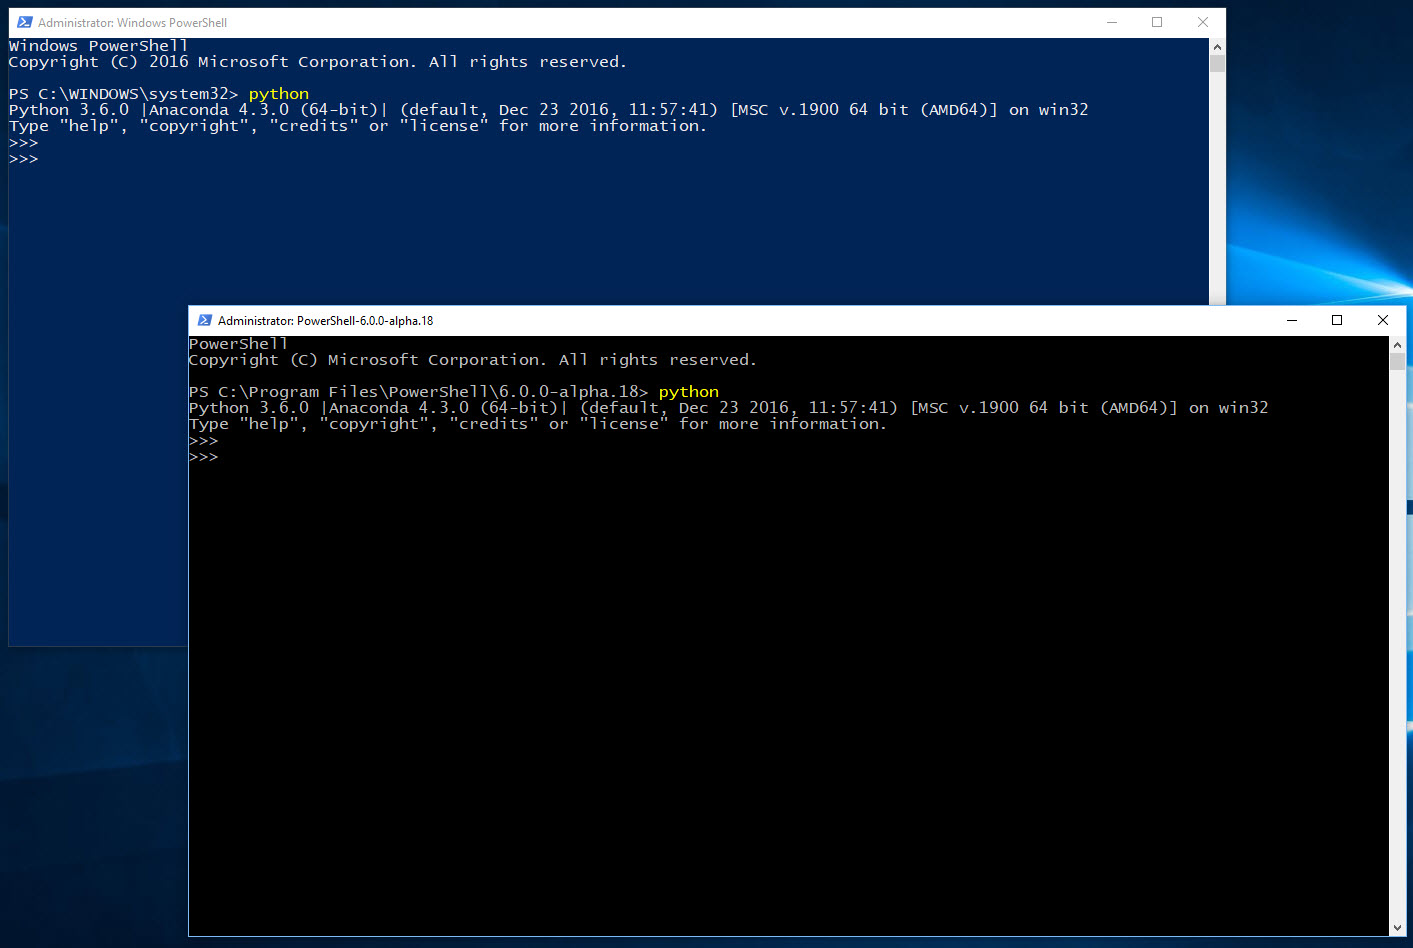
In Windows the installation is simply done through the SQL Server 2017 setup process. During the SQL Server installation process, select the “Machine Learning Services (In-Database)” option and this will automatically install both “R” and *”Anaconda” on your system.
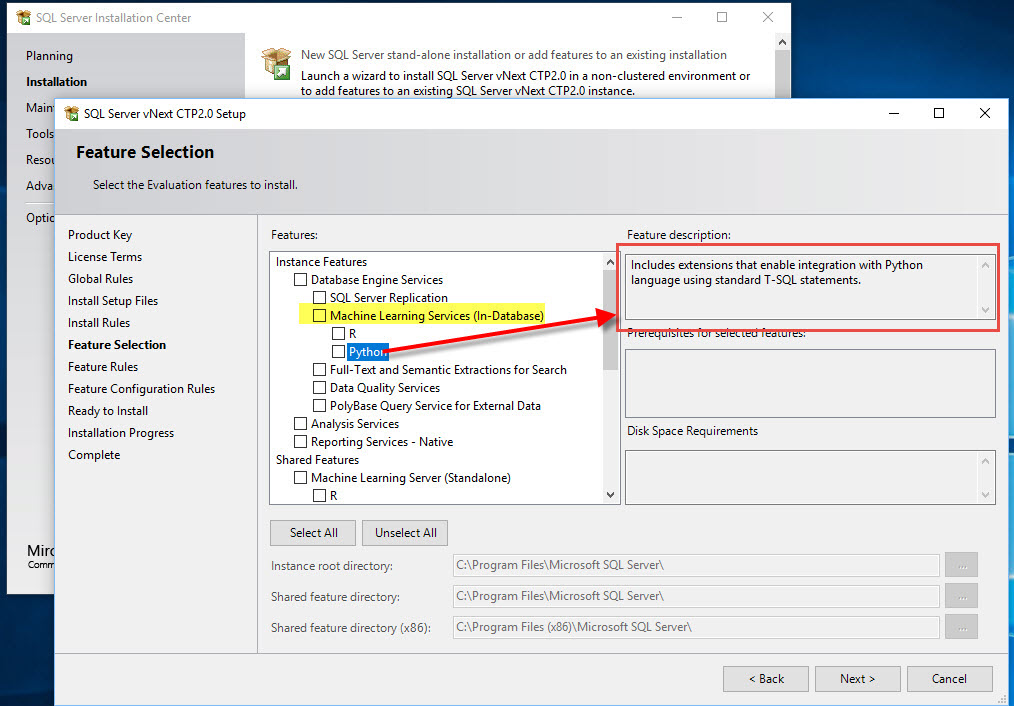
*Note: Installing Anaconda (Python 3.6) will redirect any previous version of Python to version 3.6. So, you may need to manually revert back to use older version.
Installing Anaconda in Linux (Ubuntu)
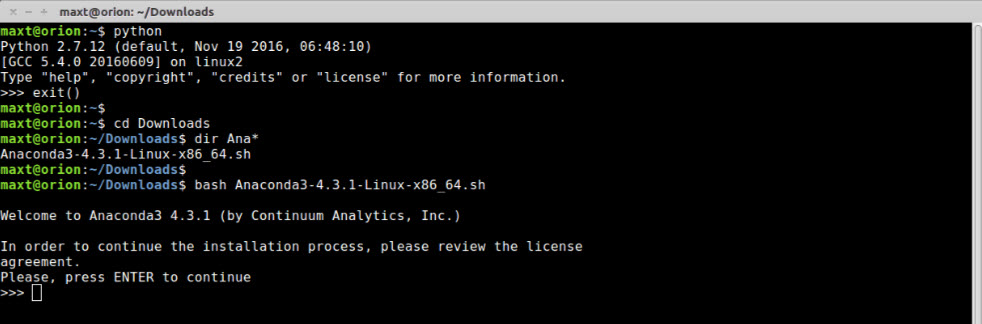
There are few more steps to complete the installation on *Linux. First, verify which is the latest version available by going to the following link: https://www.continuum.io/downloads
Then follow these steps in bash console:
1. Change directory to where you want to store the installation file:
[sourcecode language=”bash”]
$ cd Downloads
[/sourcecode]
2. The “curl” command for the latest version available:
[sourcecode language=”bash”]
$ curl -O https://repo.continuum.io/archive/Anaconda3-4.3.1-Linux-x86_64.sh
[/sourcecode]
3. Run the installation command:
[sourcecode language=”bash”]
$ bash Anaconda3-4.3.1-Linux-x86_64.sh
[/sourcecode]
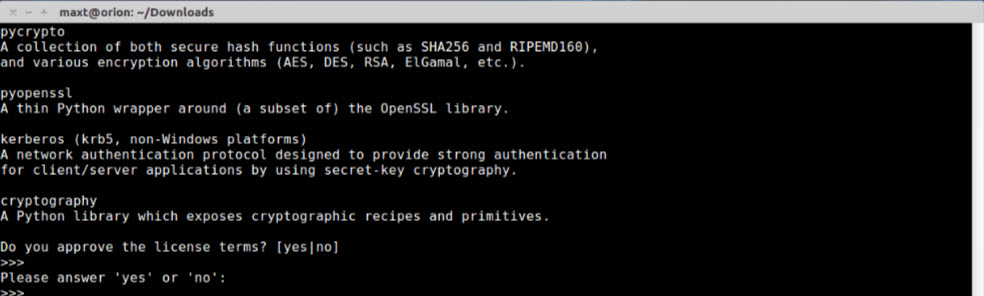
4. Enter “Yes” to Accept the license agreement.
6. Then, you can select the location where Anaconda will be installed. The default is the user home folder.
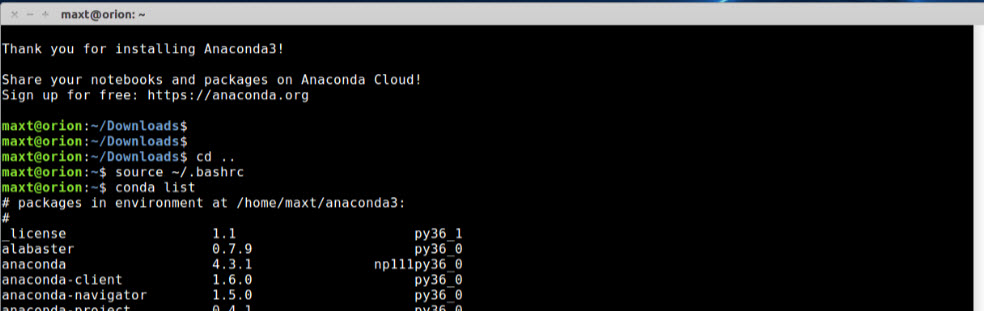
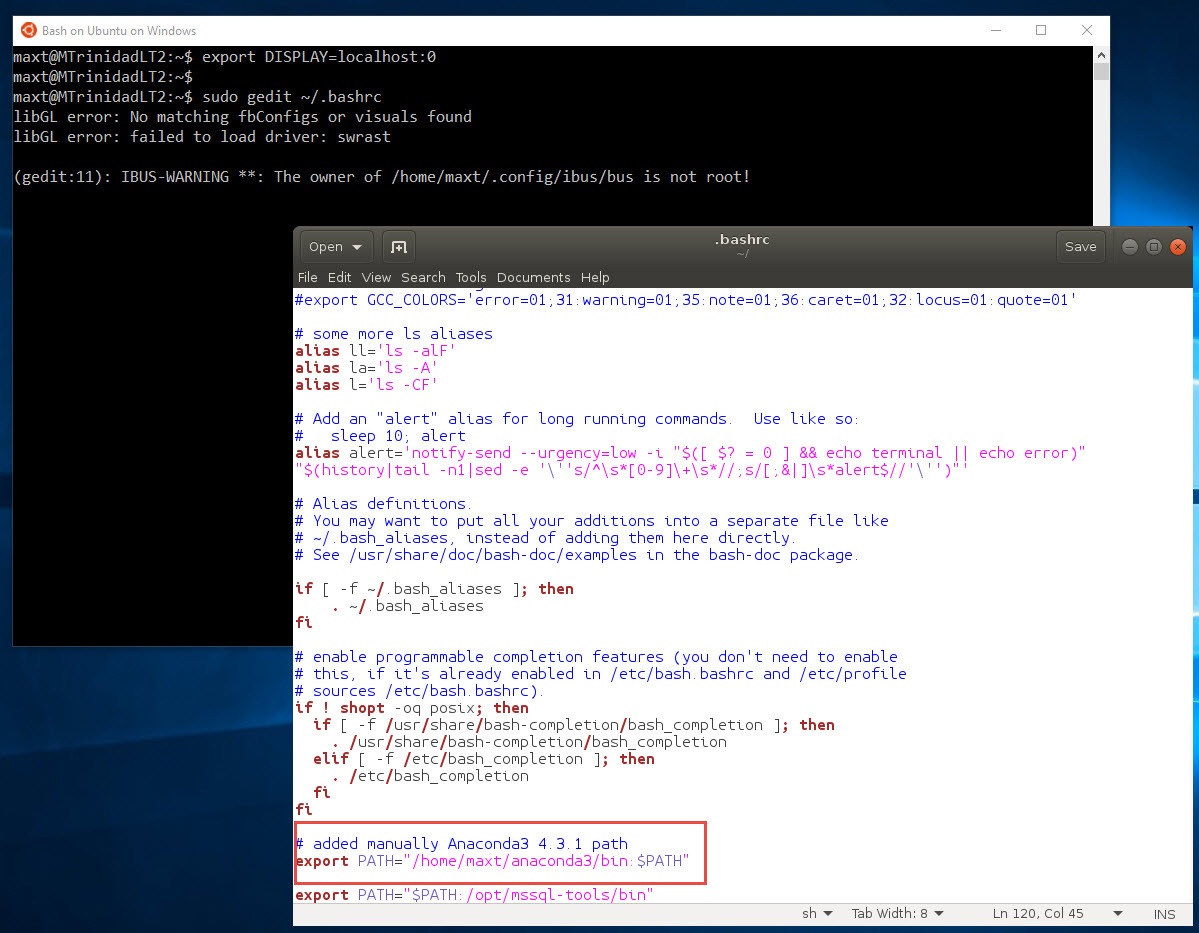
5. Add the Anacona path to user profile in the “.bashrc” file by answering “Yes” and this will force to open Python on version 3.6.
6. Finally, to activate Anaconda, type the following command:
[sourcecode language=”bash”]
$ source ~/.bashrc
[/sourcecode]

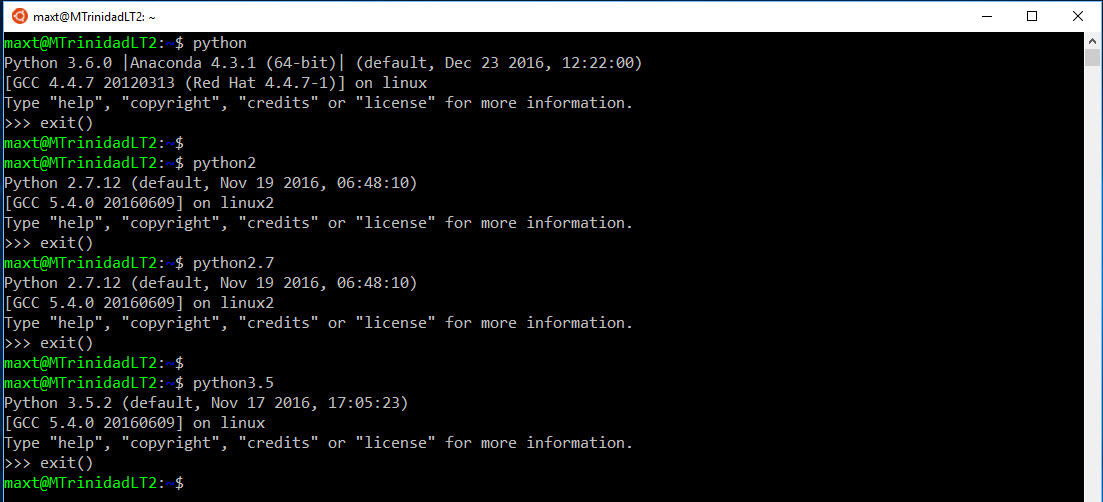
If you want to use any previous version, then you’ll need to manually type the PythonX.x executable. Try the following commands to open other versions of python previously installed in Ubuntu: python3.5, python2, or python2.7.
*Note: These steps can be applied to WSL Windows 10 Bash.
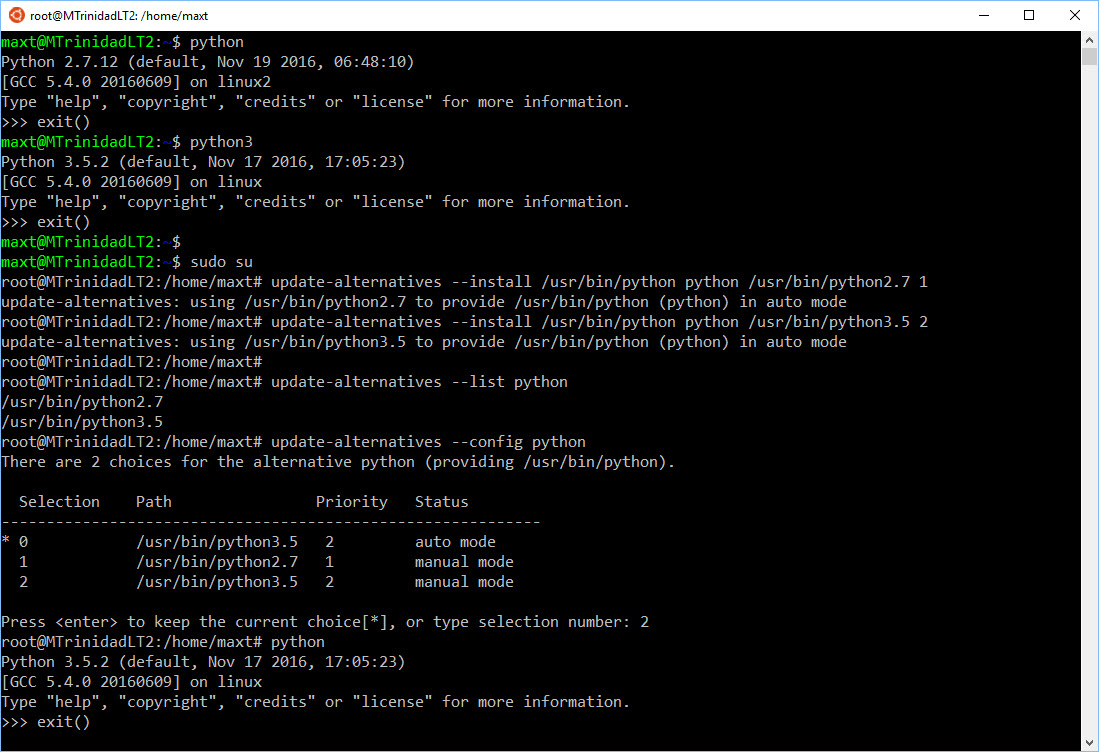
Using “update-alternatives” Linux Command
You could also setup the “update alternatives” command to swapt between the different versions of Python. This command need to be executed under super-user privilege “sudo su“.
Below is the series of commands use with “update-alternatives“:
[sourcecode language=”bash”]
##-> Install python for ‘update-alternatives’ command use:
$ sudo su
# update-alternatives –list python # will not display python
##-> To setup to use different versions:
# update-alternatives –install /usr/bin/python python /usr/bin/python2.7 5
# update-alternatives –install /usr/bin/python python /usr/bin/python3.5 1
# update-alternatives –install /usr/bin/python python /home/Username/anaconda3/bin/python3.6 2
##-> To list all installed pythons:
# update-alternatives –list python
##-> To change Python version, then select which version
# update-alternatives –config python
##-> You can use the –remove parameter to get rid of any lines added:
# update-alternatives –remove python /usr/bin/python3.5
[/sourcecode]
Remember, in Ubuntu Linux, the system default version of Python is 2.7.
It would be a bad routine, when using the “update-alternatives” command, to change back to the default version as all running scripts during the system updates will need run on Python 2.7.
Additional Package for SQL Server
During the Anaconda installation, you’ll notice that it will load lots of python packages for data science and including “tk” which provide the ability to create GUI applications.
But, there’s one package missing, “pyodbc” will be needed in order to create python scripts to connect with SQL Server.
I did install PYODBC in both Windows and Linux, run the following command at the console:
[sourcecode language=”bash”]
conda install pyodbc
[/sourcecode]
Then, to test this package was loaded, open *python and type:
[sourcecode language=”python”]
import pyodbc
## – Connect to database:
cnxn = pyodbc.connect(‘DRIVER={ODBC Driver 13 for SQL Server};SERVER=MTRINIDADLT2,51417;DATABASE=master;UID=sa;PWD=$SqlPwd01!’)
cursor = cnxn.cursor()
[/sourcecode]
Unfortunately, in Ubuntu Linux, the connection string will fail giving the following error:
[sourcecode language=”python”]
cnxn = pyodbc.connect(‘DRIVER={ODBC Driver 13 for SQL Server};SERVER=MTRINIDADLT2,51417;DATABASE=master;UID=sa;PWD=$SqlPwd01!’)
Traceback (most recent call last):
File “”, line 1, in
pyodbc.Error: (‘01000’, “[01000] [unixODBC][Driver Manager]Can’t open lib ‘/opt/microsoft/msodbcsql/lib64/libmsodbcsql-13.1.so.6.0’ : file not found (0) (SQLDriverConnect)”)
>>>
[/sourcecode]
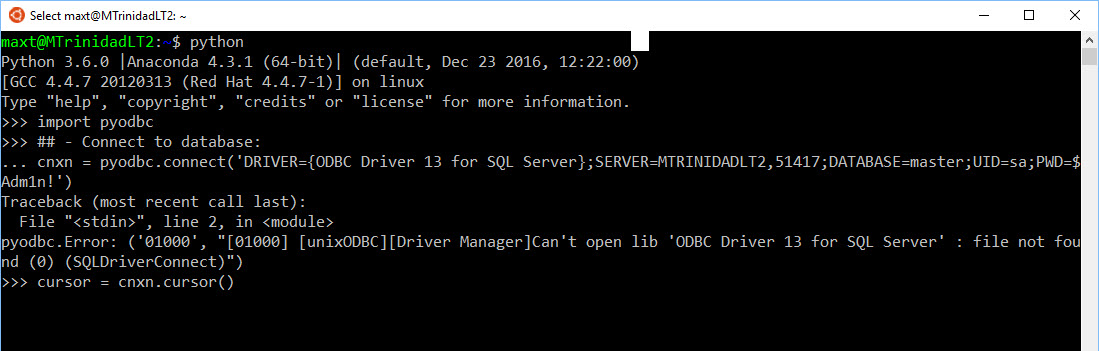
Strangely enough, this error is only on Ubuntu Linux and not Windows installation. So, Python 3.6 will work on Windows to build your scripts to work with SQL Server while Microsoft and/or Anaconda figured this one out.
*Note: This sample connection string to SQL Server is done thru SQL Server Authentication.
Configuring Anaconda in SQL Server 2017
This is only available in SQL Server 2017 and SQL Server Management Studio v17 with the feature of integrating Anaconda (Python 3.6) with SQL Server is to be able to execute the python script(s) from SQL Server Stored-Procedure.
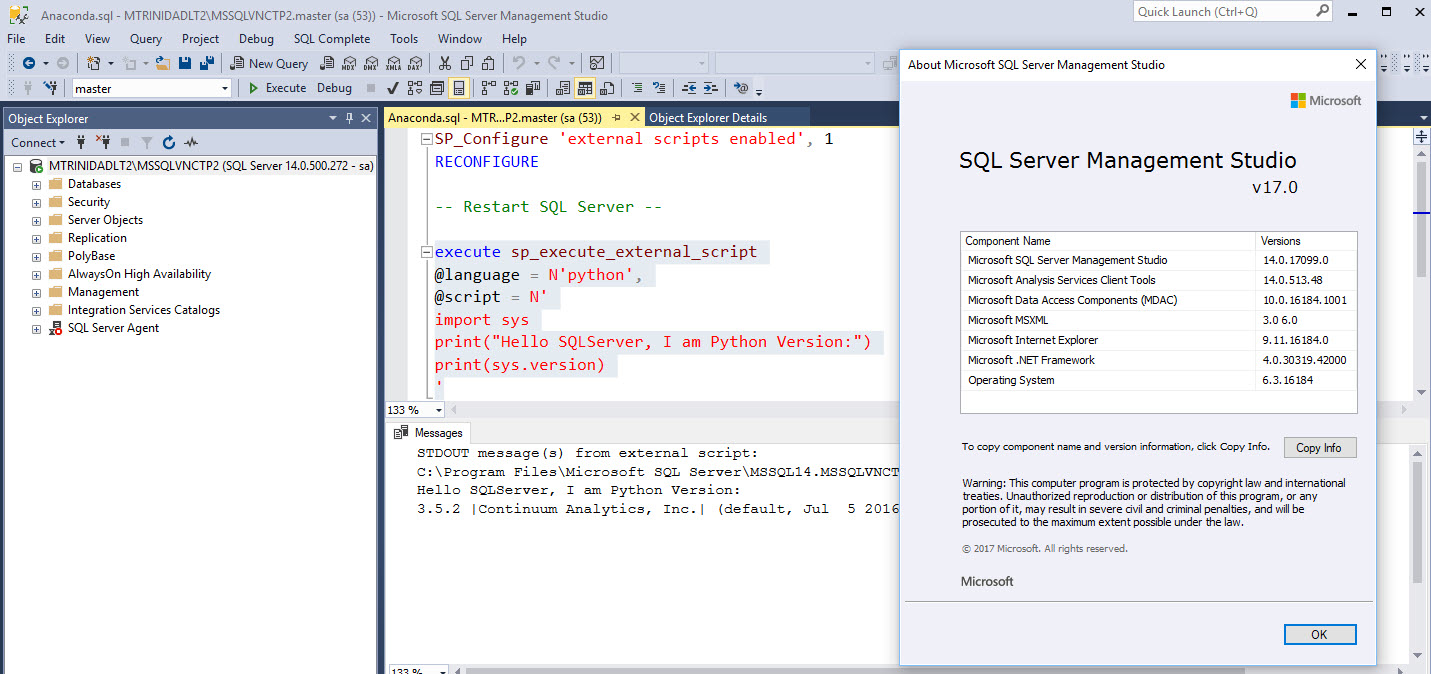
The following steps need to be complete to enable SQL Server to execute Python scripts as an external script from SSMS SQL Query or within a stored-procedure.
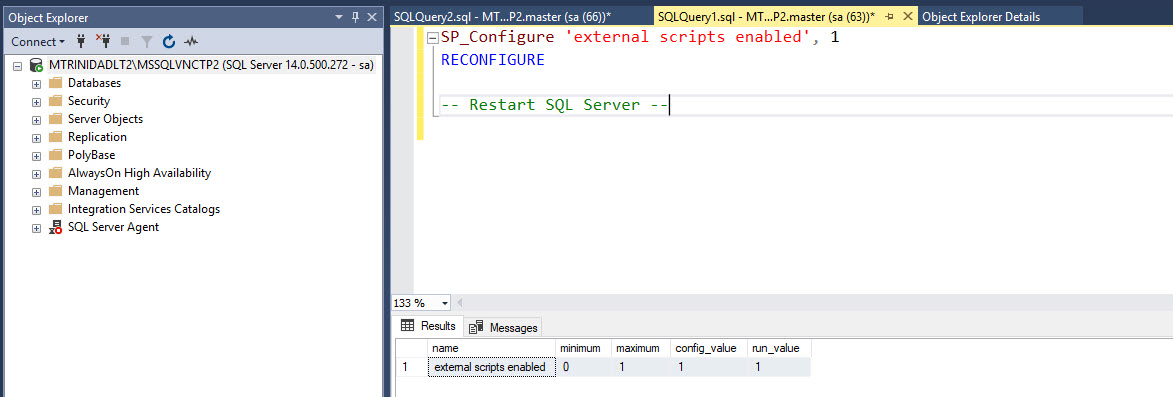
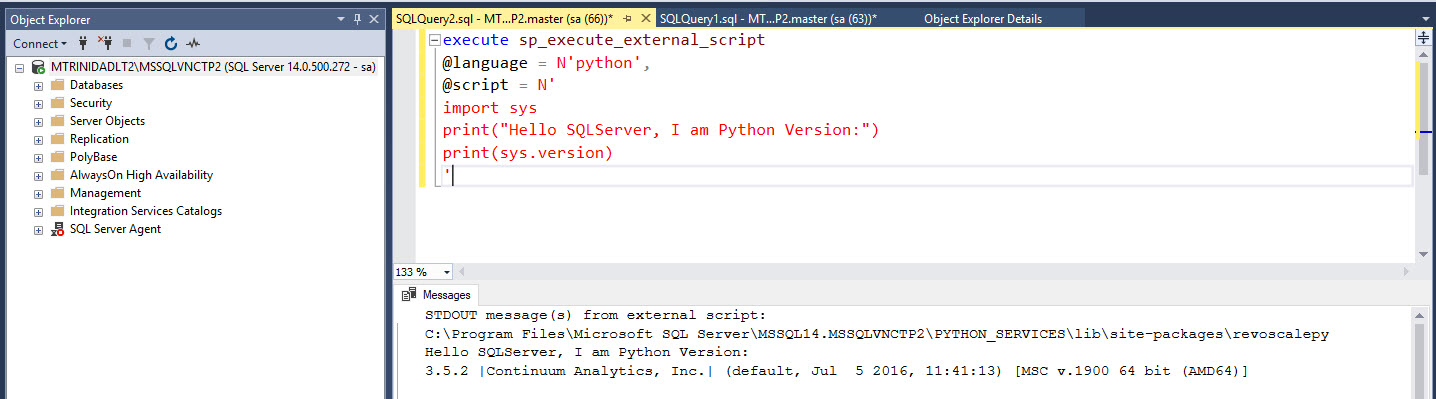
1. Execute the following T-SQL command:
[sourcecode language=”sql”]
sp_configure ‘external scripts enabled’, 1
reconfigure
[/sourcecode]
2. Then, SQL Server Service will need to be restarted for the changes to take place.
3. Proceed to execute a python script from SSMS SQL Query panel:
[sourcecode language=”sql”]
execute sp_execute_external_script
@language = N’python’,
@script = N’
import sys
print(“Hello SQLServer, I am Python Version:”)
print(sys.version)
‘
[/sourcecode]
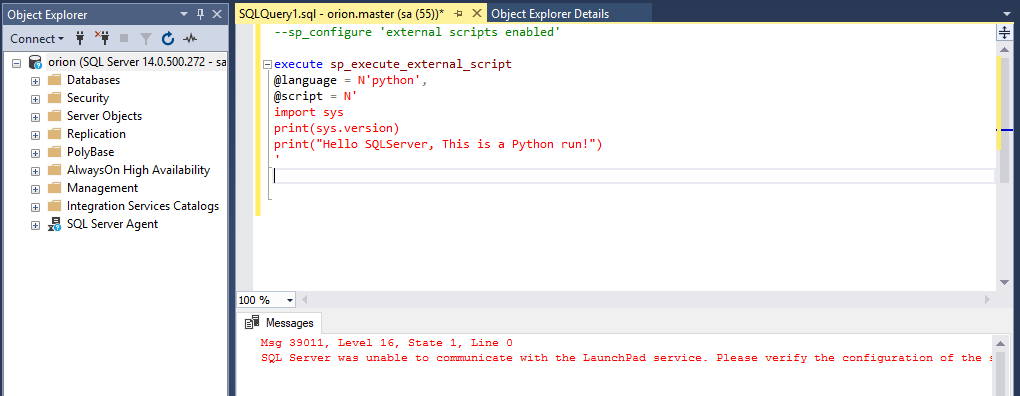
Unfortunately, I haven’t been successful to run the SSMS SQL query connected to a SQL Server on Linux. So, apparently there’s still a limitation in Linux.
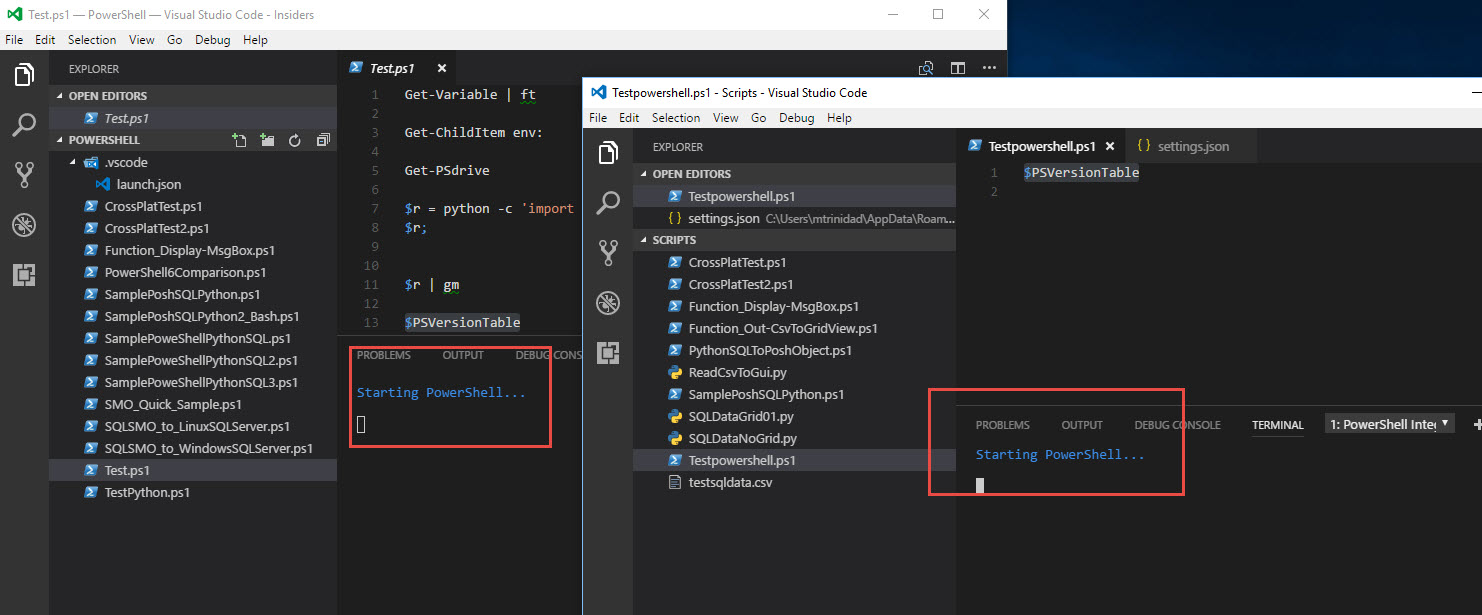
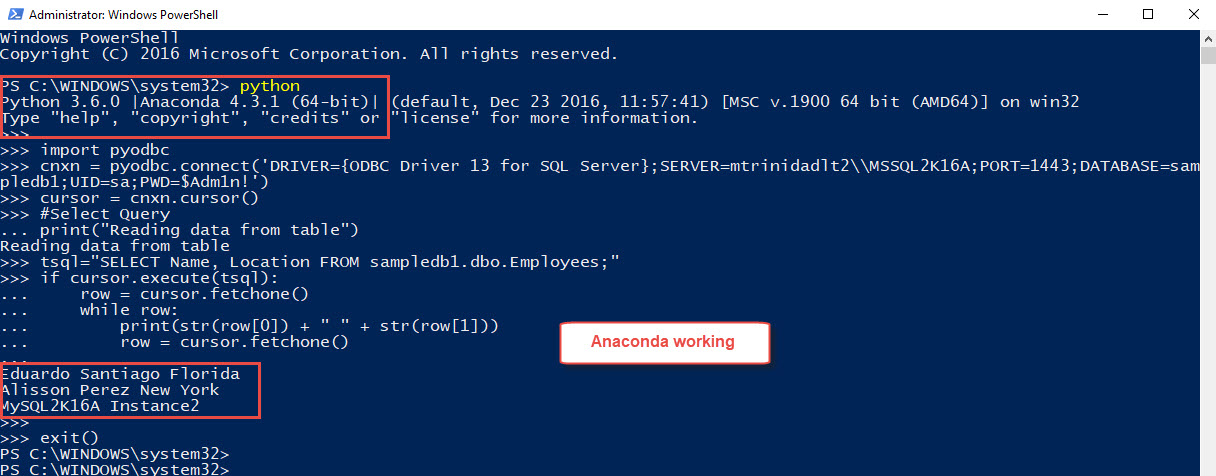
What with PowerShell!
So the main purpose of integrating Anaconda (Python 3.6) with SQL Server is to be able to execute the script from SQL Server Stored-Procedure. But, one of Anaconda installed packages is ‘tk‘.
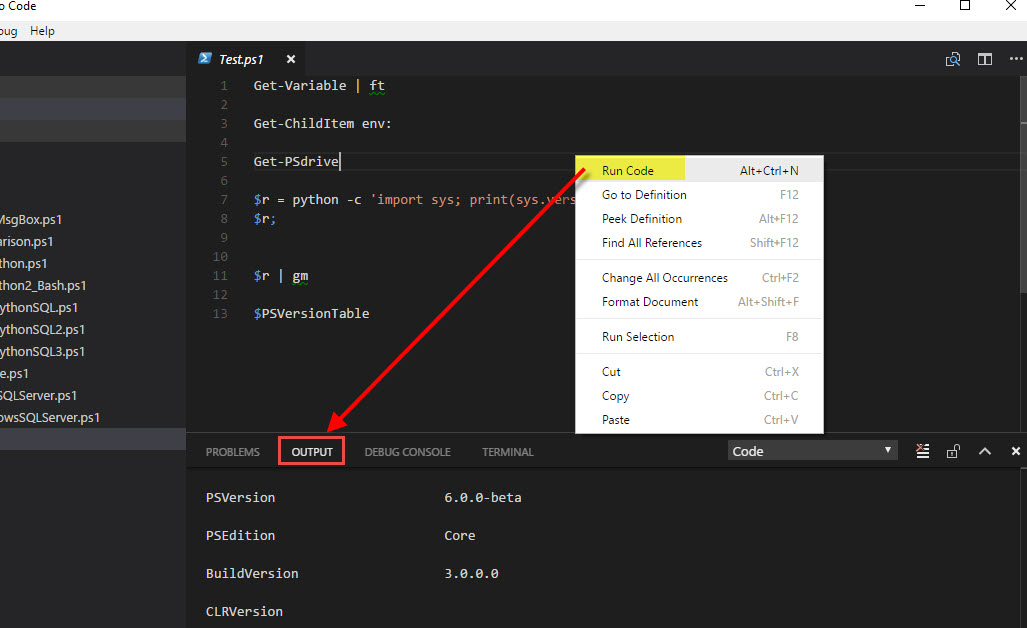
The ‘tk‘ package allows you to create GUI application in Python. This opens opens opportunities to develope and integrating some solution with PowerShell. For example, PowerShell v6 Alpha doesn’t have the Out-GridView command available yet.
So, here’s a raw with limited functionality of a python Out-GridView look-a-like. The following sample code will access some data from SQL Server, use PowerShell to manipulate the information, and then use Python ‘tk’ component to display it in a GUI datagrid.
[sourcecode language=”powershell”]
$runpy = @’
import pyodbc
from tkinter import *
cnxn = pyodbc.connect(‘DRIVER={ODBC Driver 13 for SQL Server};SERVER=MTRINIDADLT2,1738;DATABASE=master;UID=sa;PWD=$Adm1n!’)
cursor = cnxn.cursor()
#Execute T-SQL Query:
trecord = []
tsql = ‘SELECT Name, Location, Hire, HireDate FROM SampleDB1.dbo.HolidayEmployees;’
if cursor.execute(tsql):
row = cursor.fetchone()
while row:
datarow = [str(row[0]),str(row[1]),str(row[2]),str(row[3])]
trecord.append(datarow)
row = cursor.fetchone()
## – list to screen list of data and will get number of rows in the list:
i = 0;
for i, rec in enumerate(trecord):
print(rec);
for i, rec in enumerate(trecord):
col = 0;
for c in rec:
Label(text=c, relief=RIDGE, width=15).grid(row=i, column=col)
col = col + 1;
mainloop()
‘@;
python -c $runpy;
[/sourcecode]
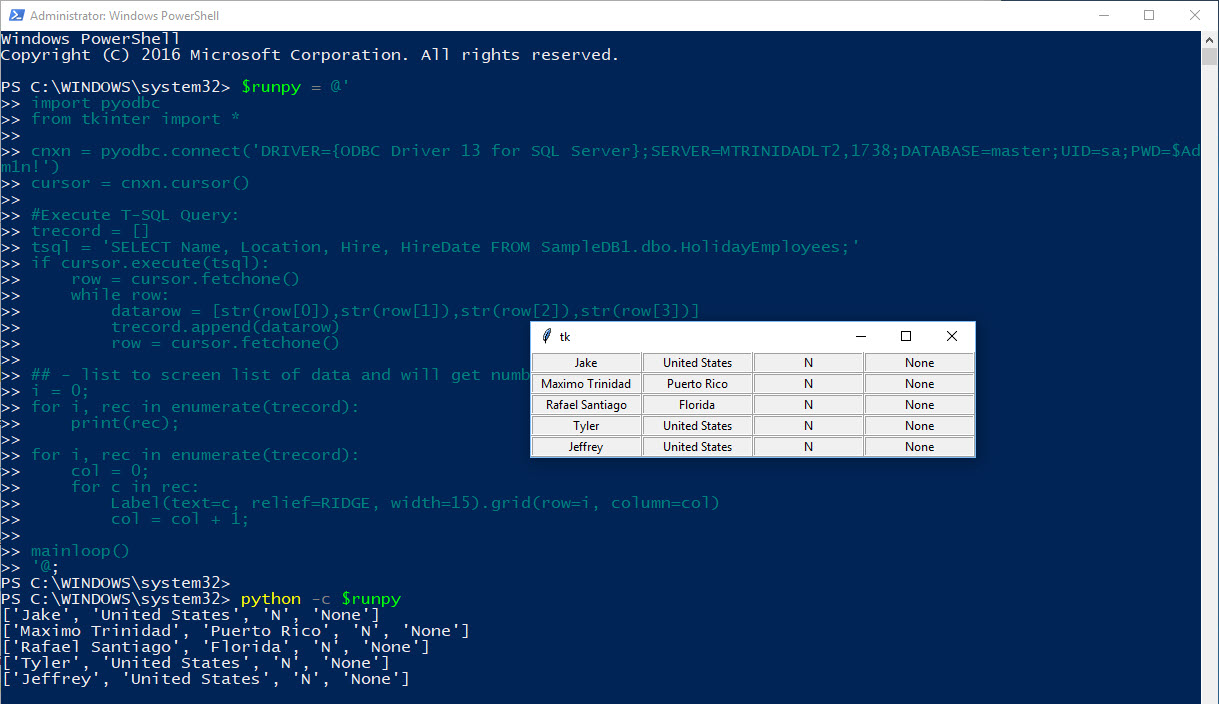
As you can image, there’s a lot of room to grow for integrating technologies such as PowerShell and Python. Just be creative!
Additional Tips
1. To edit, or commented out, the Anaconda Path, in the .bashrc file:
[sourcecode language=”bash”]
$ sudo gedit ~/.bashrc
[/sourcecode]
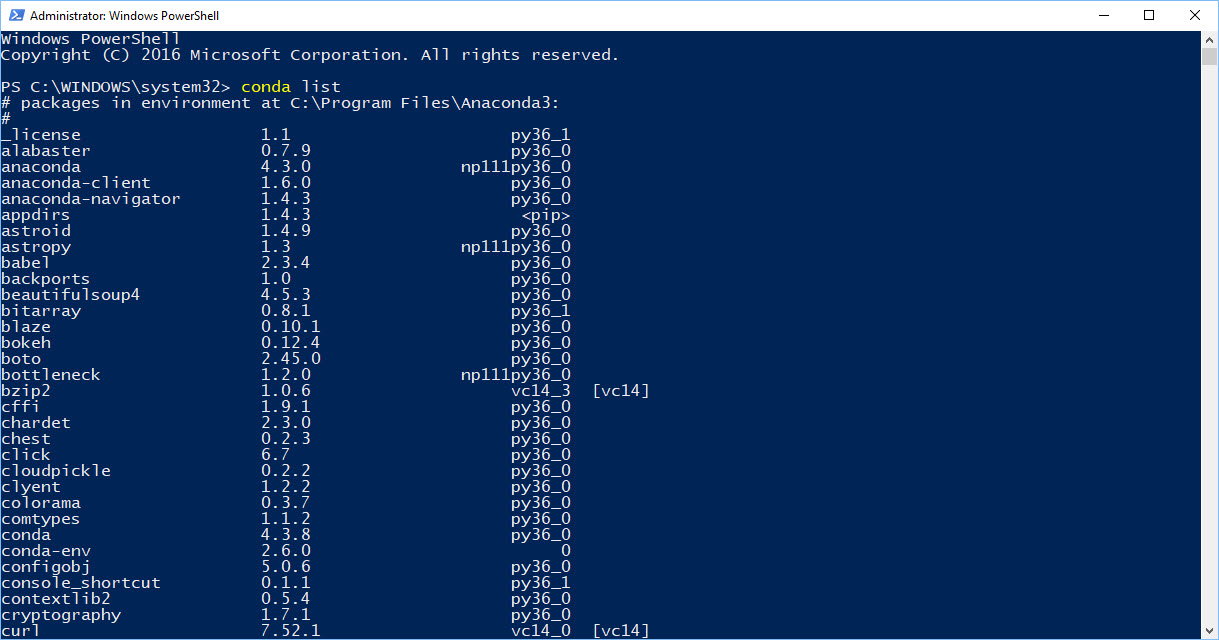
2. To find out all installed packages in Anaconda, use the following command:
[sourcecode language=”bash”]
$ conda list
[/sourcecode]
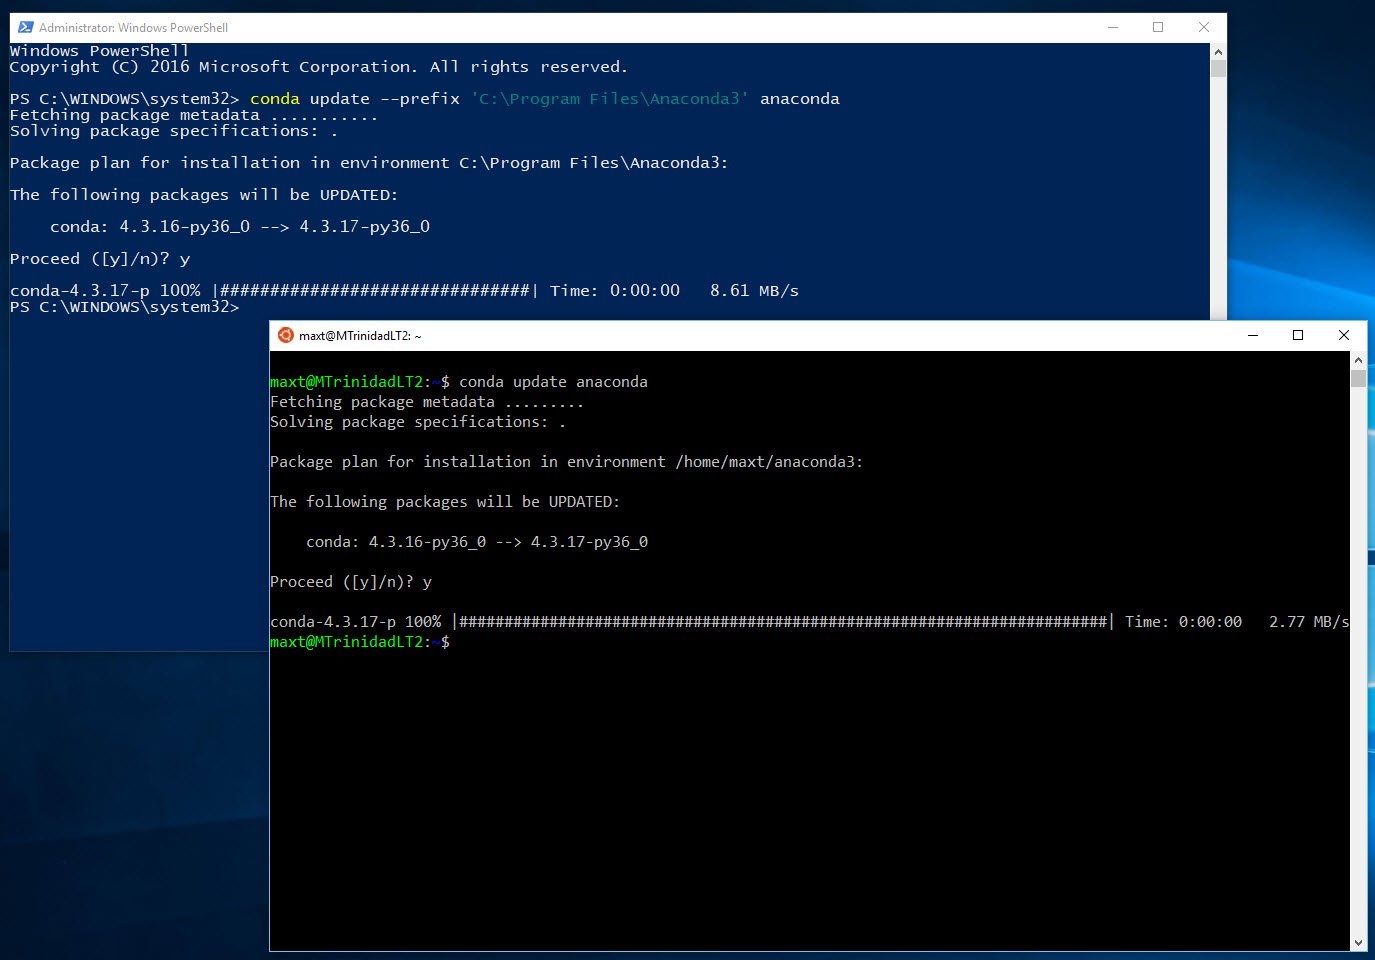
3. Upgrading Anaconda to newer version:
[sourcecode language=”bash”]
## – Windows:
conda update –prefix ‘C:\Program Files\Anaconda3’ anaconda
## – Linux:
$ conda update anaconda
[/sourcecode]
Additional Resources
* Don’t forget to check out Microsoft Data Amp Technical Sessions at: http://tinyurl.com/lmuquxu
* Check What’s new about SQL Server 2017? https://docs.microsoft.com/en-us/sql/sql-server/what-s-new-in-sql-server-2017
* Getting started in SQL Server on Linux: https://docs.microsoft.com/en-us/sql/linux/sql-server-linux-get-started-tutorial
* Download Anaconda: https://www.continuum.io/downloads