Yes! It’s possible. Here’s the information in how to set it up and start doing some PowerShell scripting. But, first understand that everything posted here is still a Work-In-Progress. And, the good news, it’s all Open Source.
I hope you find the following information essential as there’s no really any instruction in how to install these components. So, let’s get started!
Where To Get It!
The Microsoft SQL Tools Service is a set of API that provided SQL Server Data Management capabilities on all system cross-platforms. It provide a small set for SMO dll’s enough to get started.
You can download the file from following Github link: https://github.com/Microsoft/sqltoolsservice
Here’s the list of available SMO DLL’s currently include in the “SqlToolsService – ServiceLayer” file:
[sourcecode language=”text”]
Microsoft.SqlServer.ConnectionInfo.dll
Microsoft.SqlServer.Management.Dmf.dll
Microsoft.SqlServer.Management.Sdk.Sfc.dll
Microsoft.SqlServer.Management.SmoMetadataProvider.dll
Microsoft.SqlServer.Management.SqlScriptPublishModel.dll
Microsoft.SqlServer.Smo.dll
Microsoft.SqlServer.SmoExtended.dll
Microsoft.SqlServer.SqlEnum.dll
Microsoft.SqlServer.SqlParser.dll
[/sourcecode]
Keep in mind, this list will continue to grow and we hopefully expect more SMO DLL’s added.
Installation pre-requisites
In my case, I got various systems setup: Windows and Ubuntu 16.04. So, I make sure I download correct *zip or *tar.gz file
As, pre-requisite, you will needed to have already installed *”.NET Core 2.0 Preview 1” for the SQL Service Tools to work and remember this need to be installed in all systems.
Just in case, here’s the link to download “.NET Core 2.0 Preview 1“: https://www.microsoft.com/net/core/preview#windowscmd
https://www.microsoft.com/net/core/preview#linuxubuntu
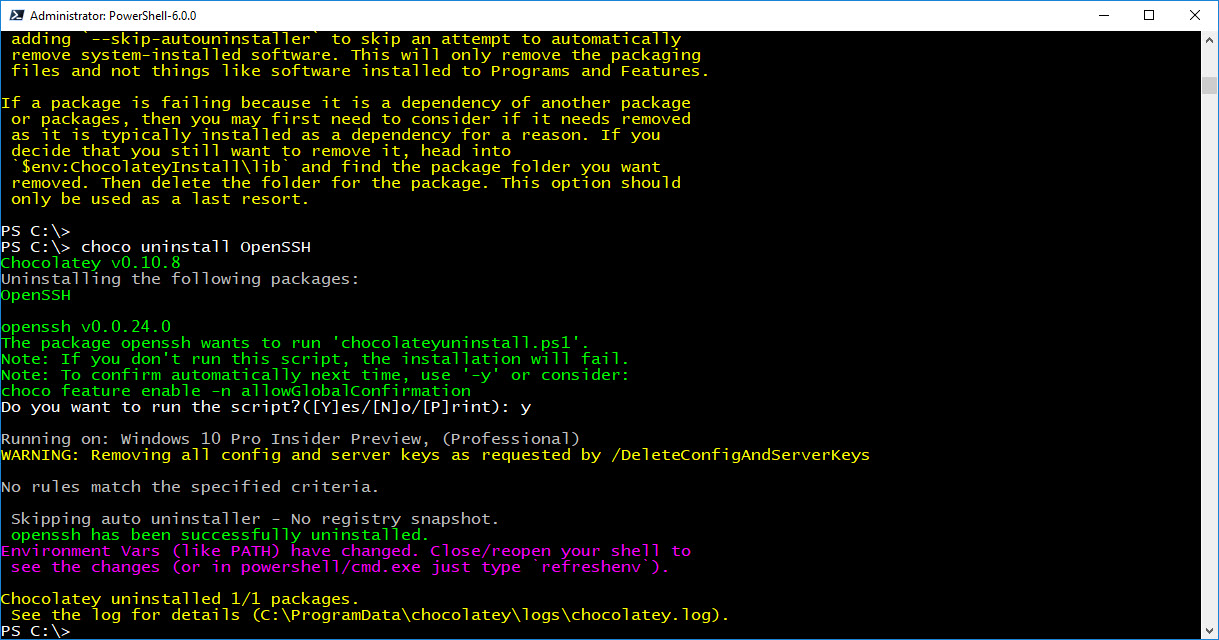
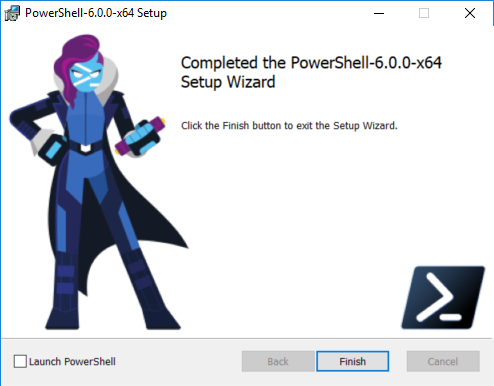
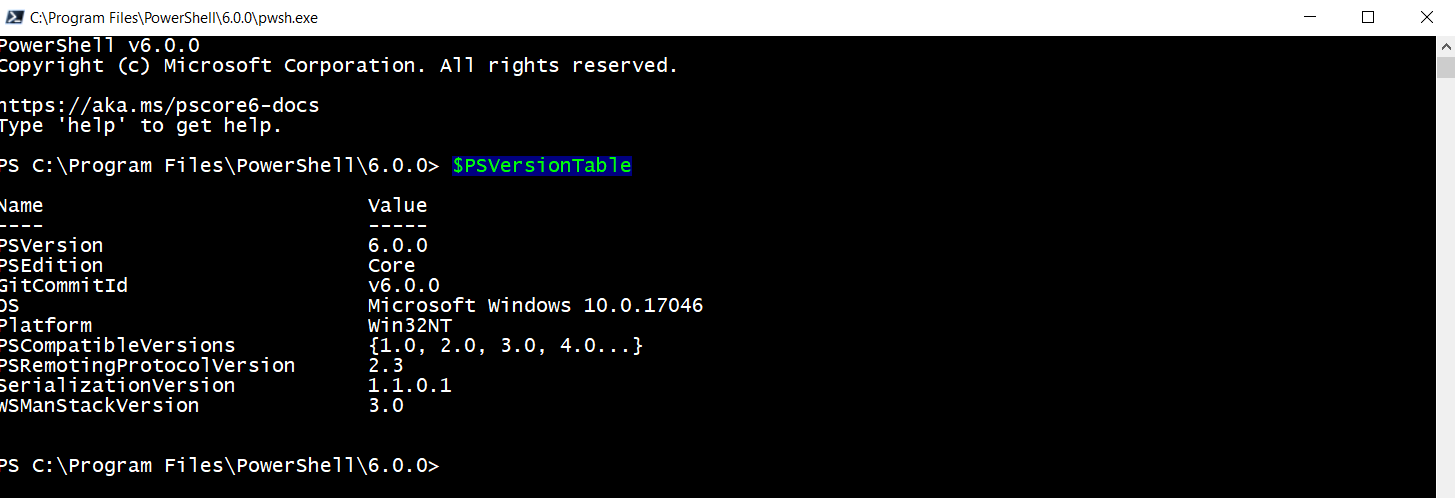
Now, because we are working with PowerShell Core, don’t forget to install the latest build found at:
https://github.com/PowerShell/PowerShell/releases
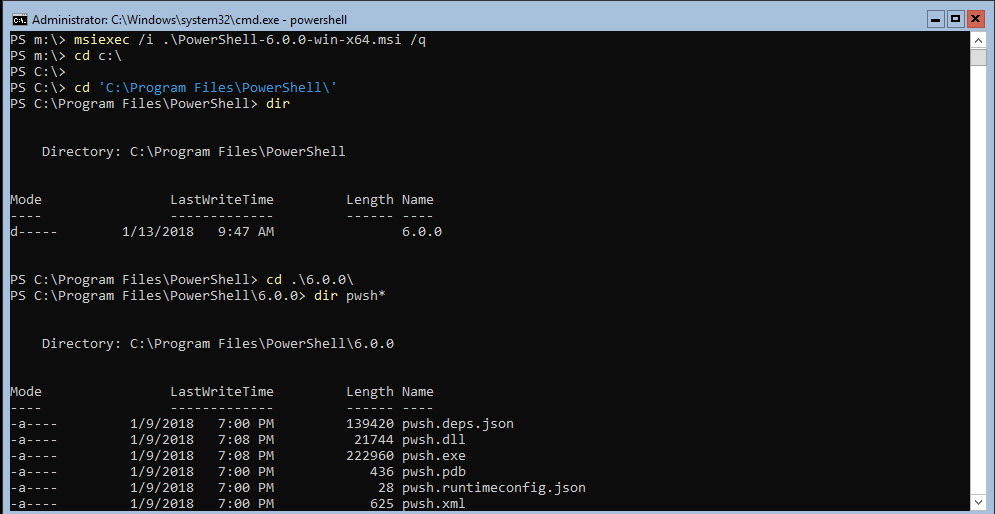
Windows Installation
You need to get the file from the latest release. At the time I writing this blog, it’s Pre-release “v1.0.0-alpha.34 – .Net Core 2.0 build“.
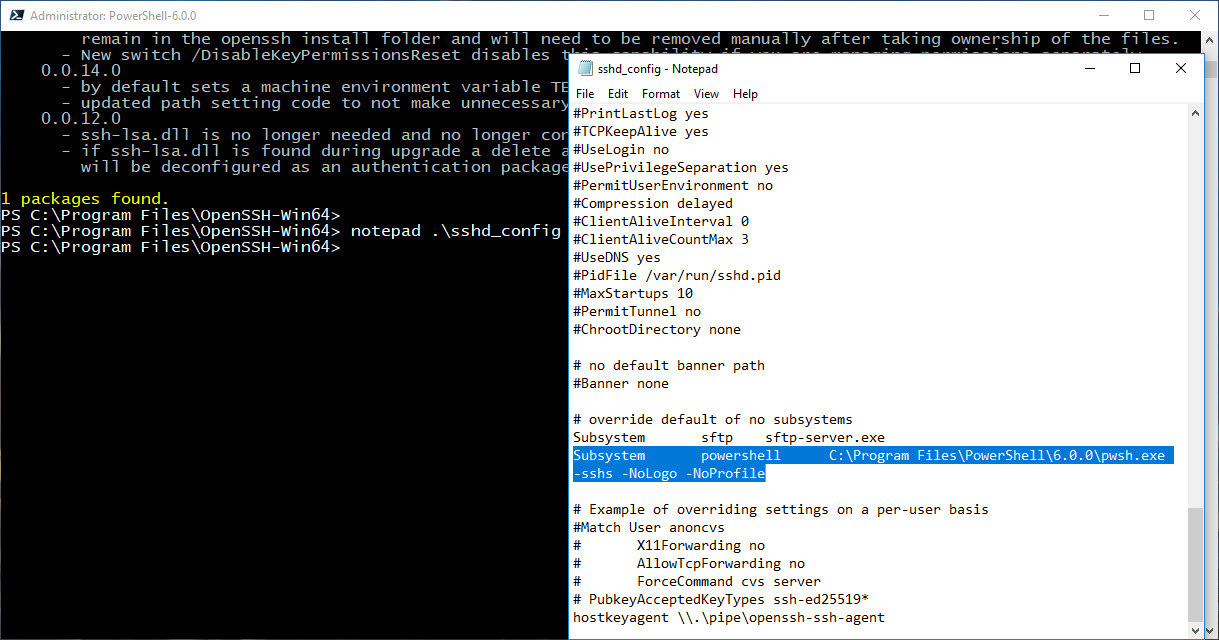
To make *”Sql Tools Services” to work in PowerShell Core, I had to extract all content in the file into the “C:\Program Files\PowerShell\6.0.0-Beta.x” folder. Remember, this will replace any existing DLL’s on that folder.
*Caution: This steps should be done on a test machine as there’s always a possibility that it could PowerShell Core DLL’s.
Don’t forget that all these components are still in development but this should stopped us from trying and even contributing.
The file you’ll need to download for Windows is: microsoft.sqltools.servicelayer-win-x64-netcoreapp2.0.zip
Please, for now ignore the *microsoft.sqltools.credentials*. If you install the Credentials DLL’s in the PowerShell Beta folder, PowerShell will not work.
Linux Installation
Now, for Linux is a different story as there’s no need to add the DLL’s in the PowerShell Core folder. You need to get the file from the latest release. At the time I writing this blog, it’s Pre-release “v1.0.0-alpha.34 – .Net Core 2.0 build“.
I would recommend doing the following steps in the Bash Console:
1. At your /home/user-name location, create the sqltoolsservice folder:
[sourcecode language=”bash”]
maxt@MyUbuntu01:~$ mkdir sqltoolsservice
[/sourcecode]
2. Change directory and Download the file for Ubuntu:
[sourcecode language=”bash”]
maxt@MyUbuntu01:~$ cd sqltoolsservice/
maxt@MyUbuntu01:~/sqltoolsservice$ wget https://github.com/Microsoft/sqltoolsservice/releases/download/v1.0.0-alpha.34/microsoft.sqltools.credentials-ubuntu16-x64-netcoreapp2.0.tar.gz
[/sourcecode]
3. Continue extract the *tar.gz into the folder:
[sourcecode language=”bash”]
maxt@MyUbuntu01:~$ tar -xzvf microsoft.sqltools.credentials-ubuntu16-x64-netcoreapp2.0.tar.gz
[/sourcecode]
That’s it for Linux. Now, you are ready to work with SMO and PowerShell.
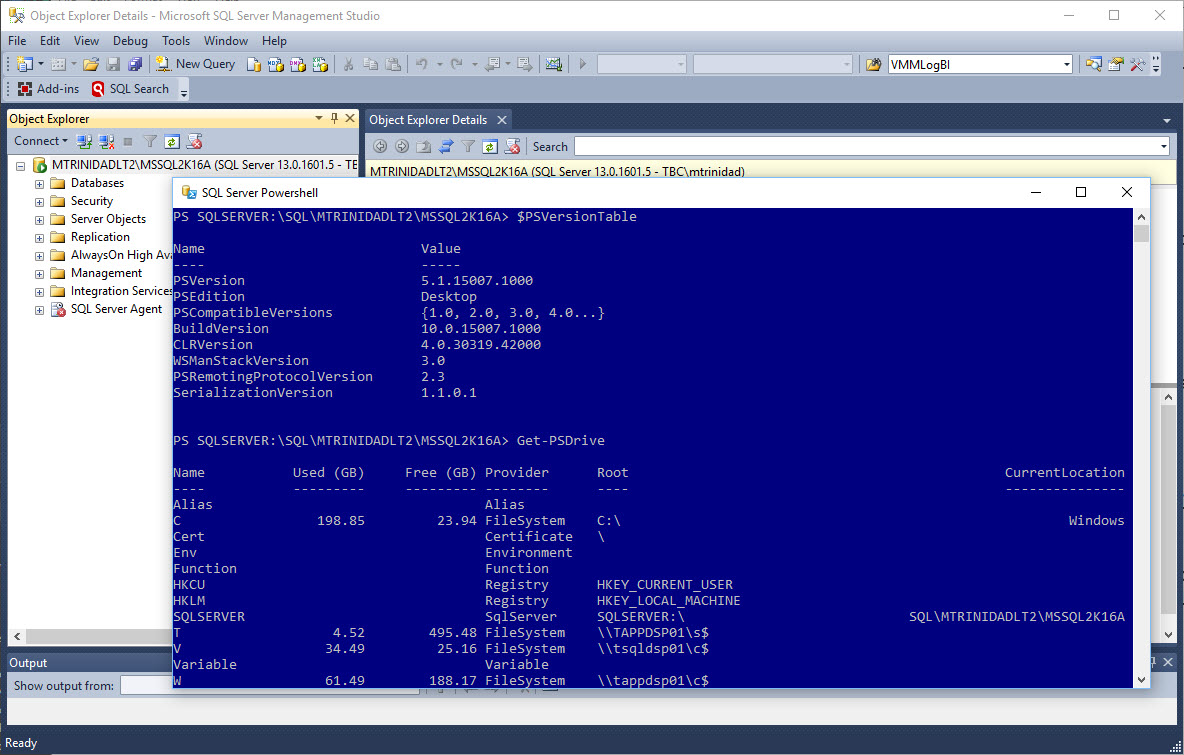
Testing SMO in PowerShell Core
This is changing my way I script SMO in PowerShell. As my normal way I’ve been scripting SMO in PowerShell doesn’t work in PowerShell Core. Basically, a few more lines need to be added and now I will use the Add-Type to get the SMO assemblies loaded.
Loading SMO Assemblies
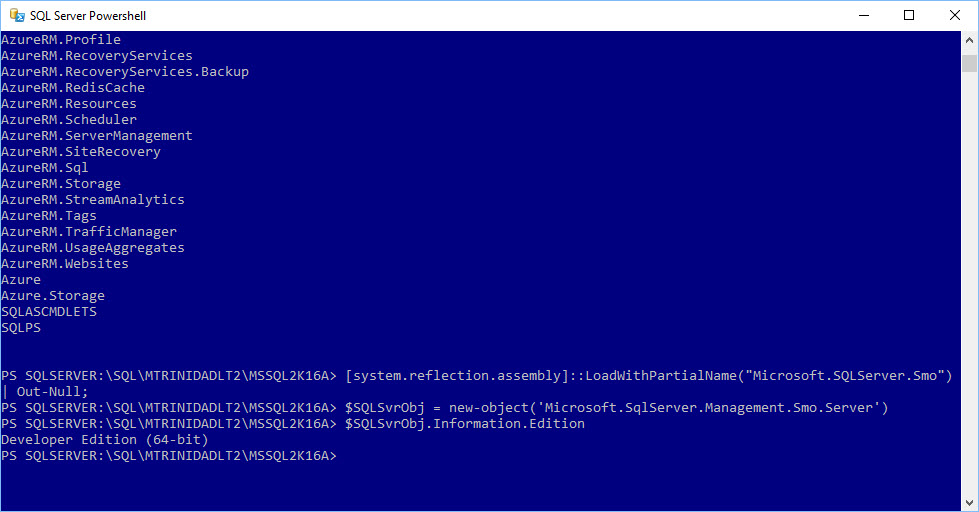
The first step is to load the SMO assemblies needed to start working with SQL Server. So, the following line is finally depricated and won’t work:
[sourcecode language=”powershell”]
[system.reflection.assembly]::LoadWithPartialName(“Microsoft.SQLServer.Smo”)
[/sourcecode]
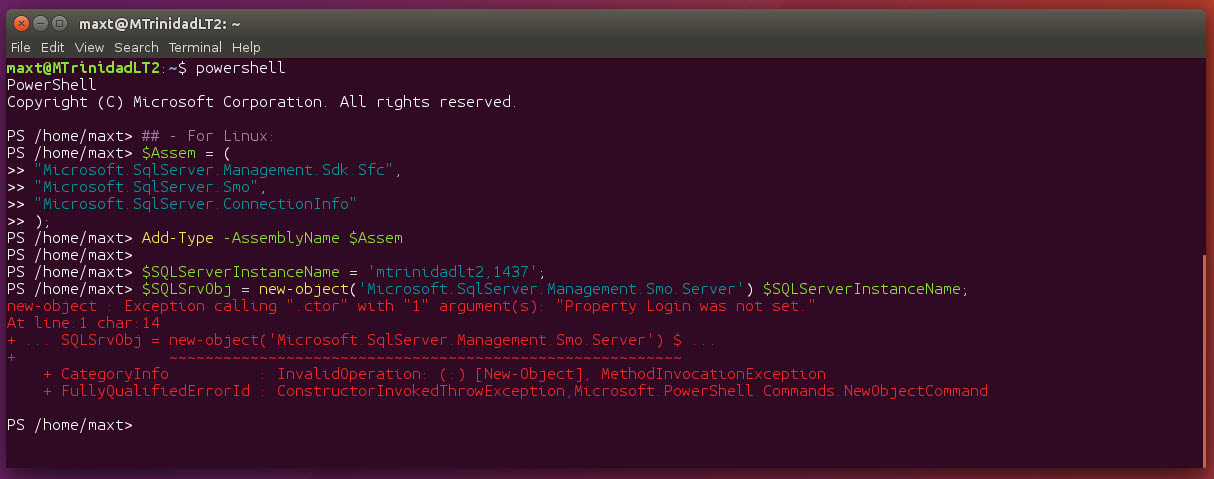
The old method I’ve been using for a long time will failed because is expecting the “Property Login …” to be set.
The updated way, has been replaced by the Add-Type with the following essential three assemblies:
[sourcecode language=”powershell”]
## – Loadind SQL Server SMO assemblied needed:
$Assem = (
“Microsoft.SqlServer.Management.Sdk.Sfc”,
“Microsoft.SqlServer.Smo”,
“Microsoft.SqlServer.ConnectionInfo”
); Add-Type -AssemblyName $Assem;
[/sourcecode]

The above assemblies are required in order to work since SQL Server SMO 2012 and greater. You can have limited use when connecting to SQL Servers version 2005, and possibly 2000.
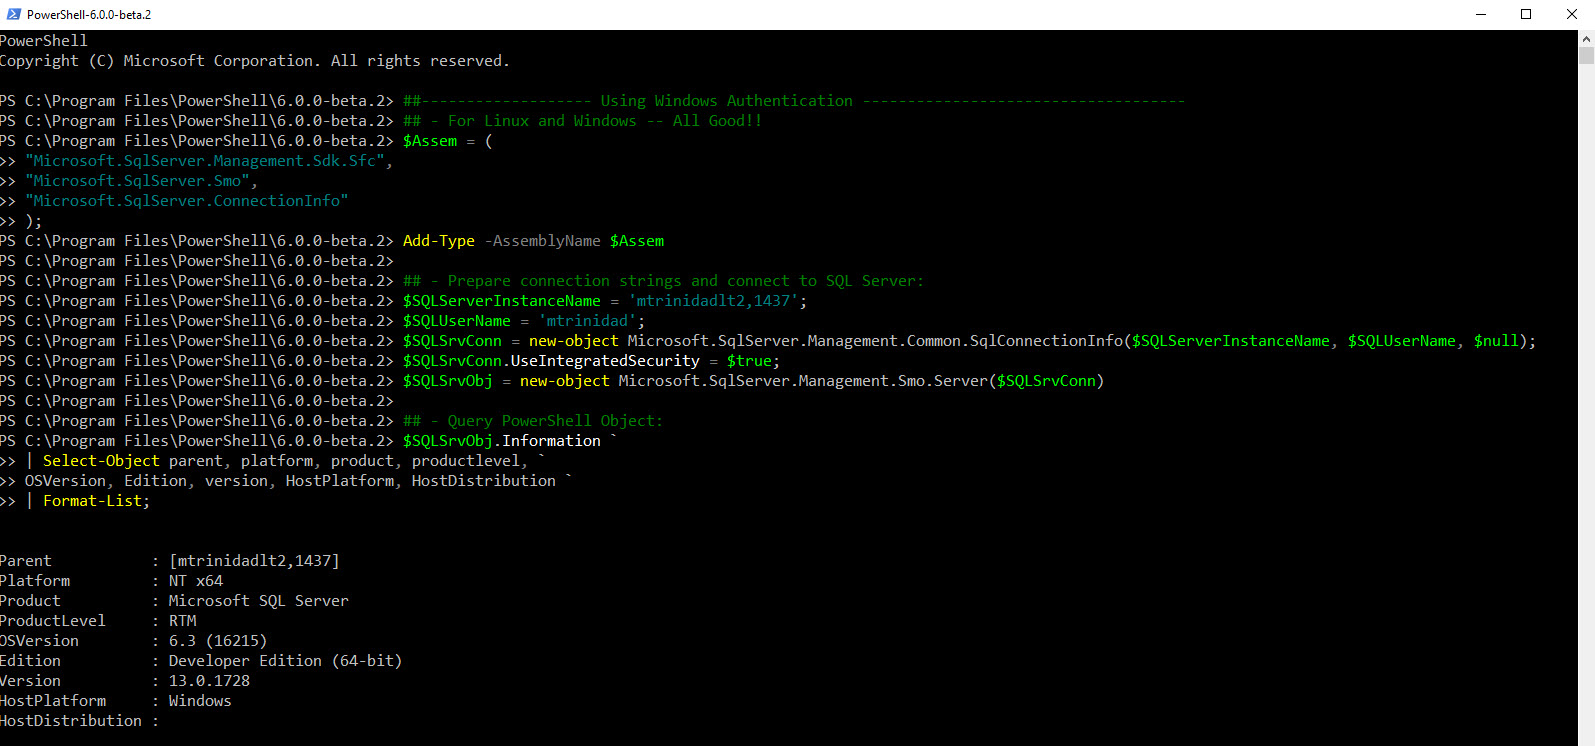
Prepare connection parameters for Windows Systems
In Windows systems, we use ‘Integrated Authentication‘. But, here’s where things change a bit since SQL Server 2012 SMO. You will need to prepare the connection parameters, and set the *.UseIntegratedSecurity property to ‘true‘ (the default is ‘false‘). At the same time, you’ll need to set the password to ‘null’ in order to connect successfull.
[sourcecode language=”powershell”]
## – Prepare connection strings and connect to a Windows SQL Server:
$SQLServerInstanceName = ‘sqlsvrinst01,1439’;
$SQLUserName = ‘winUsername’;
$SQLSrvConn = new-object Microsoft.SqlServer.Management.Common.SqlConnectionInfo($SQLServerInstanceName, $SQLUserName, $null);
$SQLSrvConn.UseIntegratedSecurity = $true;
$SQLSrvObj = new-object Microsoft.SqlServer.Management.Smo.Server($SQLSrvConn)
[/sourcecode]
Now, you can query the PowerShell Object $SQLSrvObj.
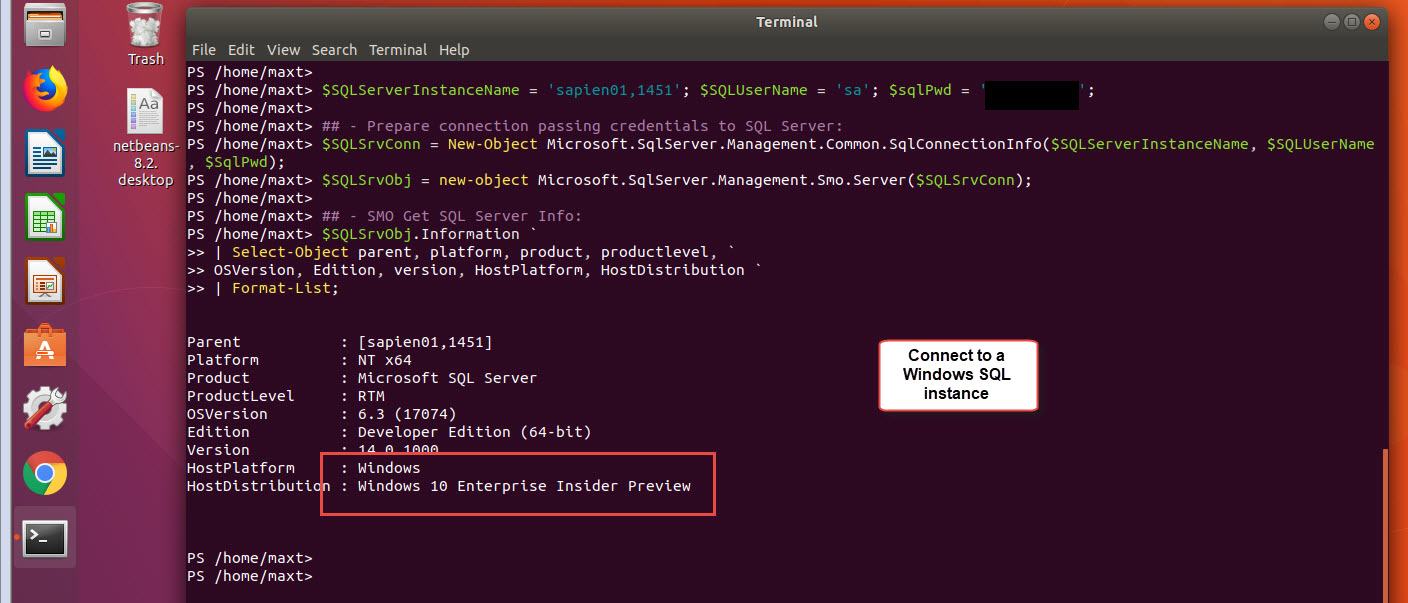
[sourcecode language=”powershell”]
## – Query PowerShell Object:
$SQLSrvObj.Information `
| Select-Object parent, platform, product, productlevel, `
OSVersion, Edition, version, HostPlatform, HostDistribution `
| Format-List;
[/sourcecode]
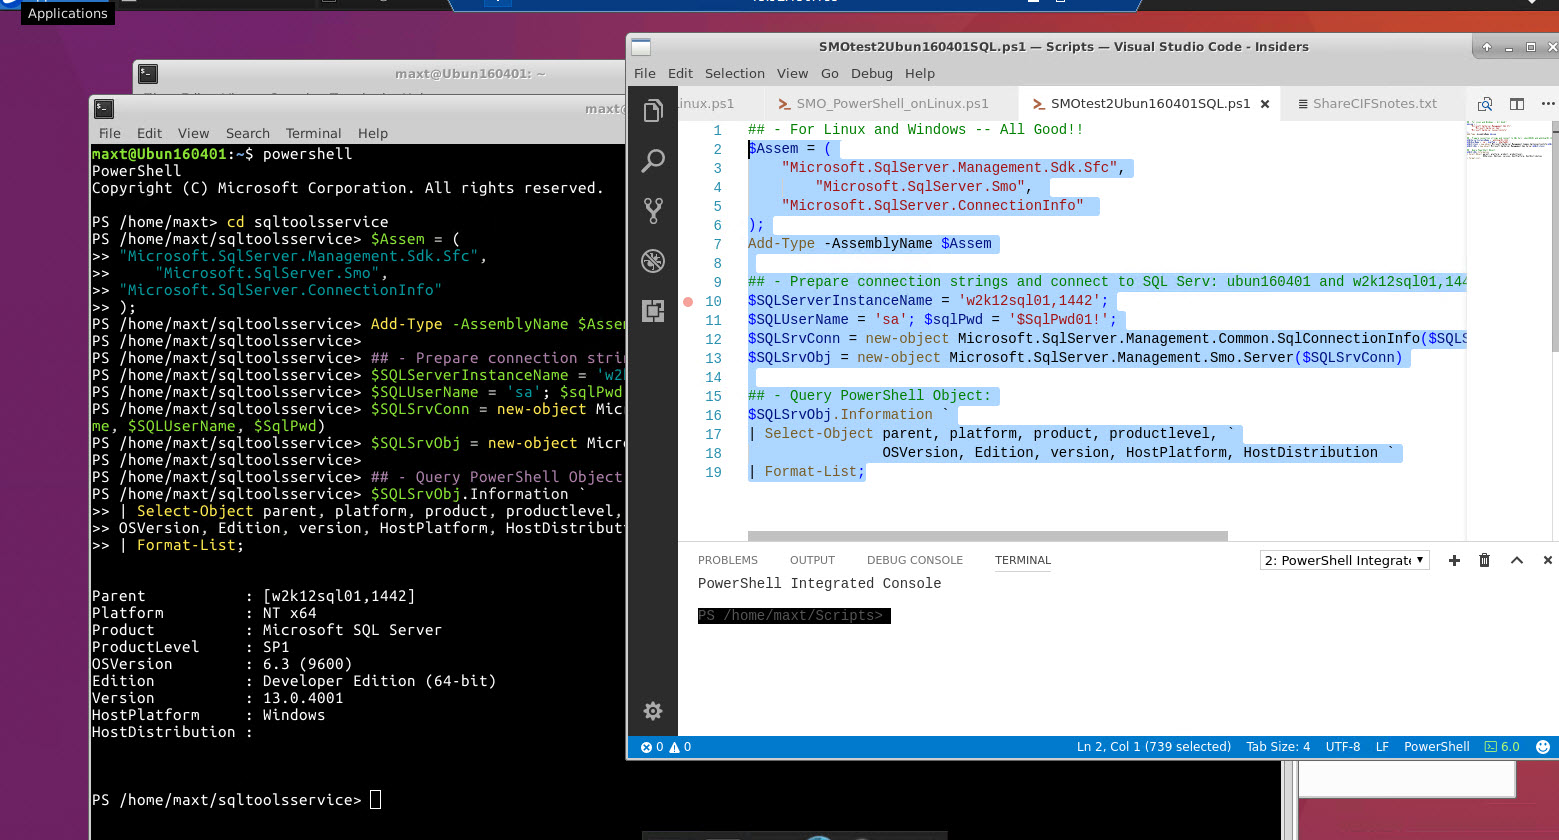
Prepare connection parameters for Linux Systems
For Linux systems, we use ‘SQL Authentication’. Here we add the SQL User password, then passing the value to the SqlConnectionInfo class. And, the *.UseIntegratedSecurity property by the default is ‘false‘.
[sourcecode language=”powershell”]
## – Prepare connection strings and connect to a Linux SQL Server:
$SQLServerInstanceName = ‘sqlsvrinst01,1439’;
$SQLUserName = ‘sqluser01’; $sqlPwd = ‘$usrpwd01!’;
$SQLSrvConn = new-object Microsoft.SqlServer.Management.Common.SqlConnectionInfo($SQLServerInstanceName, $SQLUserName, $SqlPwd)
$SQLSrvObj = new-object Microsoft.SqlServer.Management.Smo.Server($SQLSrvConn)
[/sourcecode]
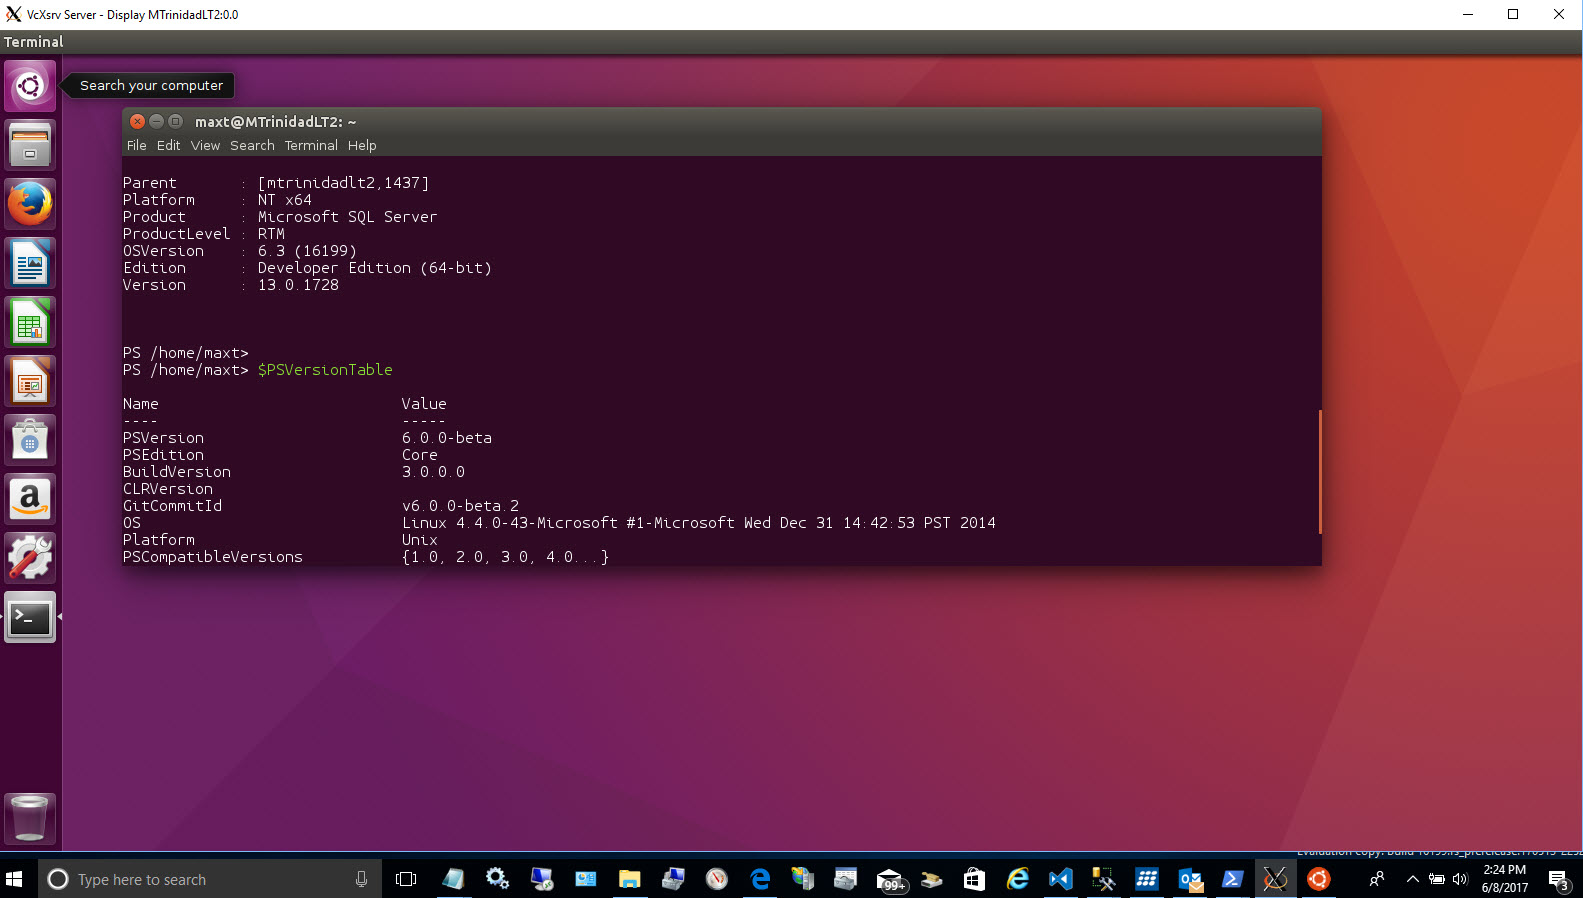
Again, you can proceed to query the PowerShell Object $SQLSrvObj.
[sourcecode language=”powershell”]
## – Query PowerShell Object:
$SQLSrvObj.Information `
| Select-Object parent, platform, product, productlevel, `
OSVersion, Edition, version, HostPlatform, HostDistribution `
| Format-List;
[/sourcecode]
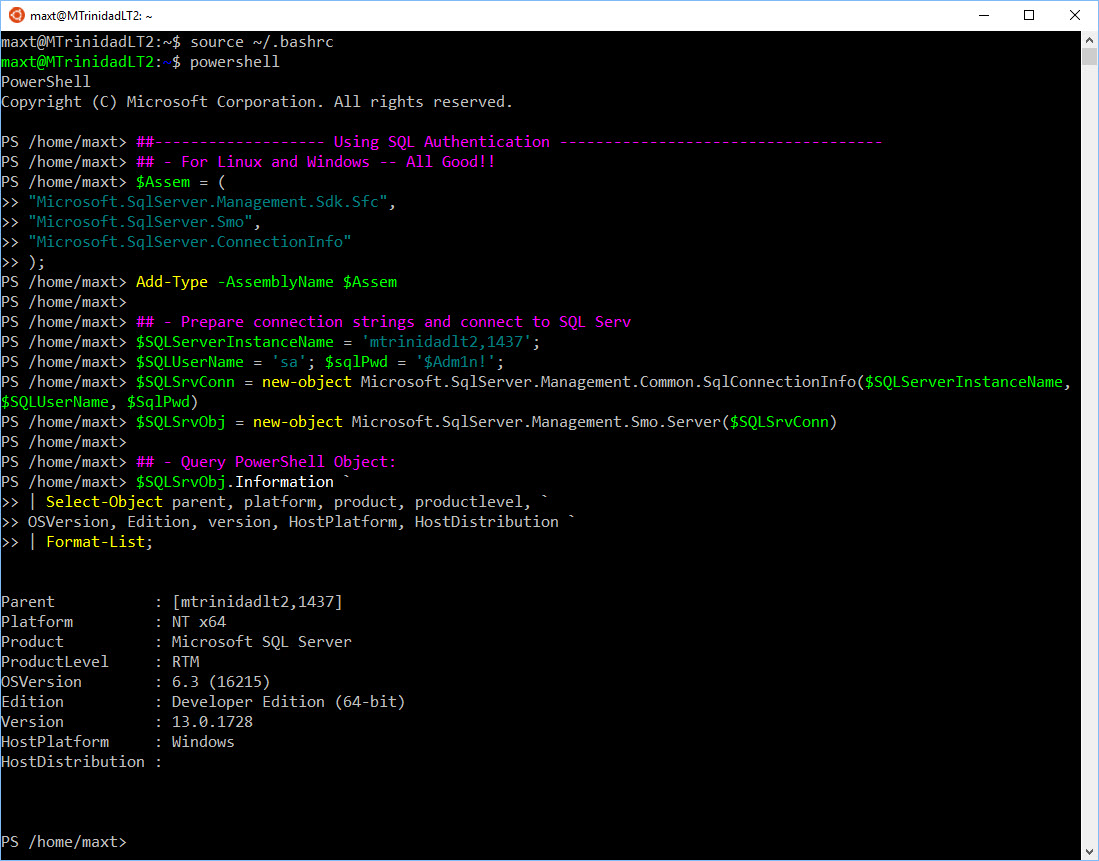
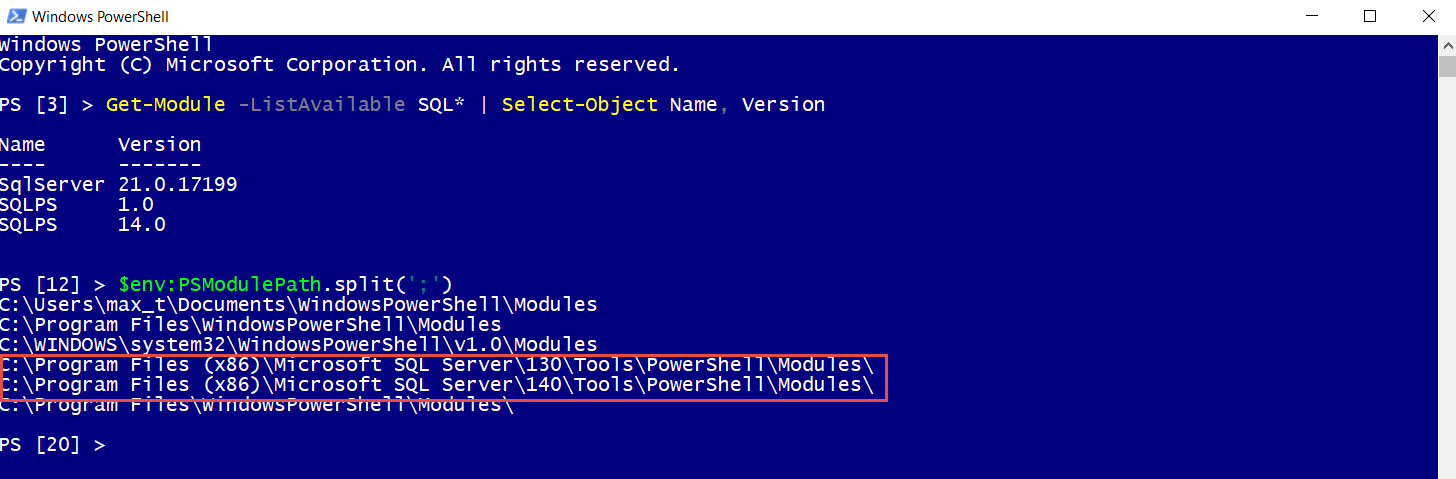
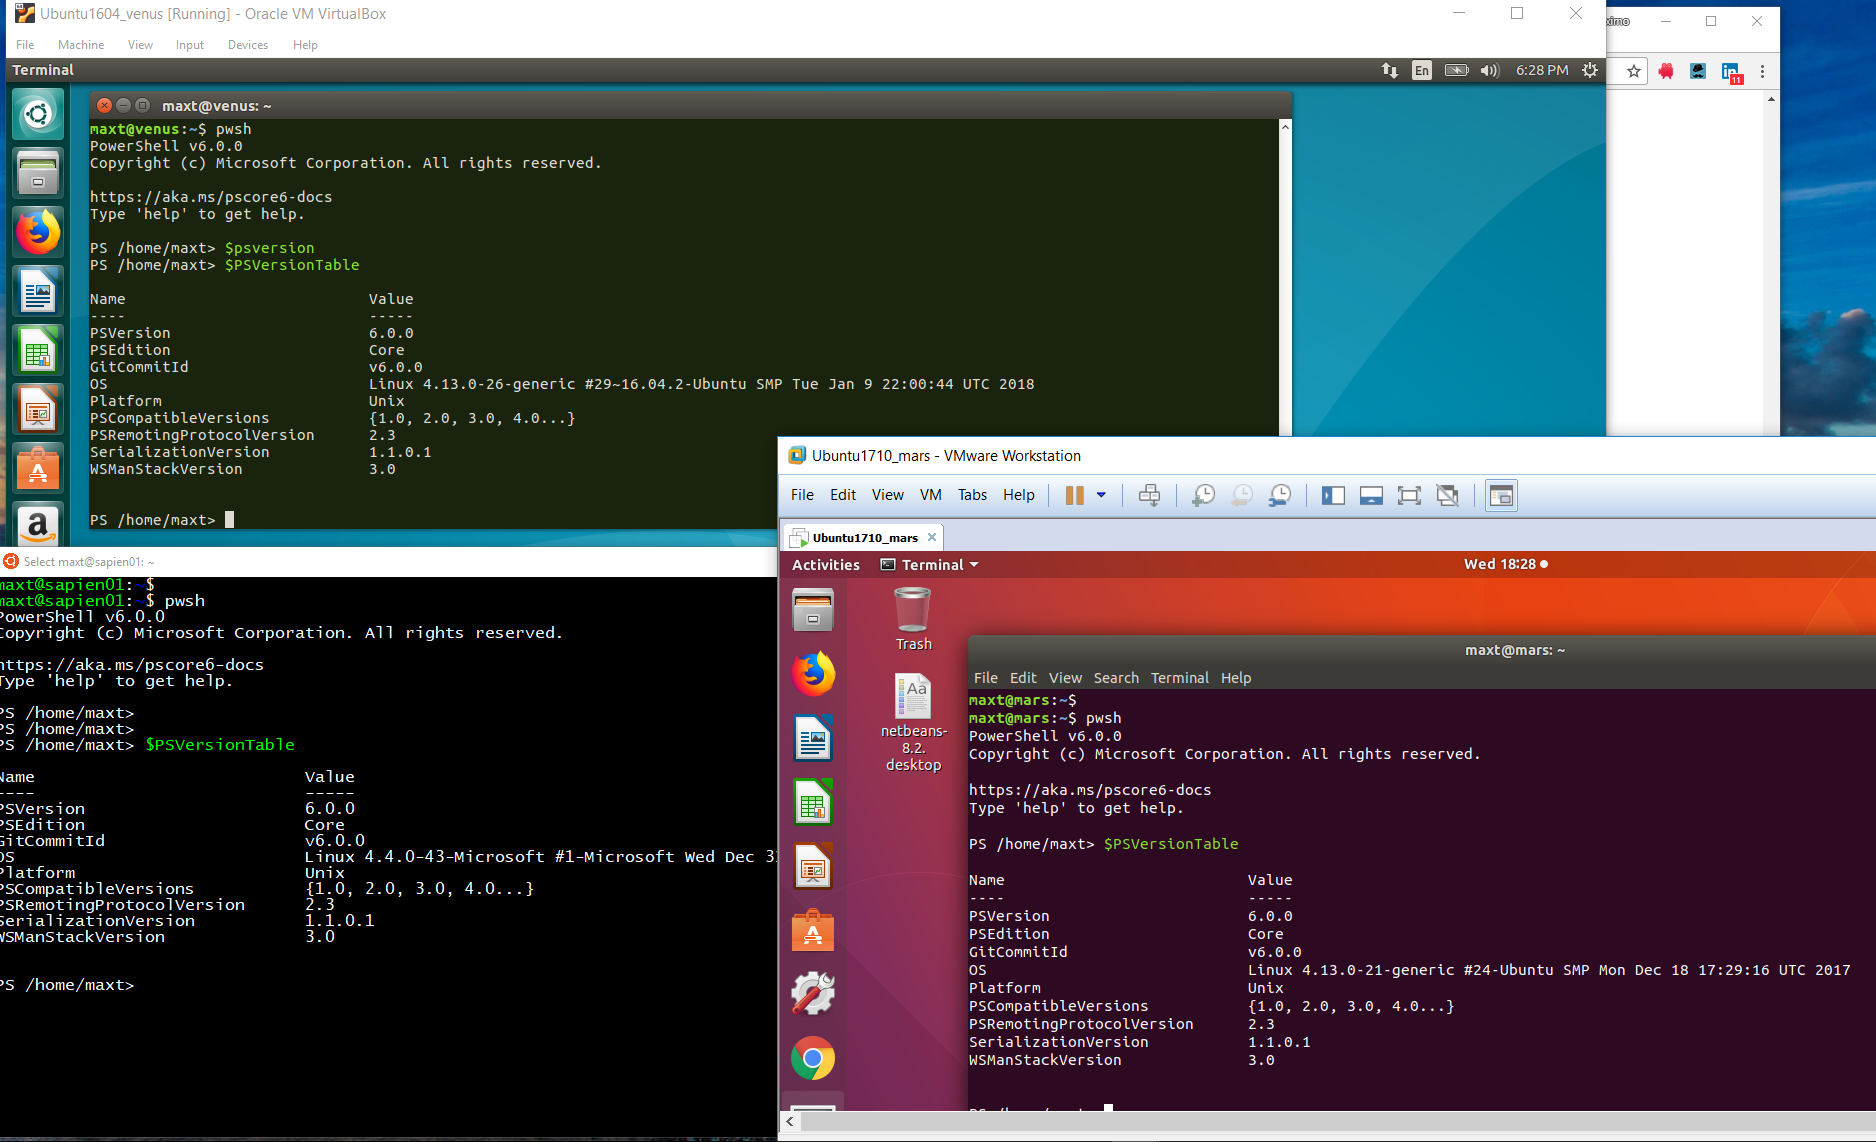
Please notice in the above image, the Windows 10 Insider Build 16215 Bash Console is running PowerShell Core. This list insider release made it possible for PowerShell Core to be functional again.
Conclusion
As we can see, this opens new opportunities to build cross-platform PowerShell scripts solutions working with SQL Servers in Linux, Windows, and others.
This is very exciting to start experiencing first hand these upcoming changes. I can’t deny that’s it’s challenging but you can’t turn down an opportunity to gain more skills.
Please, take advantage and subscribe to Microsoft Azure. Build, test, and start deploying solutions. Don’t be afraid to be creative. We all learn thru trial and errors!
This is a good time to keep up with what’s going on with technology.
Additional References:
Microsoft Azure: https://azure.microsoft.com/en-us/
Github: https://github.com/
Ubuntu: https://www.ubuntu.com/
Microsoft Windows Bash Shell: https://msdn.microsoft.com/en-us/commandline/wsl/about
Microsoft Academy: https://mva.microsoft.com/
Microsoft Channel 9: https://channel9.msdn.com/
Microsoft MVP Blog: https://blogs.msdn.microsoft.com/mvpawardprogram/
Microsoft SQL Server Docs: https://docs.microsoft.com/en-us/sql/sql-server/sql-server-technical-documentation
Microsoft PowerShell Blog: https://blogs.msdn.microsoft.com/powershell/