There’s some discussion around scripting on using Windows PowerShell vs PowerShell Core. So, just pick one? No.
Just think about supporting a cross-platform environment. Use both!
Following my recent post on “PSCore6 – SQLServer Module Expanding The Barrier Cross-Platform“, here’s a sample Hybrid-Script for cross-platform use.
Why not!
We all know the next generation (or evolution) of PowerShell is PowerShell Core. That’s it!
You are still using PowerShell, and Windows PowerShell is not going to be dropped nor removed any time soon.
So, why not start working towards, what I call, “Hybrid-scripting”? Powershell Core provides the necessary elements to help with cross-platform scripting.
In it’s basic code form, could look be something like this:
[sourcecode language=”powershell”]
## – Logic Structure for executing either PowerShell Version:
## – Use Set-StrictMode for debug purpose:
Set-StrictMode -Version 5.1
If ($PSversionTable.PSEdition -eq "Desktop") {
"Windows PowerShell"
}
else {
## – Use Set-StrictMode for debug purpose:
Set-StrictMode -Version 6.1
if ($PSVersionTable.PSEdition -eq "Core") {
If ($IsWindows) {
"WindowsCore"
}
If ($IsLinux) {
"LinuxCore"
}
If ($isMacOS) {
"MacOSCore"
}
}
};
[/sourcecode]
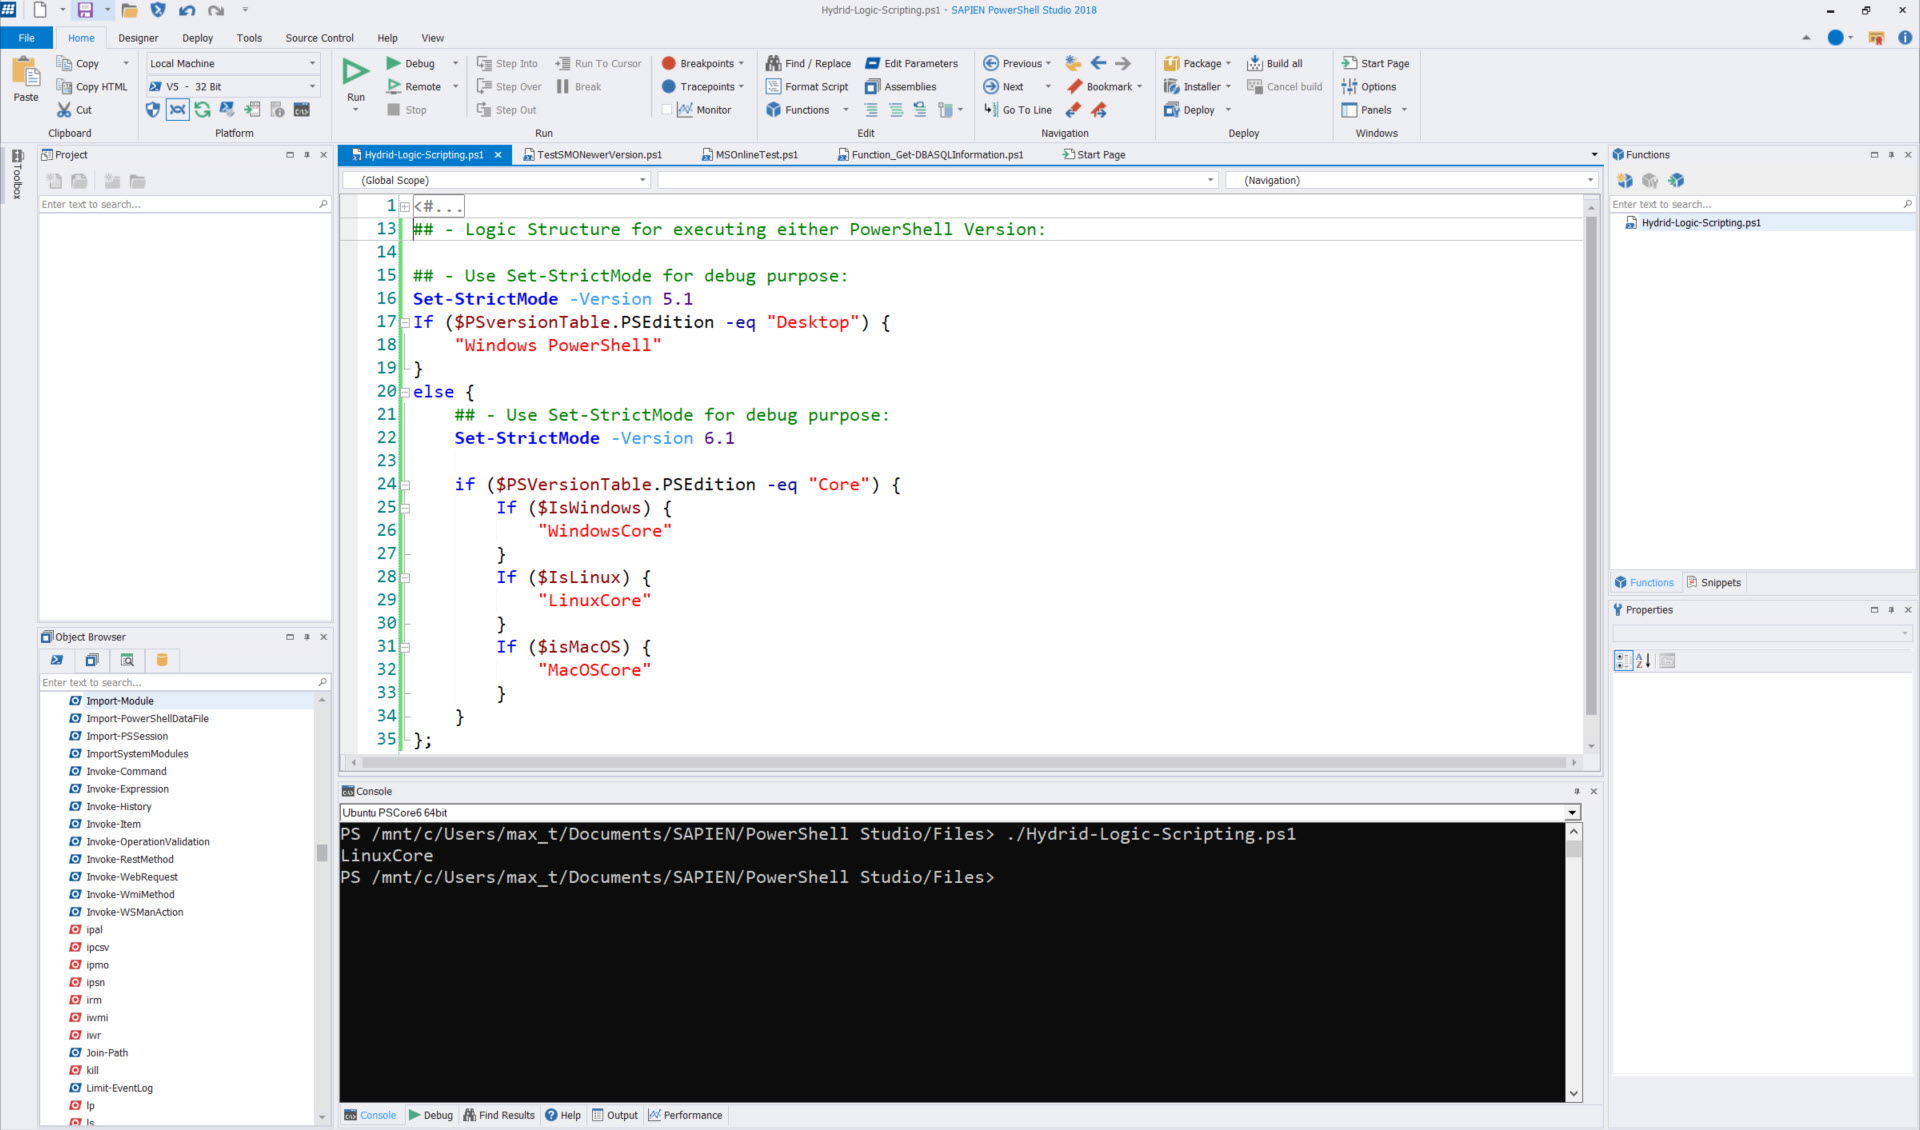
Now, let’s apply this code to a practical sample.
Sample Hybrid-Script
In the following sample script, includes Help information, begin-process-end and with try-catch code structure.
At the same time, the script will output the exception to the screen console with the failed line.
Script function name: Get-DBASQLInformation
[sourcecode language=”powershell”]
Function Get-DBASQLInformation {</pre>
<#
.SYNOPSIS
This is a cross-platform function to Get SQL Server Information.
.DESCRIPTION
This is a cross-platform function to Get SQL Server Information using SQL Authentication.
.PARAMETER UserID
Enter SQL Authentication UserID parameter.
.PARAMETER Password
Enter SQL Authentication Password parameter.
.PARAMETER SQLServerInstance
Enter SQLServerInstance name parameter.
.EXAMPLE
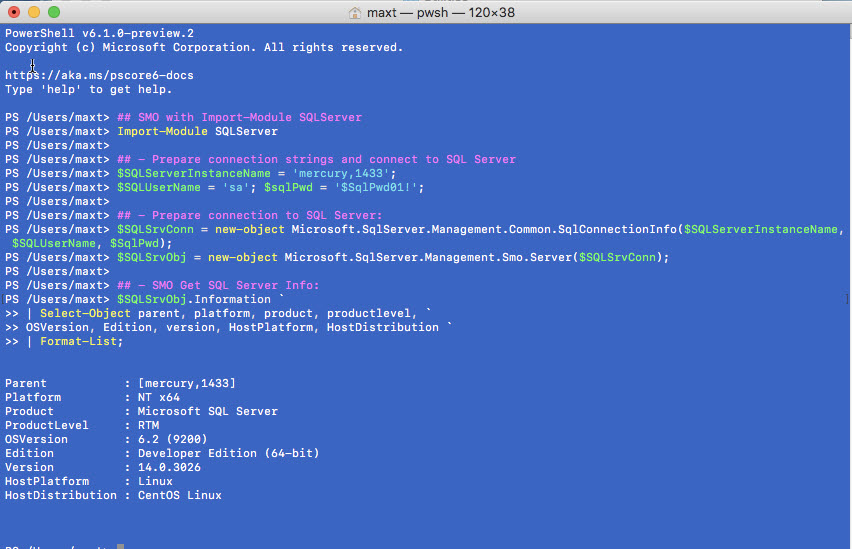
PS> Get-DBASQLInformation -UserID ‘sa’ -Password ‘$SqlPwd01!’ -SQLServerInstance ‘mercury,1433’
.NOTES
===========================================================================
Created with: SAPIEN Technologies, Inc., PowerShell Studio 2018 v5.5.152
Created on: 5/25/2018 8:27 AM
Created by: Maximo Trinidad
Organization: SAPIEN Technologies, Inc.
Filename: Function_Get-DBASQLInformation.ps1
===========================================================================
#>
<pre>[CmdletBinding()]
[OutputType([psobject])]
param
(
[Parameter(Mandatory = $true,
Position = 0)]
[string]
$UserID,
[Parameter(Mandatory = $true,
Position = 1)]
[string]
$Password,
[Parameter(Mandatory = $true,
Position = 2)]
[string]
$SQLServerInstance
)
BEGIN {
## – Internal function:
function GetSqlInfo {
param
(
[parameter(Mandatory = $true, Position = 0)]
[string]
$U,
[parameter(Mandatory = $true, Position = 1)]
[string]
$P,
[parameter(Mandatory = $true, Position = 2)]
[string]
$S
)
Try {
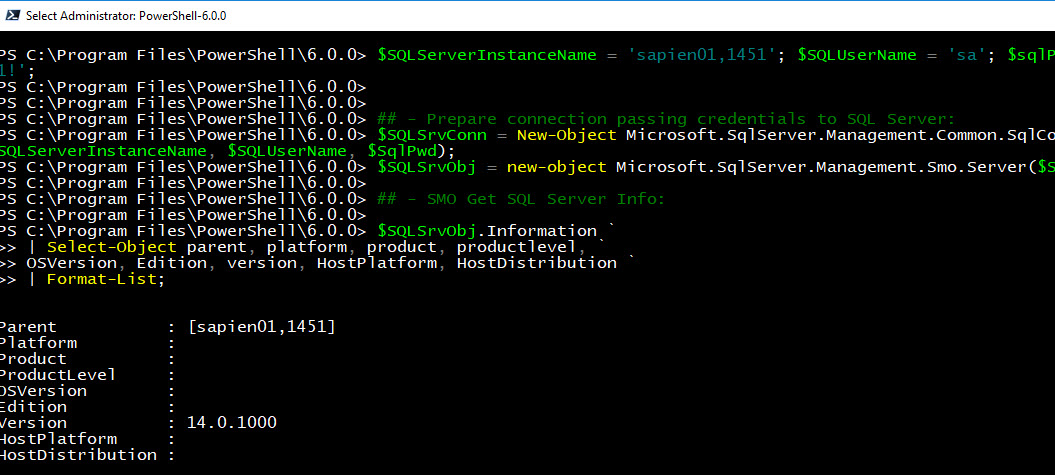
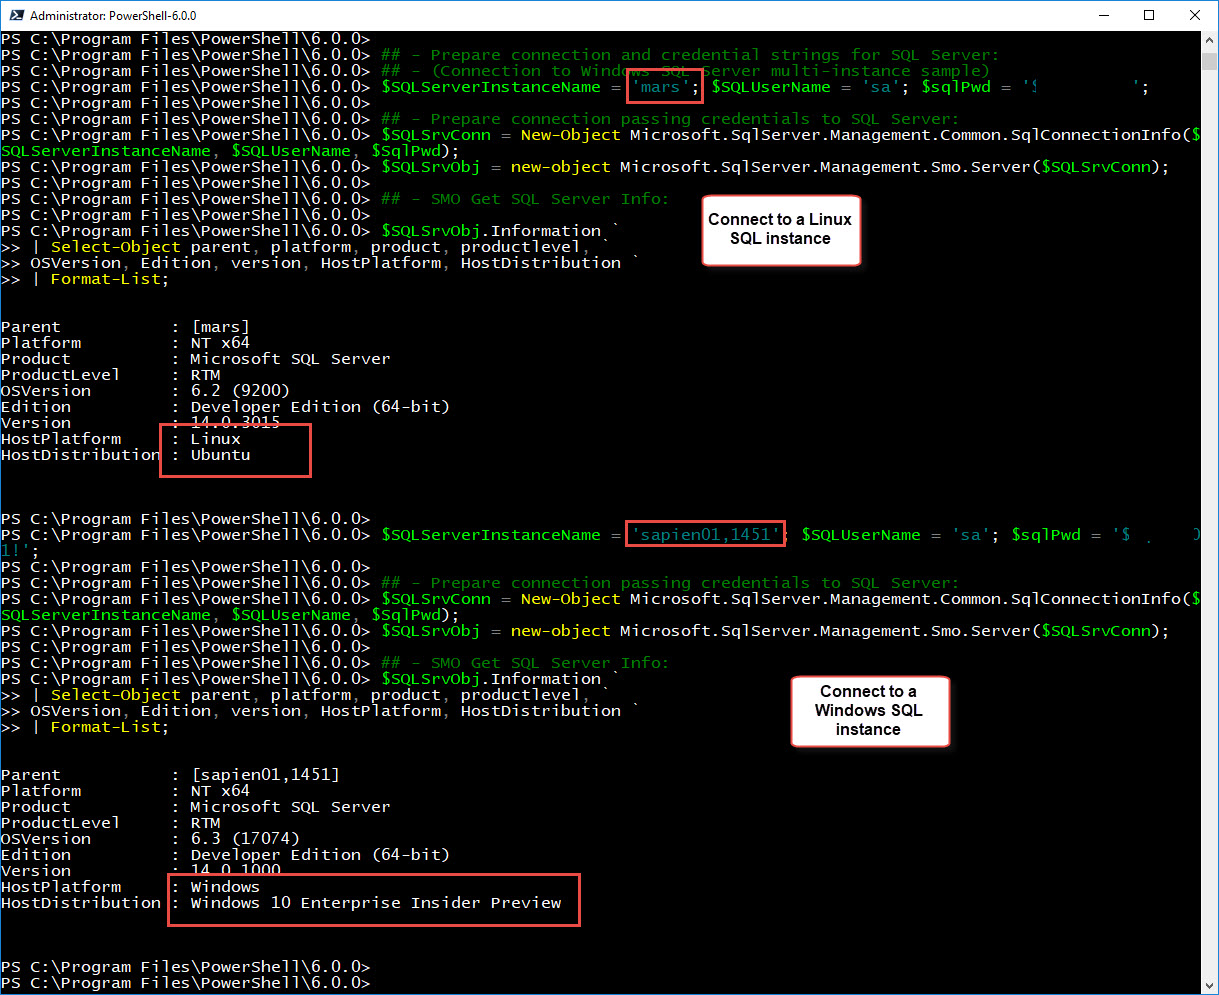
## – Prepare connection passing credentials to SQL Server:
$SQLSrvConn = New-Object Microsoft.SqlServer.Management.Common.SqlConnectionInfo($S, $U, $P);
$SQLSrvObj = new-object Microsoft.SqlServer.Management.Smo.Server($SQLSrvConn);
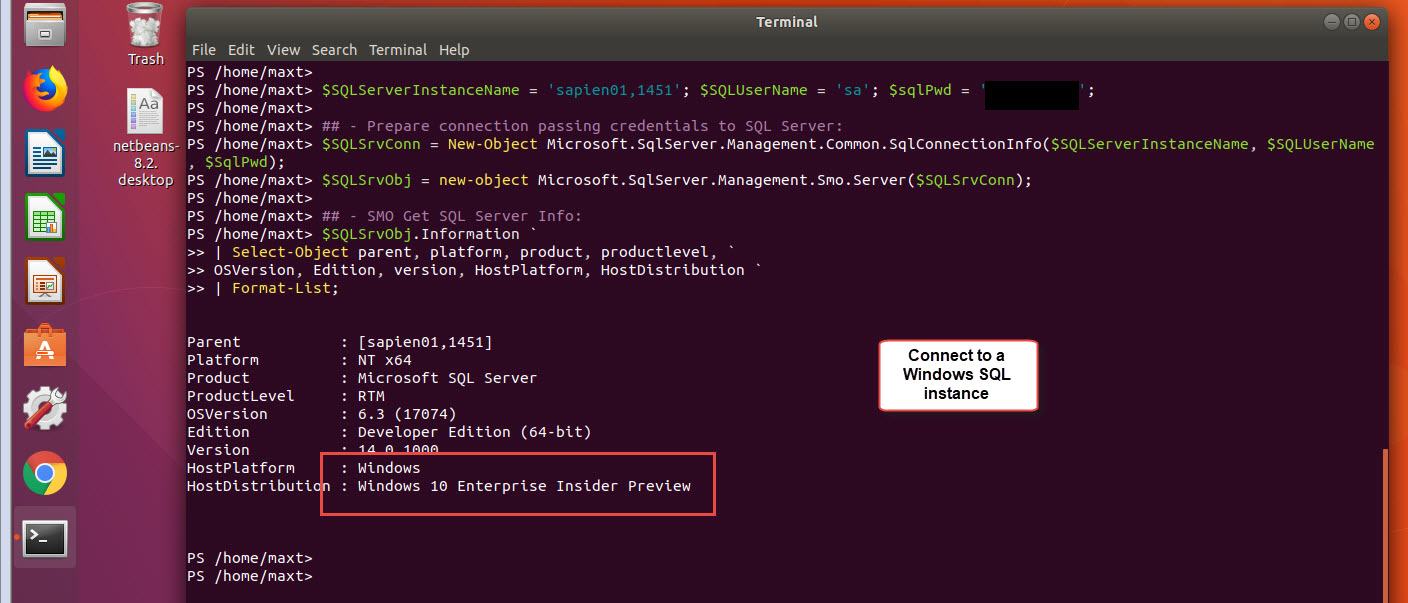
## – SMO Get SQL Server Info:
$SQLSrvObj.Information `
| Select-Object parent, platform, product, productlevel, `
OSVersion, Edition, version, HostPlatform, HostDistribution `
| Format-List;
}
catch {
## – Write Exception to Console:
Write-Host `
"Excepion found on line:`r`n$($error[0].InvocationInfo.line)"+ `
"`r`n$($Error[0].Exception)" `
-ForegroundColor Magenta;
}
}
};
PROCESS {
## – Cross-platform logic:
If ($PSversionTable.PSEdition -eq "Desktop") {
Write-Host "Windows PowerShell"
GetSqlInfo -U $UserID -P $Password -S $SQLServerInstance;
}
else {
if ($PSVersionTable.PSEdition -eq "Core") {
If ($IsWindows) {
Write-Host "Windows PScore";
}
If ($IsLinux) {
Write-Host "Linux PSCore";
}
If ($isMacOS) {
Write-Host "MacOS PSCore";
}
## – execute on non-Windows:
GetSqlInfo -U $UserID -P $Password -S $SQLServerInstance;
}
};
};
END {
## – EndBlock (Optional)
};
};
[/sourcecode]
The heart of the code are stored in the “Begin” section as a Internal-Function GetSQLInfo(). The internal-function will be only executed if it the criteria for each of the different platforms. The Try-Catch is just to trap the error if the SMO connection failed, or to indicate the SMO .NET wasn’t loaded.
Go ahead! Create a script file, copy/paste this code, and load this function. Give it a try cross-platforms: Windows, Linux, and MacOS.
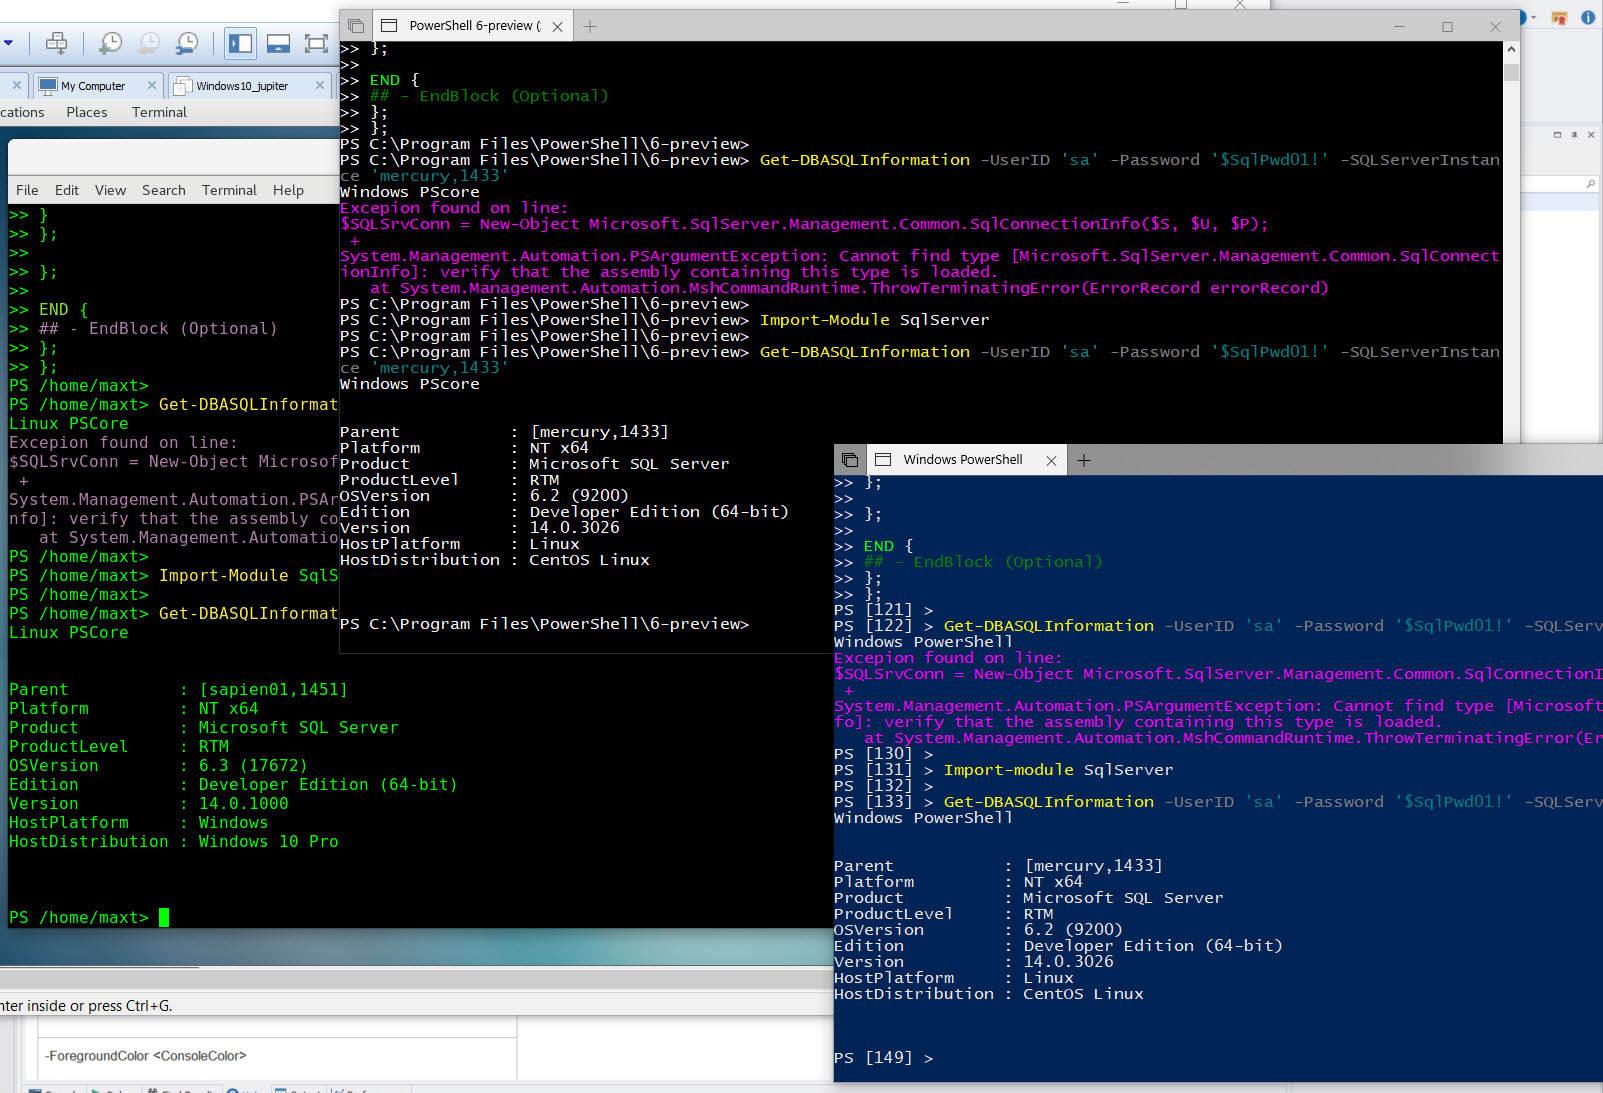
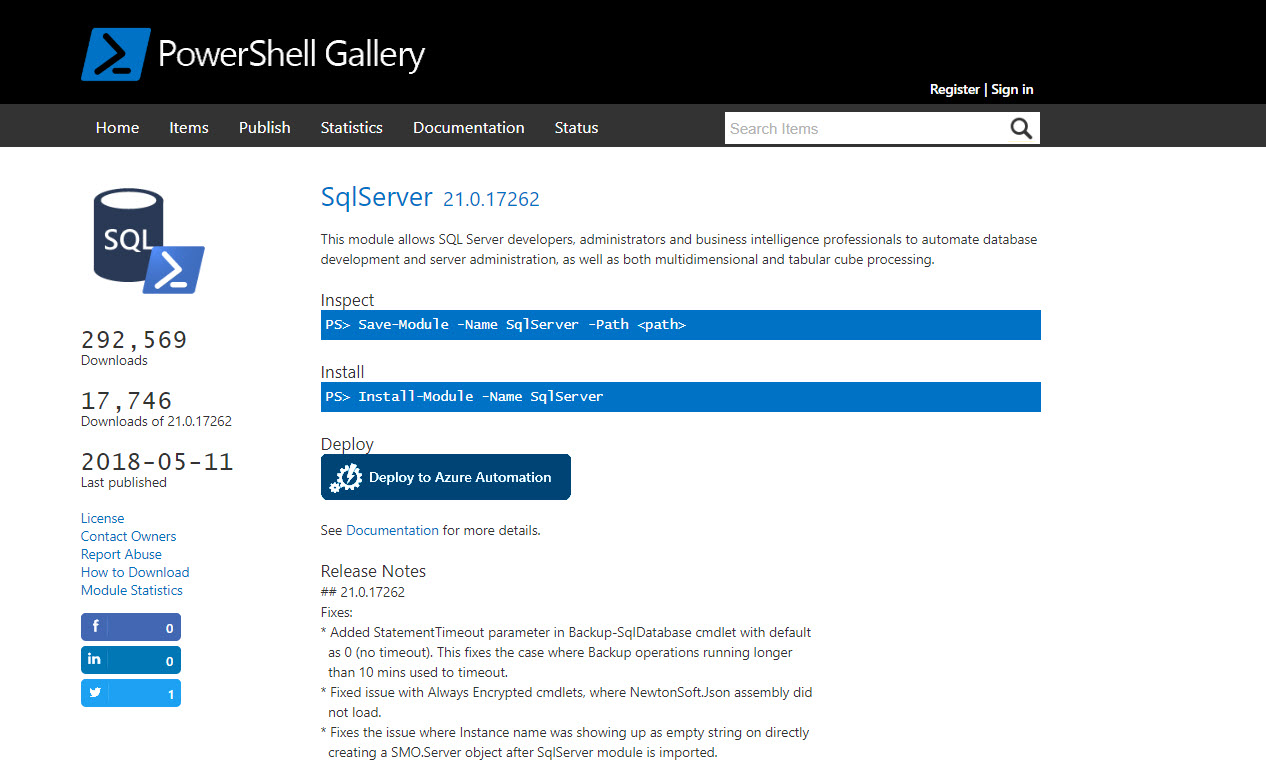
Remember, SQLServer module is a replacement for SQLPS module. I won’t recommend having both modules installed unless you use the namespace_module/cmdlet to identify which module is going to execute the cmdlet.
So make sure to always test your scripts.
What’s Next!
This function still need to worked on, but is functional enough to test-drive and see the results. So, it be modified to support Windows Authentication. Once you start scripting and building functions, you won’t stop thinking what else can be added.
Just keep working on it and learning from the PowerShell Community.
Go Bold! Learn PowerShell Core!