It’s been over two years since I touch this topic, so here’s an updated post about using SQL Server Management Object (SMO) on the latest PowerShell Version 7.
Here’s 411 on what’s out there!
For the most part, nowadays you can use SMO to connect:
1. Windows to Linux.
2. Linux to Windows.
3. Windows to Linux Containers.
4. Linux to Linux Containers.
5. Windows to Windows Containers.
6. WSL to Linux Containers or Windows.
And, of course, will include cloud technologies.
Now, we have to extend our skills thanks to Docker Container.
*Note: Any connection issues connecting from Linux to Windows, can be solved by creating the inbound rule for Linux in Windows Firewall.
Ways to use SMO
There are two ways you could use SMO in PowerShell 7 (cross-platform):
1. Installing the SMO NuGet packages, two packages are requiered:
a. Microsoft.SqlServer.SqlManagementObjects Version 150.18208.0 (as of 03/23/2020)
b. Microsoft.Data.SqlClient Version 1.1.1 (recommended)
2. Installing the PowerShell Module: SqlServer Version 21.1.18221 (as of 03/23/2020)
Keep in mind, once the packages and/or modules are installed, you need to update them manually.
Working with SMO NuGet Packages
To install the Microsoft.SqlServer.SqlManagementObjects package. You first need to verify that Nuget Package Management is registered in PowerShell 7. Execute the following code will do the task of registration:
function Verify-NugetRegistered
{
[CmdletBinding()]
Param ()
# Microsoft provided code: Test Auto sAVCE
# Register NuGet package source, if needed
# The package source may not be available on some systems (e.g. Linux/Windows)
if (-not (Get-PackageSource | Where-Object{ $_.Name -eq 'Nuget' }))
{
Register-PackageSource -Name Nuget -ProviderName NuGet -Location https://www.nuget.org/api/v2
}
else
{
Write-Host "NuGet Already Exist! No Need to install." -ForegroundColor Yellow;
};
}; Verify-NugetRegistered;
Now, here’s the tricky part. There’s a known issue when executing the Install-Package cmdlet which will fail to install the package.
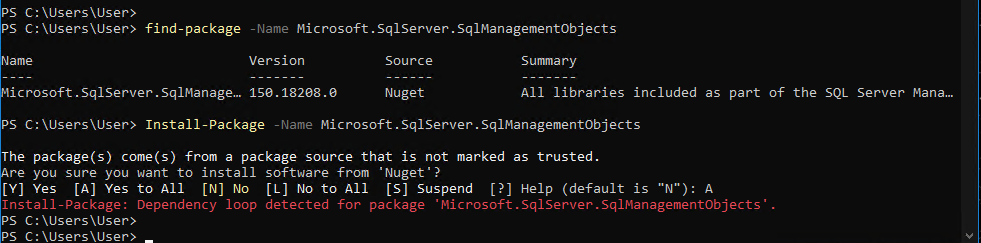
The workaround is to download the Nuget.exe CLI and place the executable in the following folder: “C:\Program Files\PackageManagement\NuGet\Packages.”
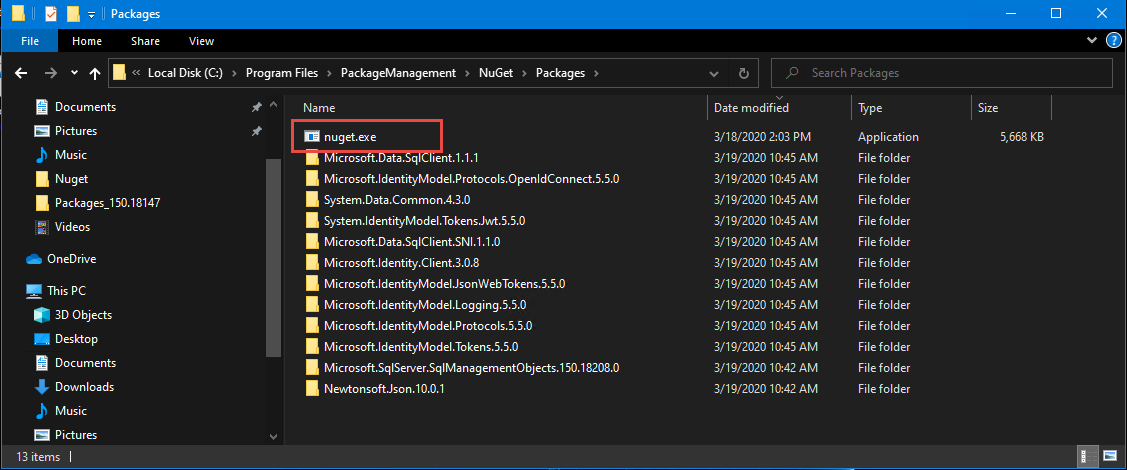
This is the PowerShell default path for storing Packages, and it may not exist in the beginning. So you may need to manually create the folders.
To install the SMO packages needed, execute the following command in PowerShell 7 prompt as an Admin:
cd 'C:\Program Files\PackageManagement\NuGet\Packages\'
./nuget install Microsoft.SqlServer.SqlManagementObjects -version 150.18208.0
Pause
./nuget install Microsoft.Data.SqlClient -version 1.1.1
Pause
Notice, I included the versions of the packages as of 3/23/2020. These SMO packages will support SQL Server 2019 or older, but keeping in mind the older the SQL Server version the latest features will not apply.
Also, these packages doesn’t contain any PowerShell cmdlets, they are meant for developing solution from scratch. For example, below I’m creating an SMO script to connect to a SQL Server providing my SQL authentication, query to get the SQL Server engine version, and manipulate the results from the script.
## - PowerShell 7 loading .NET Core netstandard 2.0 library SMO dll's:
$smopath = Join-Path ((Get-Package Microsoft.SqlServer.SqlManagementObjects).Source `
| Split-Path) (Join-Path lib netstandard2.0);

Add-Type -Path (Join-Path $smopath Microsoft.SqlServer.Smo.dll);
Add-Type -Path (Join-Path $smopath Microsoft.SqlServer.ConnectionInfo.dll);
Add-Type -Path (Join-Path $smopath Microsoft.SqlServer.SmoExtended.dll);
Add-Type -Path (Join-Path $smopath Microsoft.SqlServer.Management.Sdk.Sfc.dll);

## - Prepare login credentials:
$SQLServerInstanceName = 'sapien01,1449';
$SQLUserName = 'sa'; $SqlPwd = '$SqlPwd01!';

## - Prepare connection to SQL Server:
$SQLSrvConn = `
new-object Microsoft.SqlServer.Management.Common.SqlConnectionInfo($SQLServerInstanceName, $SQLUserName, $SqlPwd);
$SQLSrvObj = new-object Microsoft.SqlServer.Management.Smo.Server($SQLSrvConn);

## - Sample T-SQL Queries:
$SqlQuery = 'Select @@Version as FullVersion';

## - Execute T-SQL Query:
[array]$result = $SQLSrvObj.Databases['master'].ExecuteWithResults($SqlQuery);
$GetVersion = $result.tables.Rows;
$GetVersion.FullVersion.Split(' - ')[0];

## - SMO Get SQL Server Info:
$SQLSrvObj.Information `
| Select-Object parent, platform, `
@{ label = 'FullVersion'; Expression = { $GetVersion.FullVersion.Split(' - ')[0]; } }, `
OSVersion, Edition, version, HostPlatform, HostDistribution `
| Format-List;
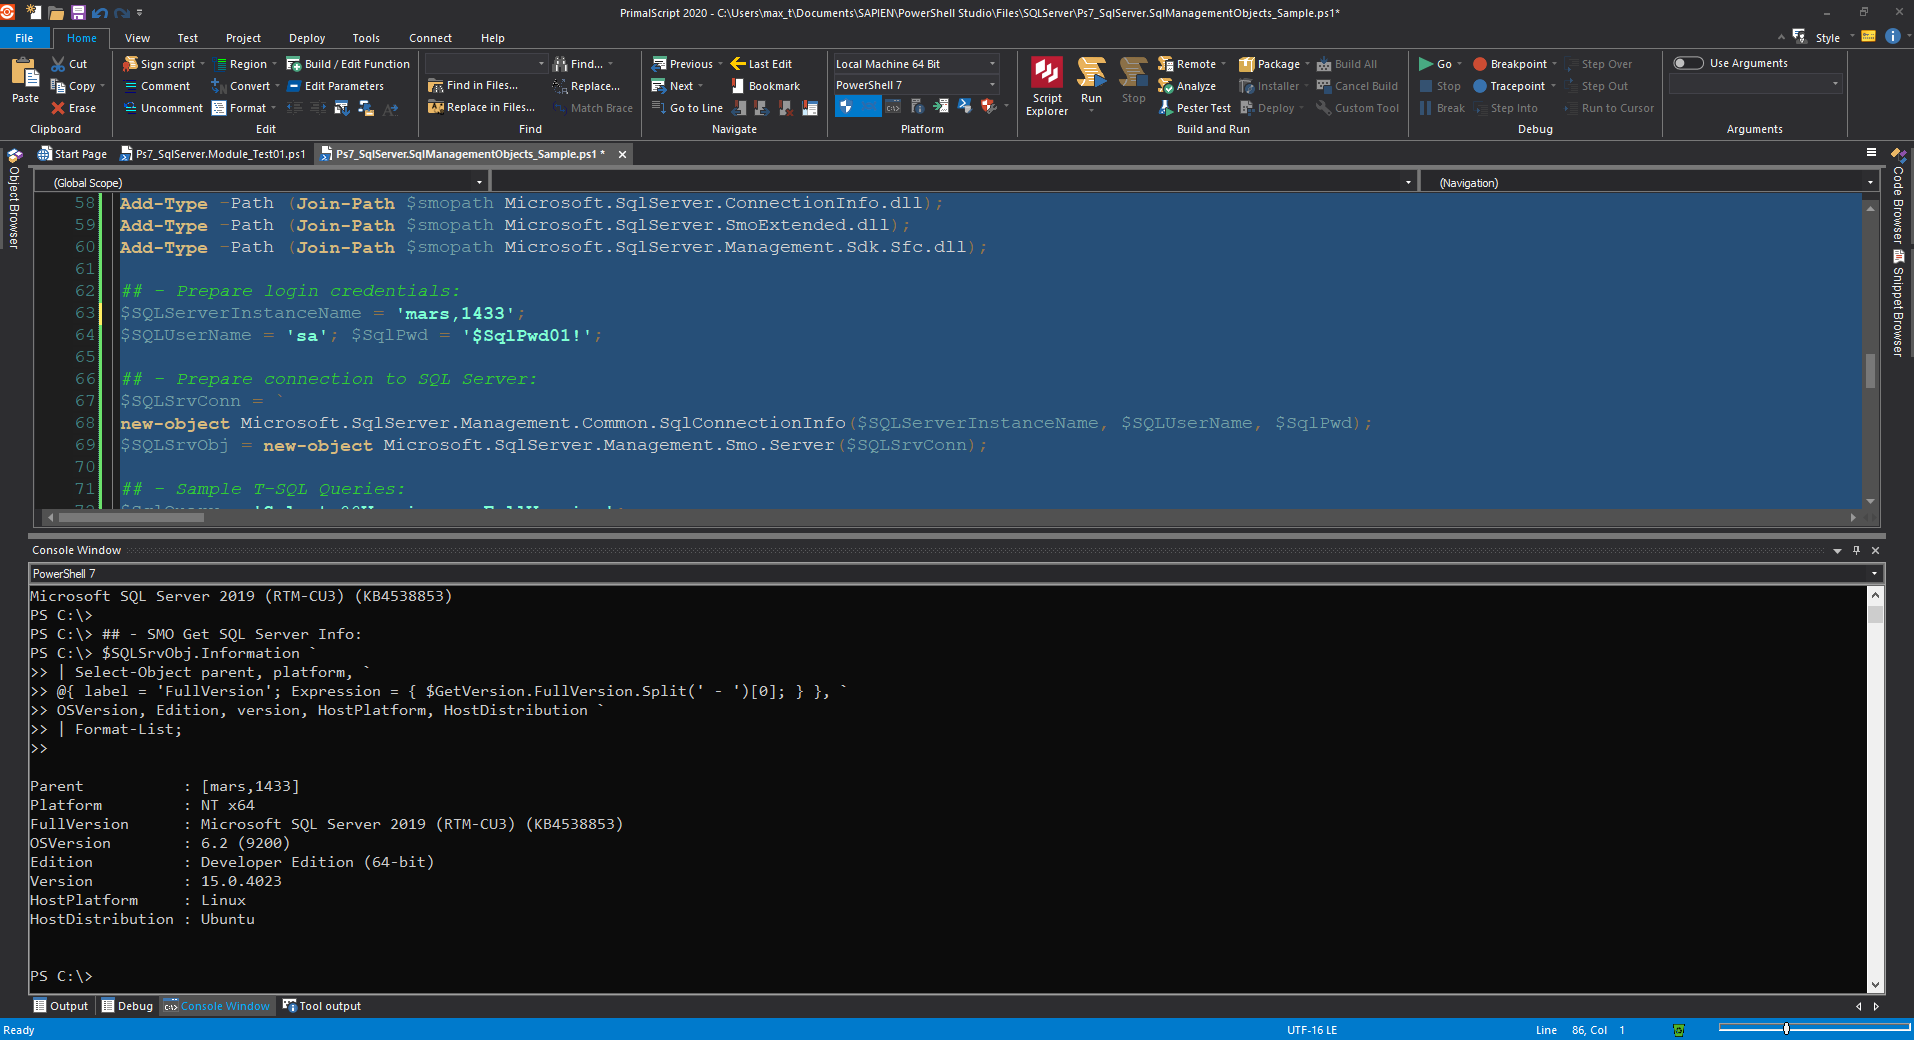
The best thing! This Package is supported cross-platform so you can execute the script on any OS.
The beauty of coding with SMO is that everything is documented. Just check the Microsoft Documentation “SQL Server Management Objects (SMO) Programming Guide“.
Working with SqlServer Module
Now, using the SQL Server Module in PowerShell 7 is makes it a bit simple to install. And, it’s supported cross-platform.
Just execute the following command as an Admin:
Install-Module -Name SqlServer -AllowClobber
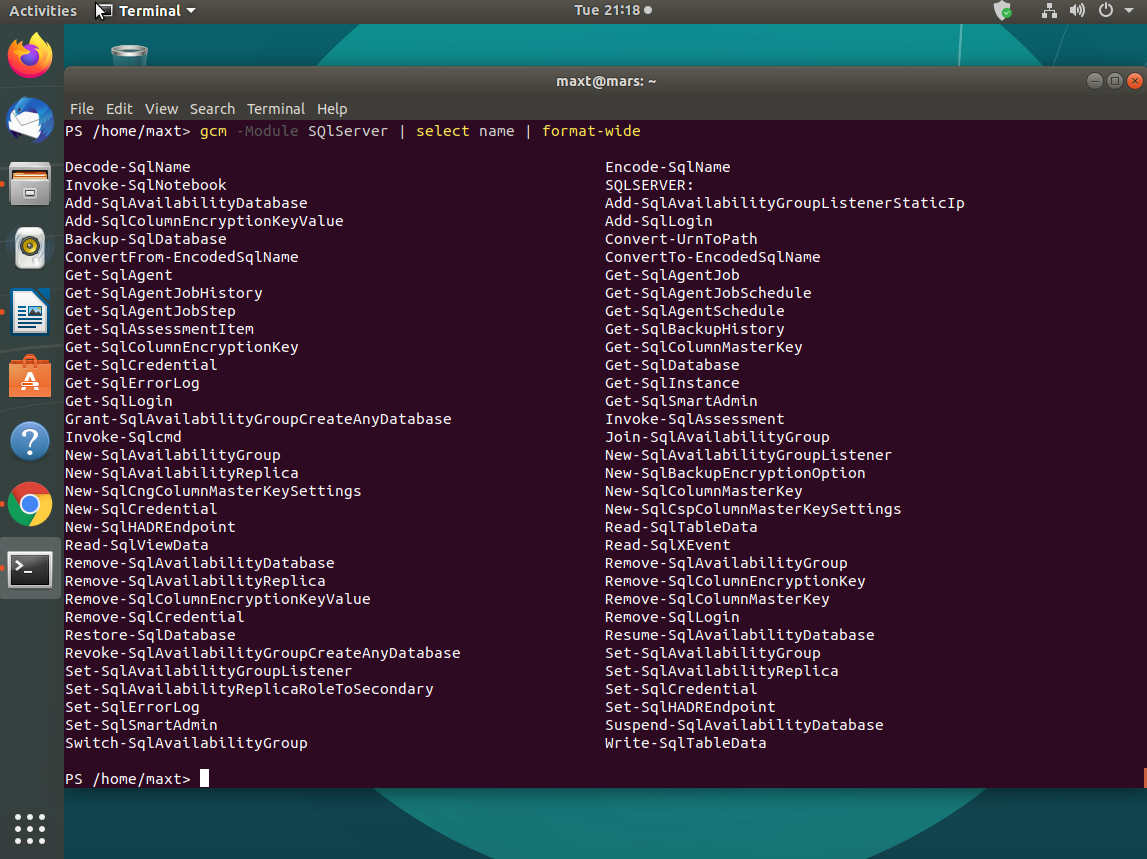
The latest version contains a total of 66 commands you can use to manage your SQL Server engine.
Now, besides having all of these commands available, in the future, you may have the need to create custom functions.
Here’s the variation of the previous SMO script sample:
## - Import the SqlServer module which it loads all needed SMO assemblies:
Import-Module SqlServer

## - Prepare login credentials:
$SQLServerInstanceName = 'sapien01,1449';
$SQLUserName = 'sa'; $SqlPwd = '$SqlPwd01!';

## - Prepare connection to SQL Server:
$SQLSrvConn = `
new-object Microsoft.SqlServer.Management.Common.SqlConnectionInfo($SQLServerInstanceName, $SQLUserName, $SqlPwd);
$SQLSrvObj = new-object Microsoft.SqlServer.Management.Smo.Server($SQLSrvConn);

## - Sample T-SQL Queries:
$SqlQuery = 'Select @@Version as FullVersion';

## - Execute T-SQL Query:
[array]$result = $SQLSrvObj.Databases['master'].ExecuteWithResults($SqlQuery);
$GetVersion = $result.tables.Rows;
$GetVersion.FullVersion.Split(' - ')[0];

## - SMO Get SQL Server Info:
$SQLSrvObj.Information `
| Select-Object parent, platform, `
@{ label = 'FullVersion'; Expression = { $GetVersion.FullVersion.Split(' - ')[0]; } }, `
OSVersion, Edition, version, HostPlatform, HostDistribution `
| Format-List;
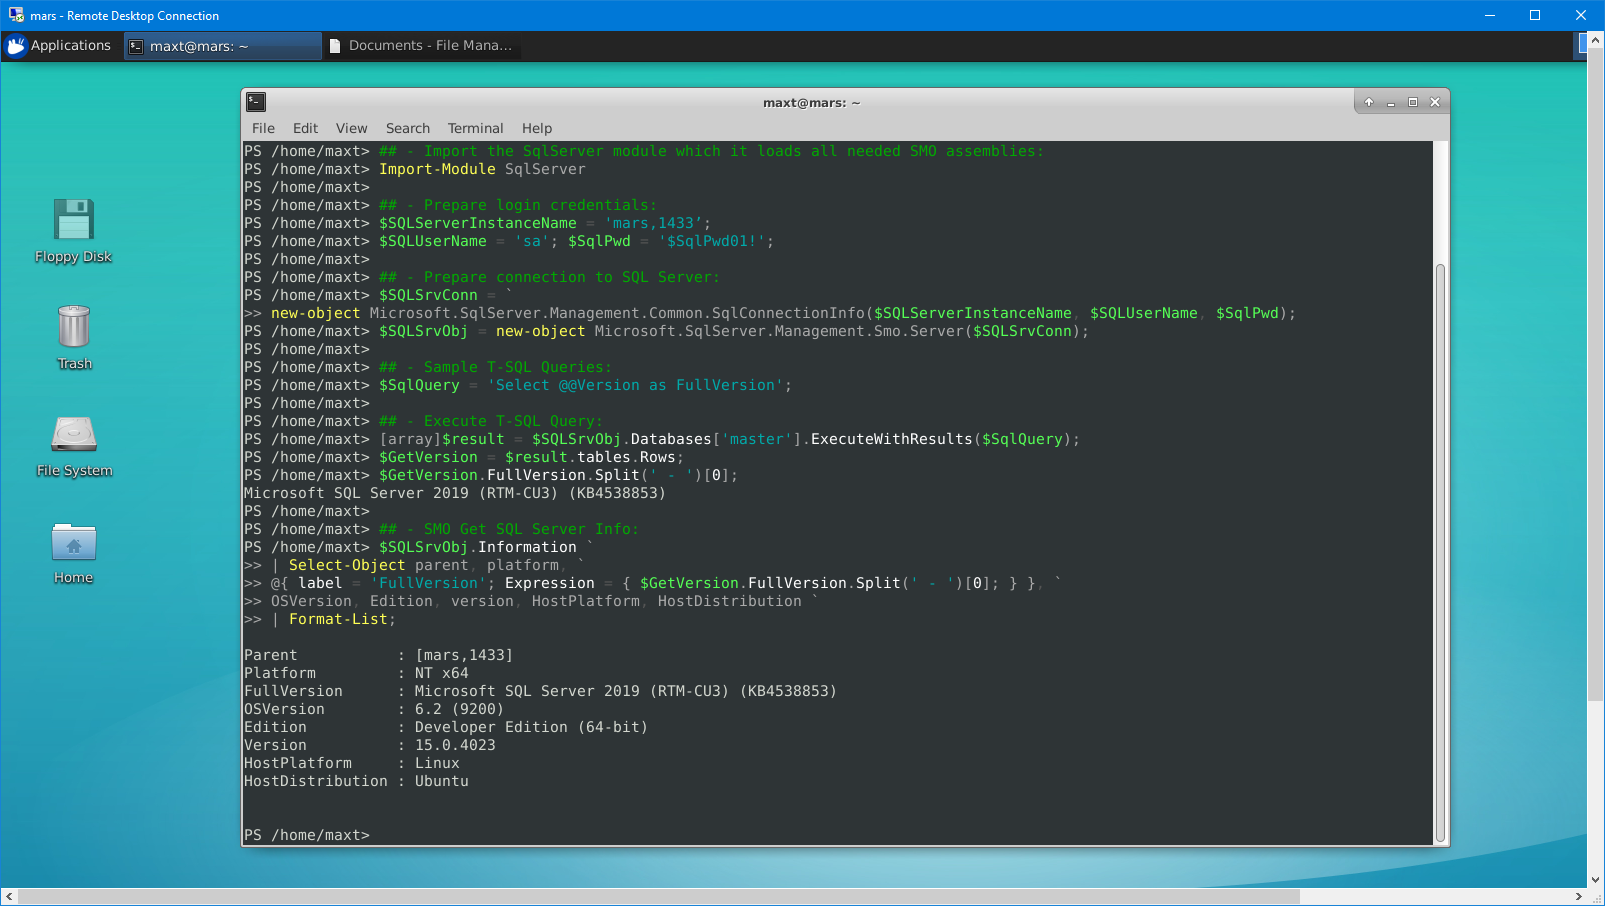
The differences is quite simple. All SMO assemblies are previously loaded when you import the SqlServer module. So, you don’t have to worry about including the assemblies in the code. Make sure to check all of the commands available that can help you manage the SQL Server.
Additional Tools Available
Now, don’t forget to check other SQL Server community tools that are available, such as:
1. DBATools – SQL SMO PowerShell.
2. MSSql-Scripter – Python-based tool.
3. Mssql-cli – Python-based tool.
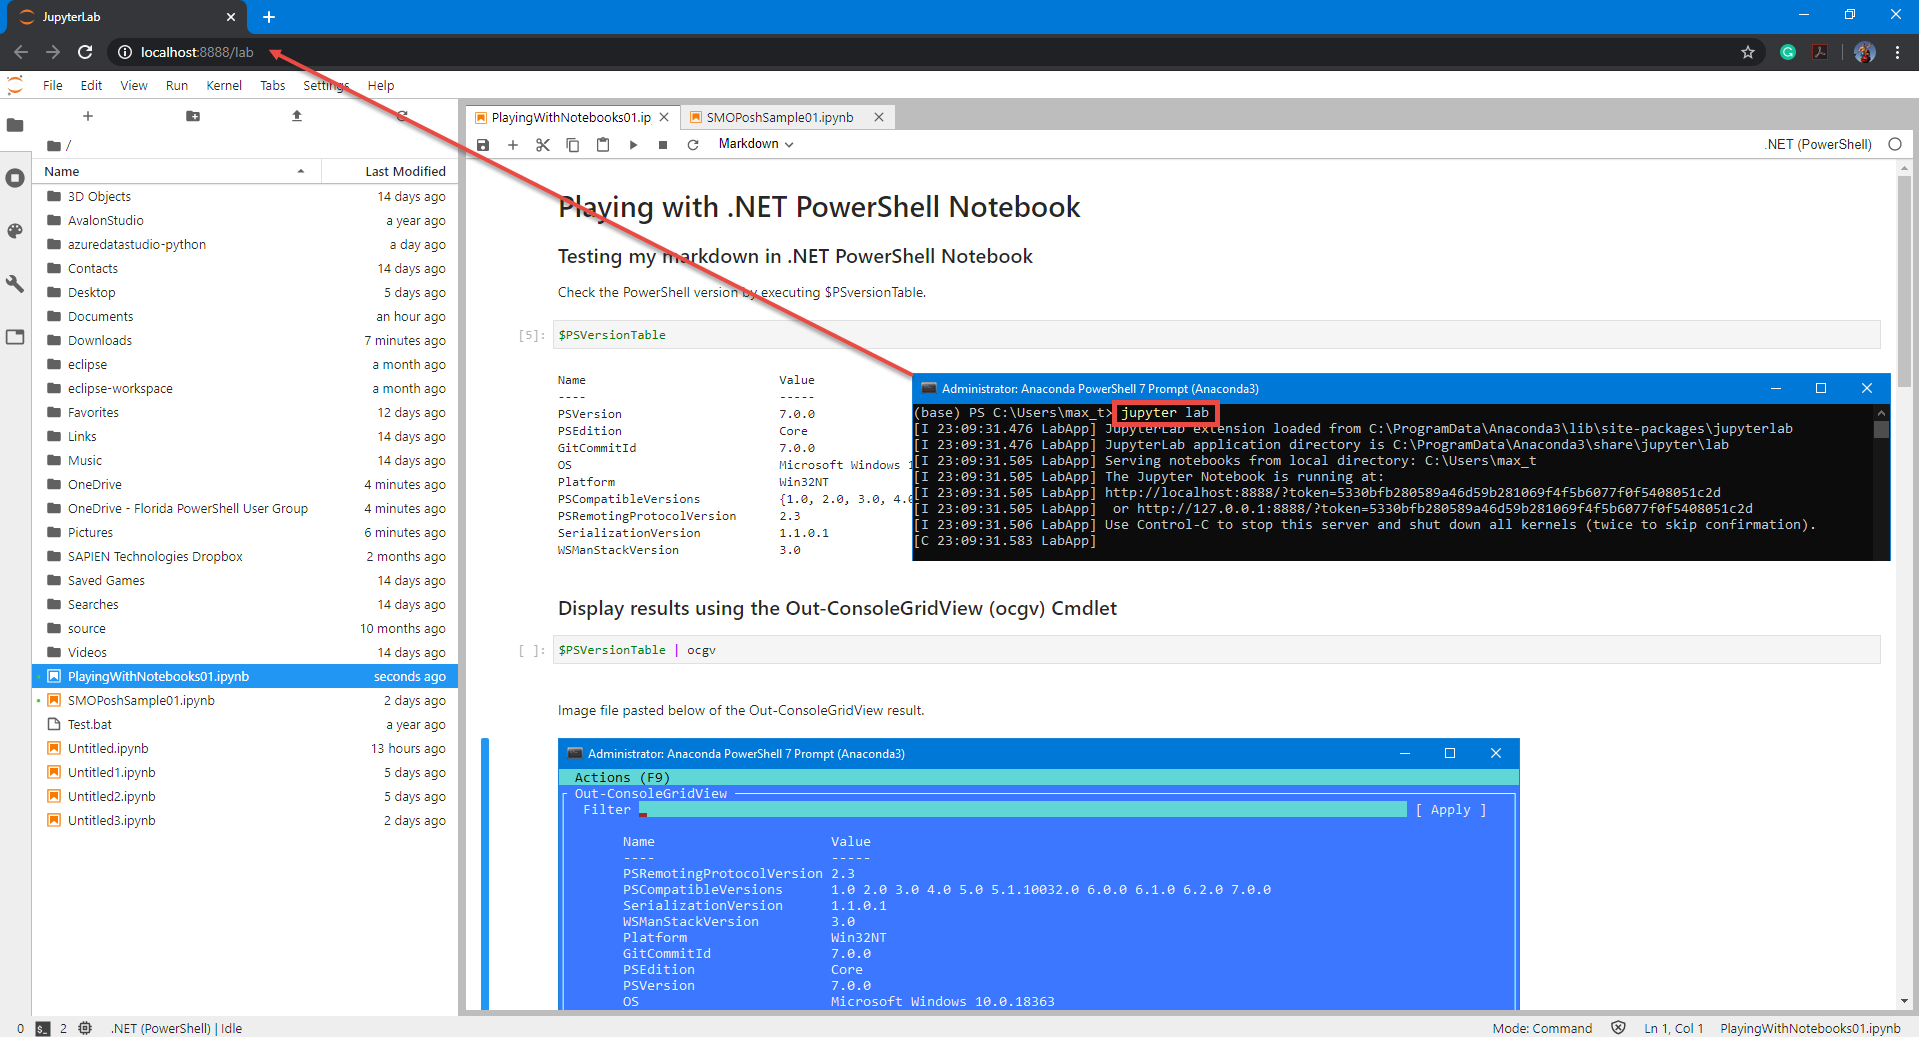
And, don’t forget to check out .NET Interactive which brings Jupyter Notebook with PowerShell kernel.
If you want to try .NET Notebook, I suggest to first install Anaconda (Python 3.7) which makes it simple to use in Windows.
If you want to experiment with .NET Notebook without installing anything in your system, then try MyBinder. This is a web-based .NET Notebook that’s run from a container.
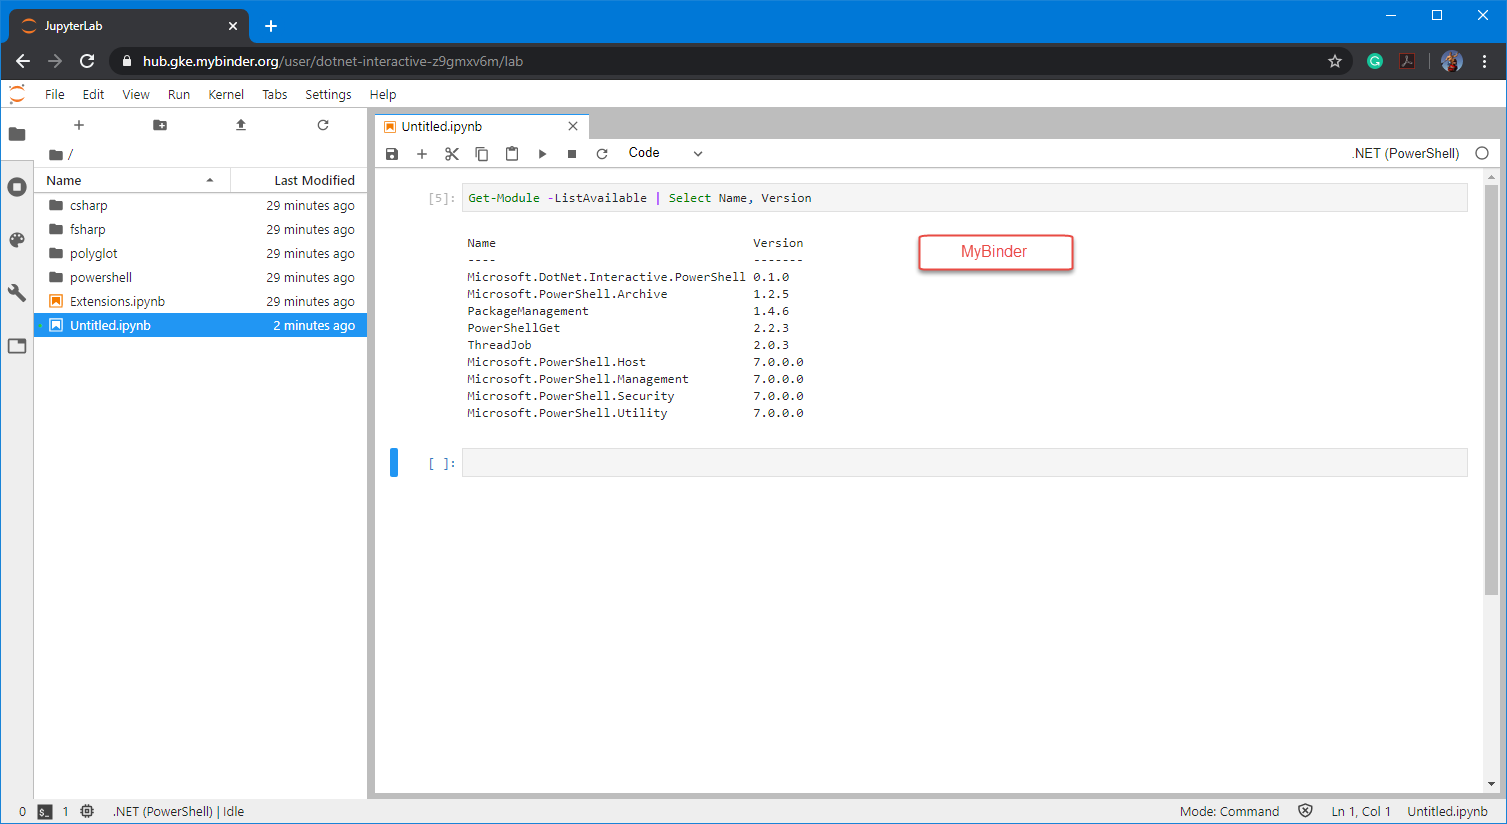
Unfortunately, in this scenario, only the PowerShell 7 core modules are available. But at least you will be able to learn the essentials of .NET Notebook.
Go ahead and start using this Amazing technology!