The latest release of .NET Interactive Preview 2 (February 6), which includes .NET Notebook for PowerShell. Remember, this is a .NET Core component that is available cross-platform.
This is great! You can start using notebook file and share it across many systems, both Windows and Linux Operating Systems.
Check out Microsoft blog post on “Public Preview of PowerShell Support in Jupyter Notebooks.”
Before you continue, I suggest to get Anaconda 2019.10 (v4.8.1) installed in your system.
Installing .NET Interactive in Ubuntu
In Windows, just takes a few steps to set it up. For Linux, it takes a few extra steps but still is quick enough to get you started.
For Windows, follow the instructions found at the .NET Interactive page in Github.
For Linux, for Ubuntu 18.04, follow the blog post “Ubuntu 18.04 Package Manager – Install .NET Core“.
Basically, in either operating systems, you install:
- Install the .NET Core SDK
- Install the ASP.NET Core runtime
- Install the .NET Core runtime
After these components are installed, proceed to install .NET Interactive Tools, which will include PowerShell support in Jupyter Notebook.
1. Install the .NET Interactive Global tools with this simple command:
$ dotnet tool install --global Microsoft.dotnet-interactive
2. Then install .NET Interactive “Jupyter” component with the following command:
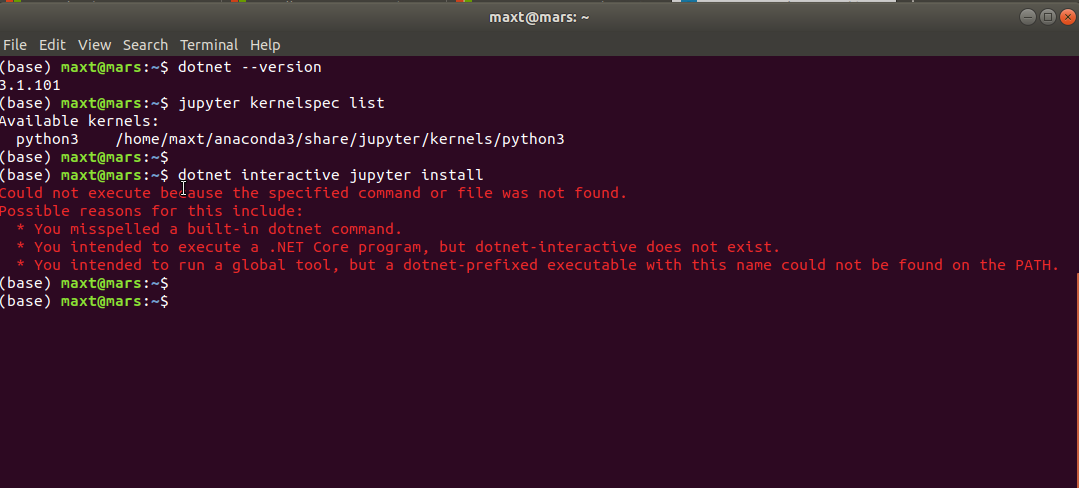
$ dotnet interactive jupyter install
At this point, in Ubuntu, you will encounter the following known error: (see image)
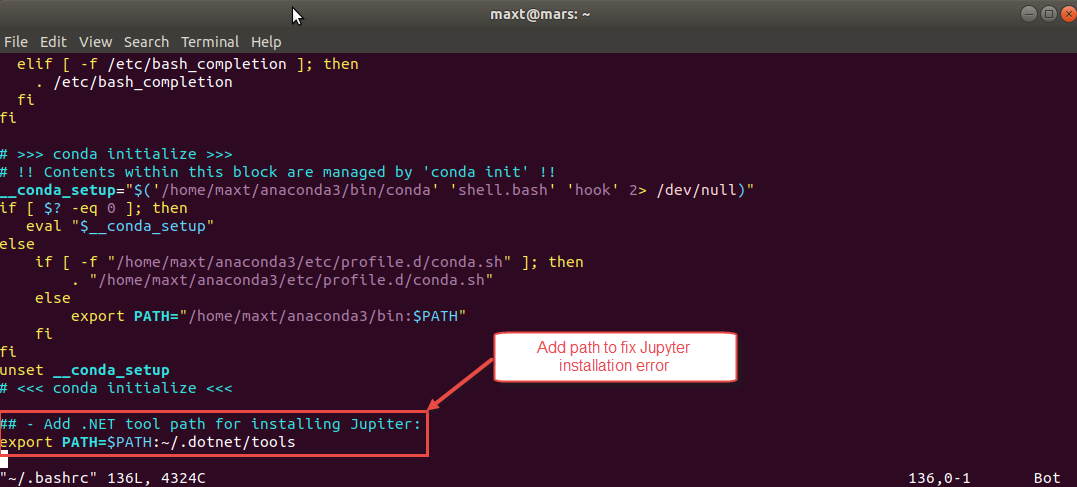
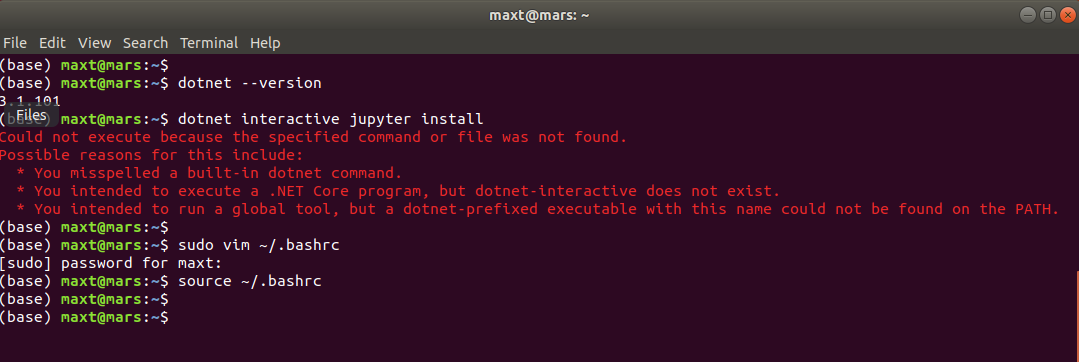
To resolve the issue, use the text editor to open the ~/.bashrc file to add the path to .NET Tools folder:
$ sudo vim ~/.bashrc
## - Add path to .NET Tools:
export PATH=$PATH:~/.dotnet/tools
:wq
$ source ~/.bashrc
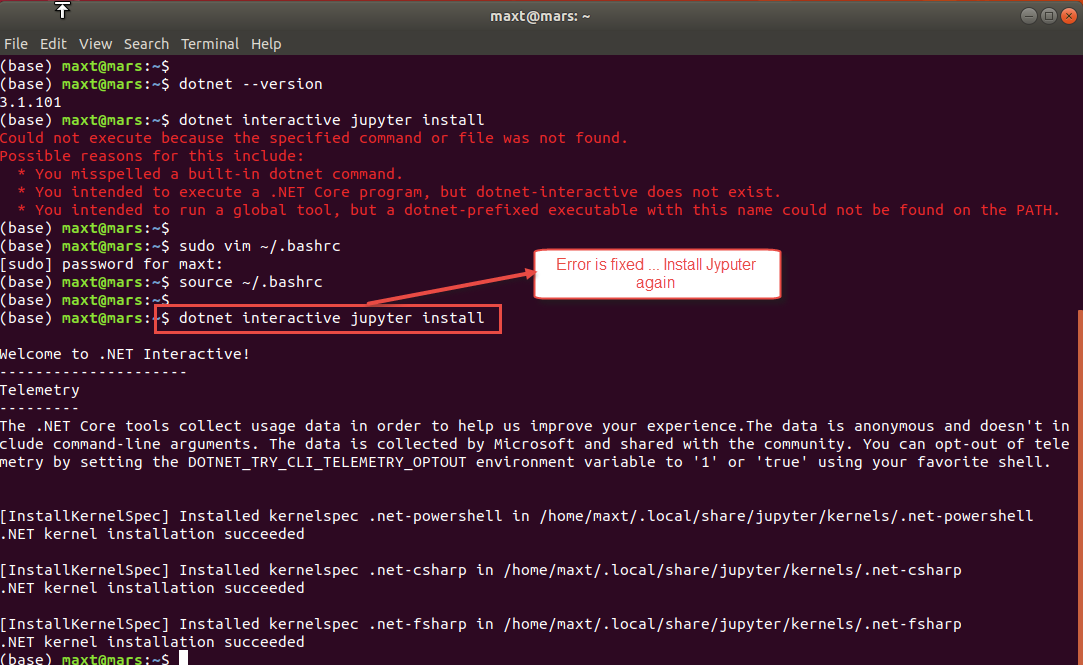
Now, we rerun the command, and this time it will complete without any errors:
$ dotnet interactive jupyter install
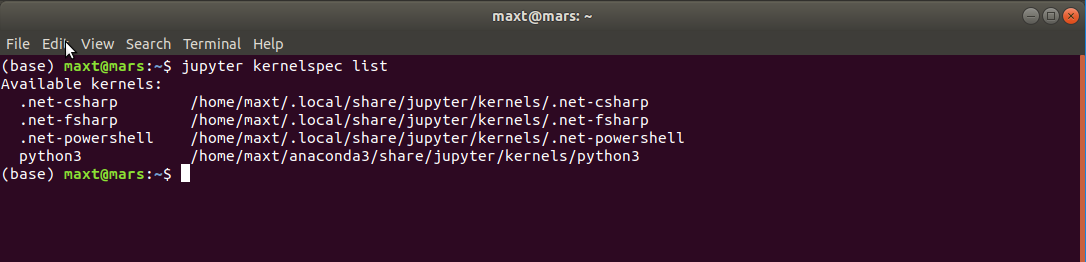
To verify that all Jupyter kernel was installed, execute the following command:
$ jupyter kernelspec list
Now, you’re ready to work with PowerShell Jupyter Notebook.
Starting Jupyter Notebook
In Windows, you use any console application to start a Jupyter Notebook session using: DOS, Windows PowerShell, and even PowerShell 7 Preview. Have you to use the Anaconda menu shortcut has provided for running the Windows PowerShell prompt?
Better yet, check my instructions on how to create the “Anaconda Pwsh7 Preview Prompt” shortcut in my previous blog post “ANACONDA AND POWERSHELL WORKING TOGETHER!“.()

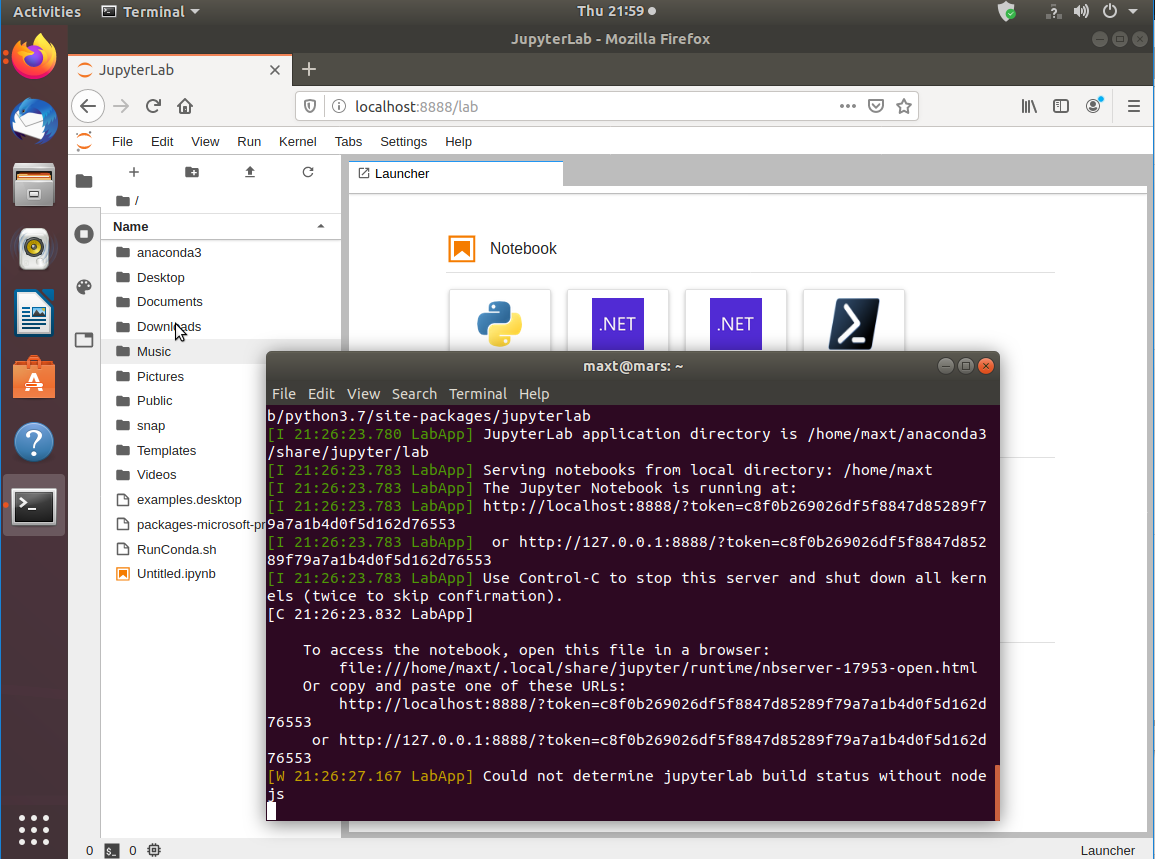
Back in Linux, open a bash terminal session.
Now, to start a .NET Interactive Jupyter Notebook session, at the console prompt type the following command:
jupyter lab
At this point, the Jupyter Notebook will open on your default browser (Windows or Linux).
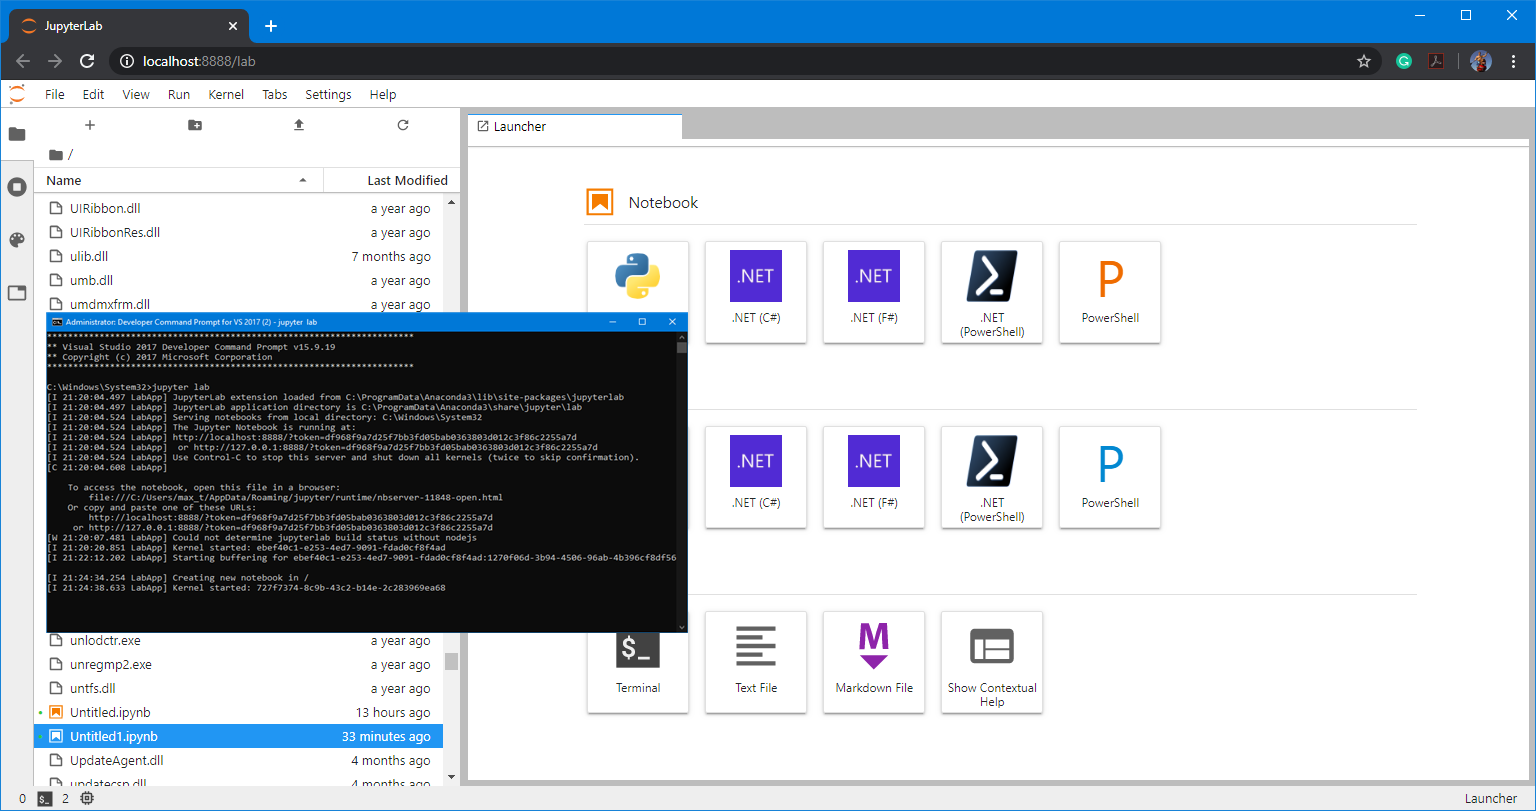
The launcher will show all available components for creating notebook files.

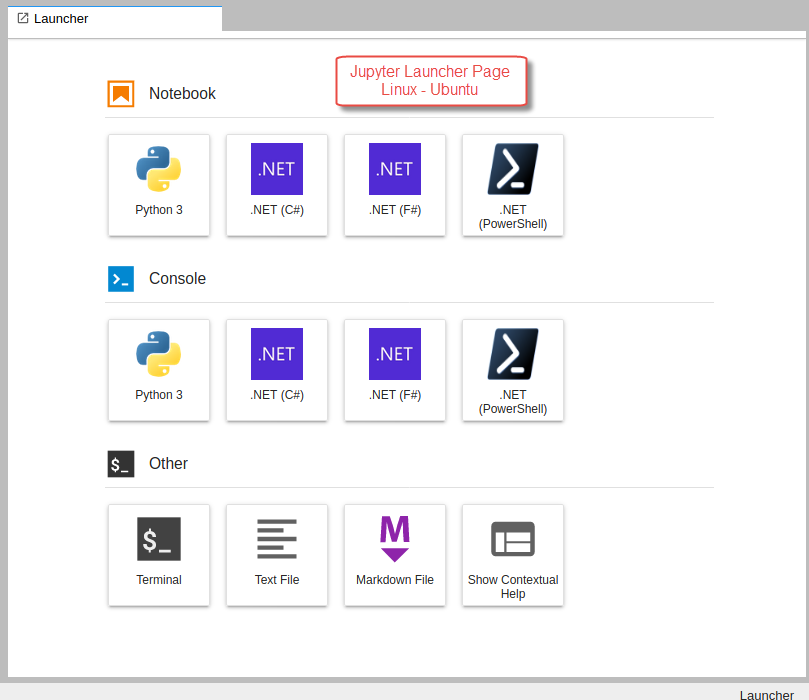
Just pick the notebook kernel you wish to start working… let say “.NET PowerShell.”
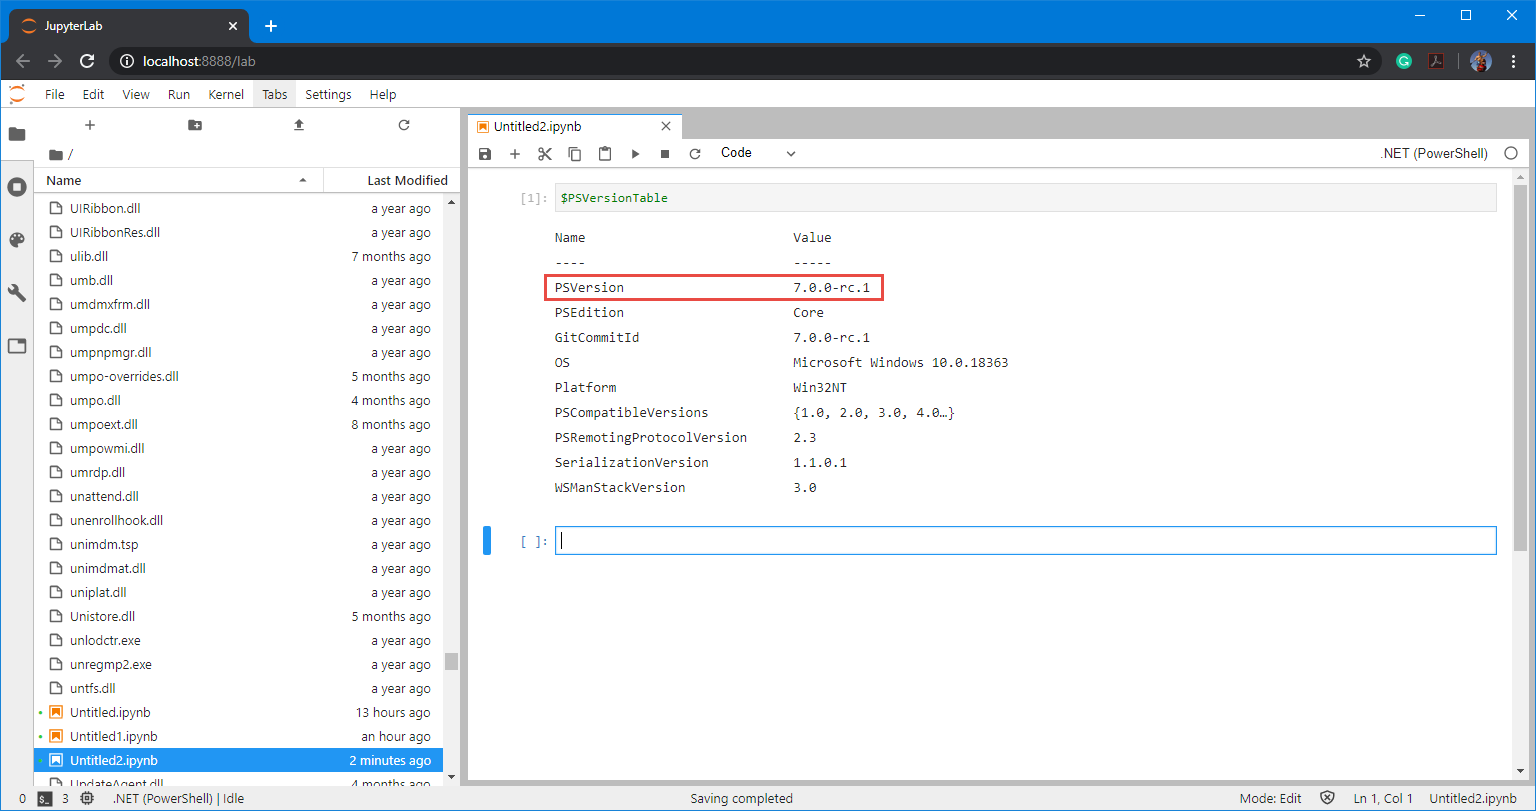
Notice that I running the $PSVersionTable in the Notebook that the .NET PowerShell kernel is one release behind the latest update.
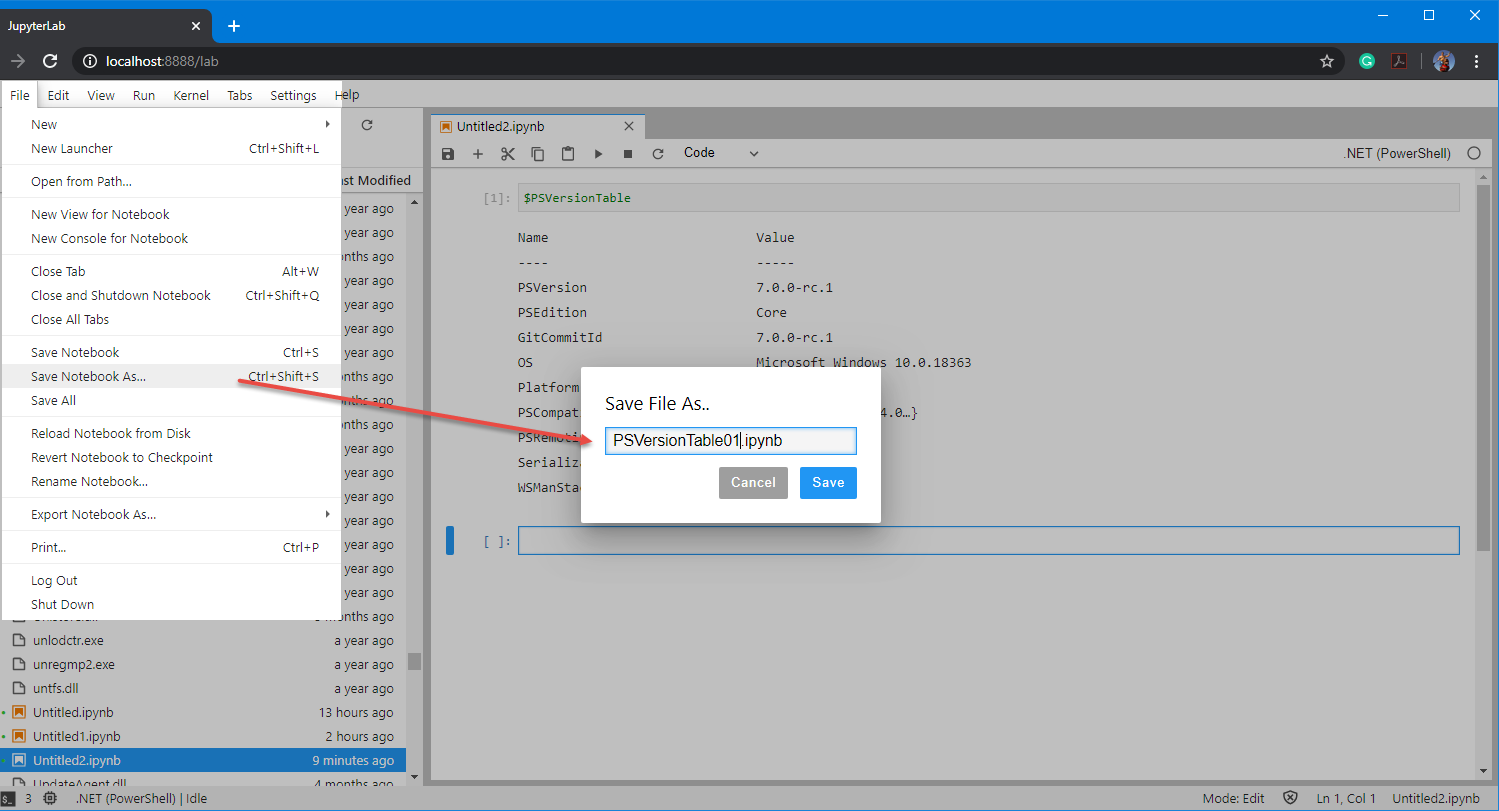
Now that I test that my .NET Notebook works, I can save my results for later use.
Please, if you encounter any issues with .NET Interactive/.NET Notebook, post them in their Github repo.
Wait! How can I get PowerShell 7 Preview RC 2 updated in .NET Interactive?
I did post the issue about why I was getting PowerShell 7 Preview RC 1 instead of RC2 and got the answer.
It looks like the initial build of .NET Interactive installation will install version ‘1.0.110801‘, which includes PowerShell 7 Preview RC1.
To get the latest build available with PowerShell 7 Preview RC 2, you need to run the update command:
## - To update tool - use PowerShell 7 Preview RC2
dotnet tool update -g --add-source "https://dotnet.myget.org/F/dotnet-try/api/v3/index.json" Microsoft.dotnet-interactive
Run the “jupyter lab” command again and run again the saved *.ipynb.
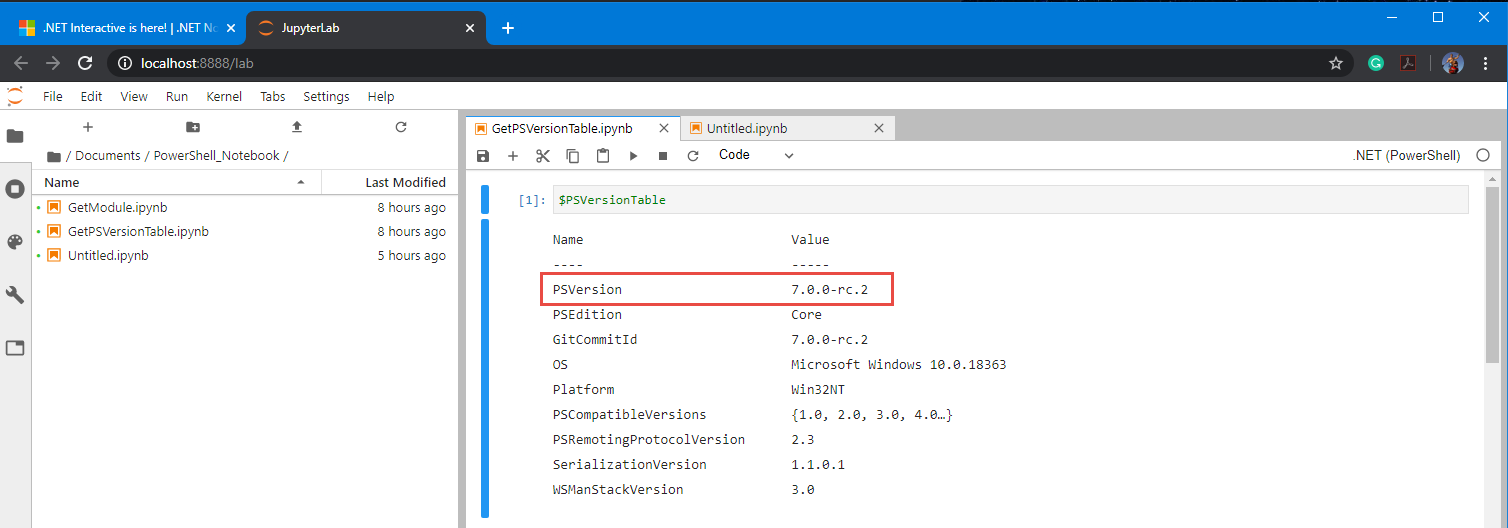
And that’s it! As you can see, this command can get your .NET Interactive installation refreshed with the latest build.
Some exciting features are coming down the pipeline. Stay tuned for more!