Containers have been popular for some time now in the industry. It’s becoming as important as learning PowerShell. Have you try it?
Installing Docker
While learning about Docker Container, I notice that is much easier to installed on a Linux system. In Windows, Hyper-V is a requirement to install Docker, and specially if you want to use the “Windows Subsystem in Linux” WSL feature, there’s more setup to complete. So, I’m not using Hyper-V, I’m using VMware Workstation. To keeping simple, I created an Ubuntu 18.04 VM using VMWare Workstation.
You can find the Docker CE installation instructions in the following link.
If you’re using Ubuntu 18.04. make sure to install Curl, as it isn’t included in the OS.
$ sudo apt install curl
After the Docker CE installation completes, make sure to run the “hello-world” to test the container runs.
If you have Hyper-V and you’re interested in pursuing making Docker CE works in Windows 10 WSL (Windows Subsystem for Linux), check the following link on “running-docker-on-bash-on-windows“.
Use PowerShell Core
Make sure you have the latest PowerShell Core installed. If it was previously installed, then use the “$ sudo apt upgrade” to get the latest version. Of course, this all depends on which installation method you previously chose to install PowerShell
Or, just go to the Github PowerShell page to get the latest version(s) for either GA (Generally Available) or the Preview.
Now, before starting to working with Docker as a non-root user, you will need to add the current user to the “Docker” group, by using the following command line:
$ sudo usermod -aG docker your-userid
Then, open a PowerShell Core session to start working with Docker containers.
The following docker commands are the essentials to work with containers and can be executed from within the PowerShell Core session:
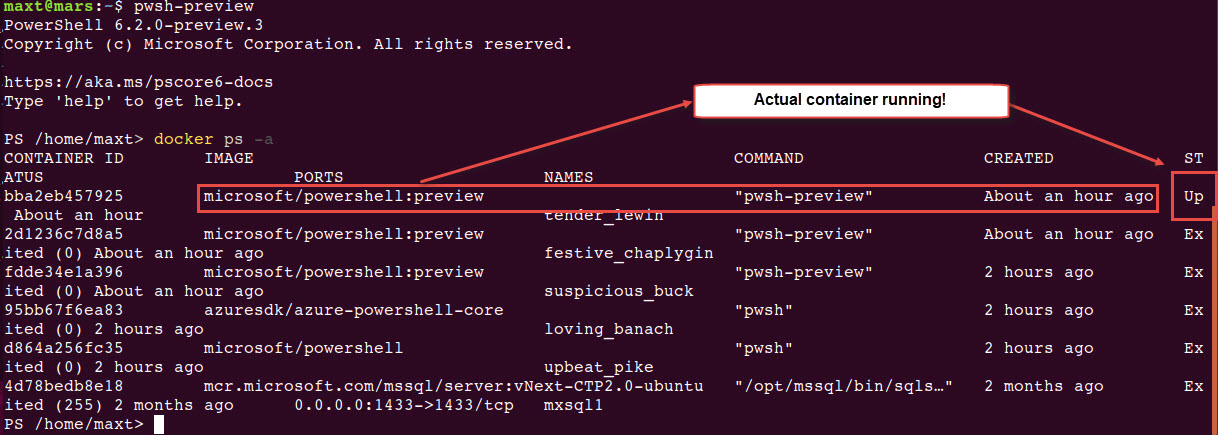
1. Listing active container
PS /> docker ps -a
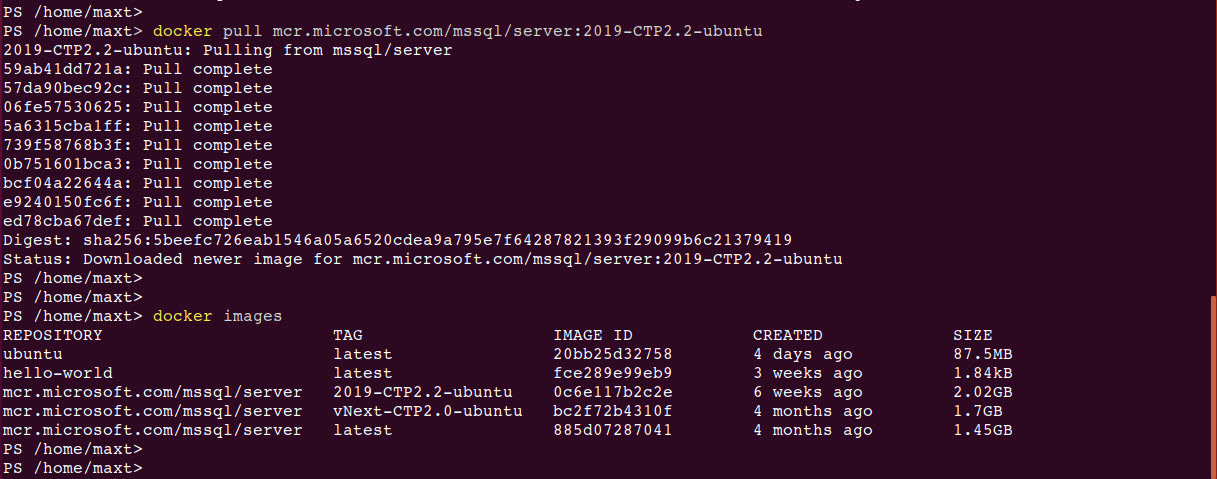
2. Listing images in your system
PS /> docker images

3. Get an container image
PS /> docker pull image-name (not GUID)
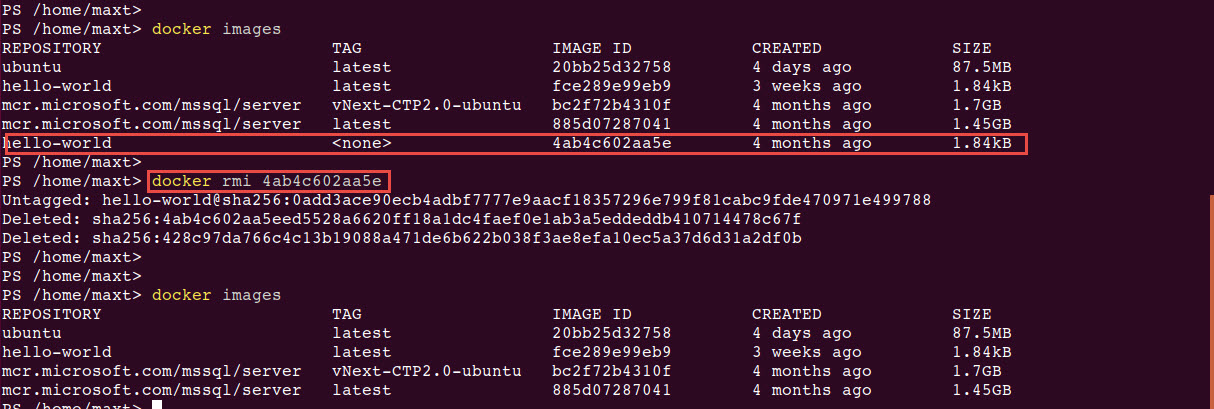
4. Image(s) cleanup
PS /> docker rmi image-GUID
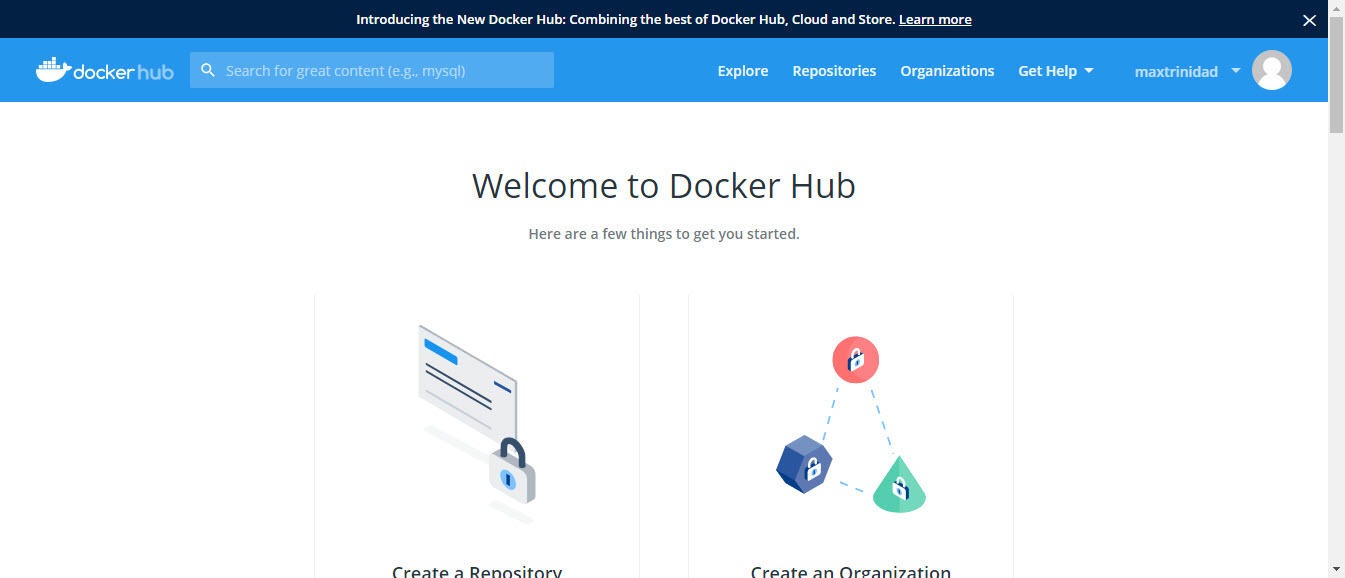
If you want to find a particular image, then go to Docker Hub site. An account is required in order to login to the Docker Hub. In there you’ll find certified images that can download using the “docker pull <imagename>” command line.
Docker PowerShell Containers
Interesting enough, while doing a search in Docker Hub, I found ta couple of PowerShell Core containers available that caught my attention.
1. “PowerShell” (Verified Publisher).
2. “azuresdk/azure-powershell-core”.
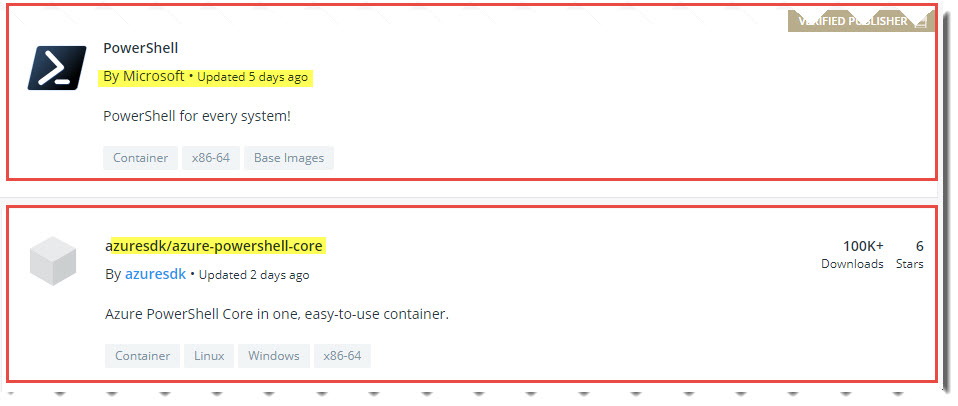
Also, “PowerShell-Preview” is available under the PowerShell Core container page
To try them out, just execute the following command:
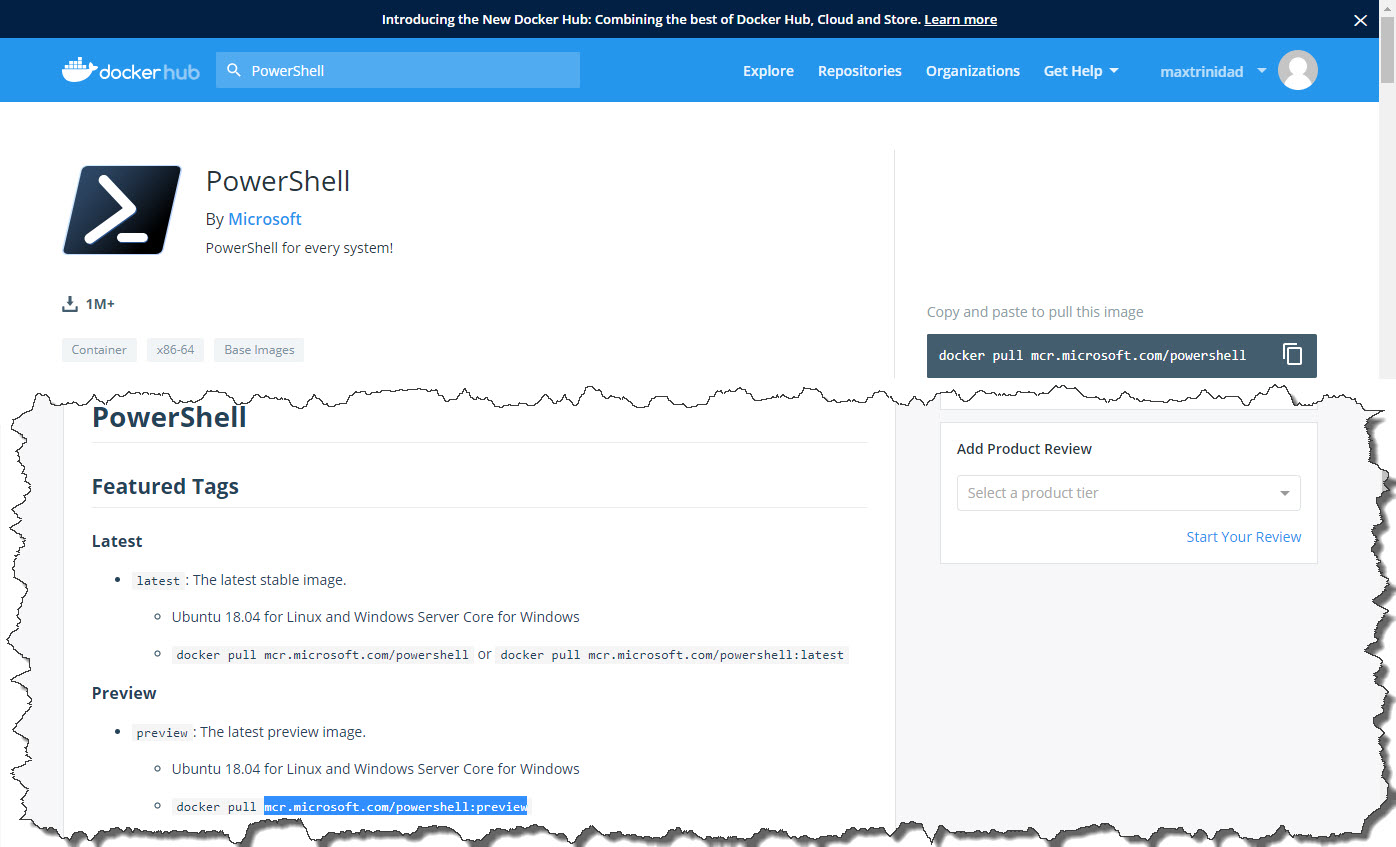
1. PowerShell – Read documentation. Then execute the following command line to pull the container to your system.
PS /> docker pull mcr.microsoft.com/powershell
2. Azure-PowerShell-Core – As of now, current documentation is out-dated. (
PS /> docker pull azuresdk/azure-powershell-core
3. PowerShell-Preview
PS /> docker pull mcr.microsoft.com/powershell:preview
After completing pulling the docker images, then we are ready to check the containers by executing the following command:
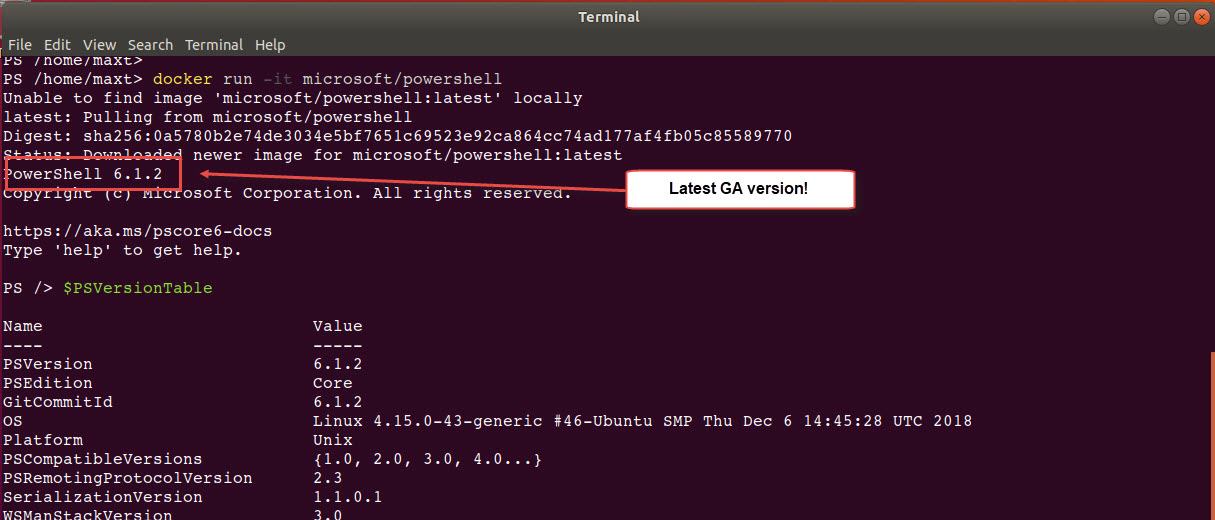
1. Execute PowerShell Core GA
docker run -it microsoft/powershell
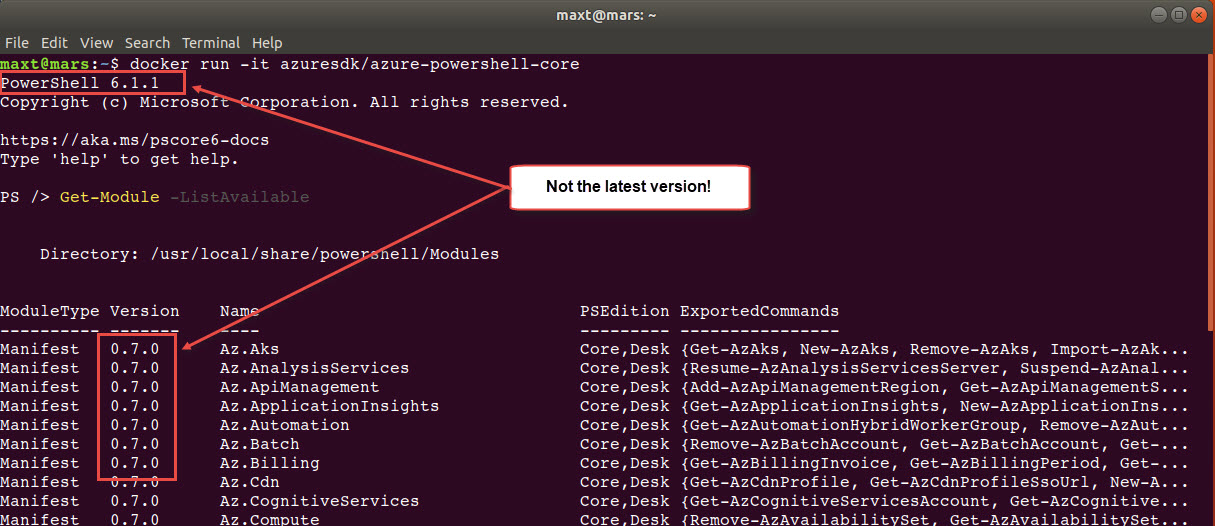
2. Execute *Azure-PowerShell
docker run -it azuresdk/azure-powershell-core
3. Execute PowerShell Core Preview (latest)
docker run -it microsoft/powershell:preview

Note: It seems the Azure-PowerShell container is not currently up-to-date for both PowerShell Core GA and the Azure modules version. Just check for upcoming updates on these repositories later.
Summary
As you can see, working with Docker containers and PowerShell makes it a convenient test environment. Either way, if you’re want to use Linux terminal session with or without PowerShell, there’s no reason why not to try it. So, after you have created the linux VM and complete the installation of Docker CE, you’ll get it working in minutes.