Yes! There’s a change, and is a good one. While checking out some recent blog post on Export-Csv command, I took it a little further. And, I ended up finding that the parameters have change in this cmdlet.
Difference
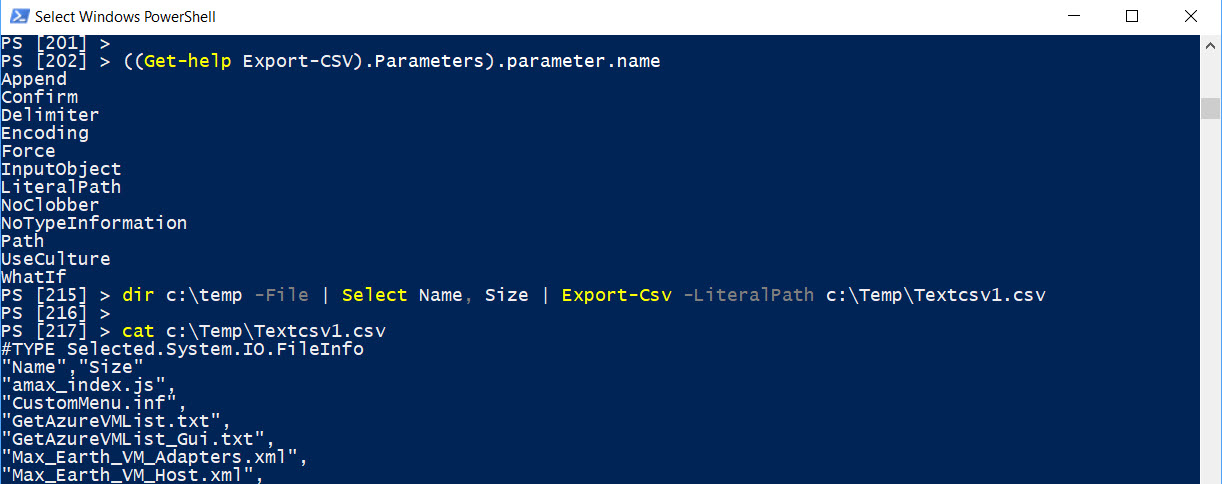
Export-Csv – Windows Powershell parameter names:
[sourcecode language=”powershell”]
((Get-help Export-Csv).Parameters).parameter.name
Append
Confirm
Delimiter
Encoding
Force
InputObject
LiteralPath
NoClobber
NoTypeInformation
Path
UseCulture
WhatIf
[/sourcecode]
Export-Csv – PowerShell Core parameter names:
[sourcecode language=”powershell”]
((Get-help Export-Csv).Parameters).parameter.name
Append
Confirm
Delimiter
Encoding
Force
IncludeTypeInformation
InputObject
LiteralPath
NoClobber
NoTypeInformation
Path
UseCulture
WhatIf
[/sourcecode]
Notice in PowerShell Core, there’s a new parameter: “-IncludeTypeInformation“.
Our prayer answered!
For a long time, in Windows PowerShell, we had to add the parameter “-NoTypeInformation“, so the “#TYPE …” line on the first row of the *CSV would not be included.
So, in Windows PowerShell executing the command without the “-NoTypeInformation” parameter, will produce the following result:
Now, using the same command in PowerShell Core without the “-NoTypeInformation” parameter, will produce a different result:
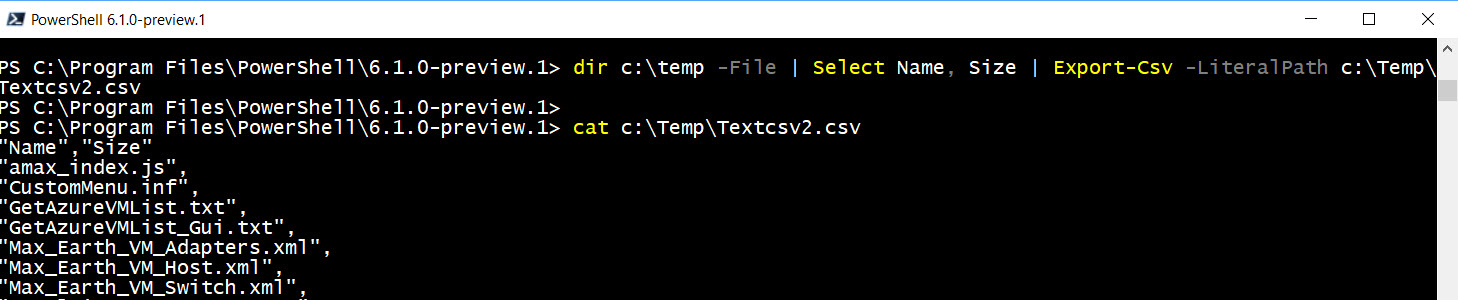
Moving forward with PowerShell, there’s no need to include the “-NoTypeInformation” parameter. Apparently, seems like the “-NoTypeInformation” parameter is the default when is not use in the cmdlet. So, no changes are needed to any previous developed scripts.
Clean Data
There is one thing we’ve learn thru time, is to always provide clean data. Knowing that a *CSV file is a text data set with columns and rows, always provide the columns name(s). This way the data structure looks nice and well defined.
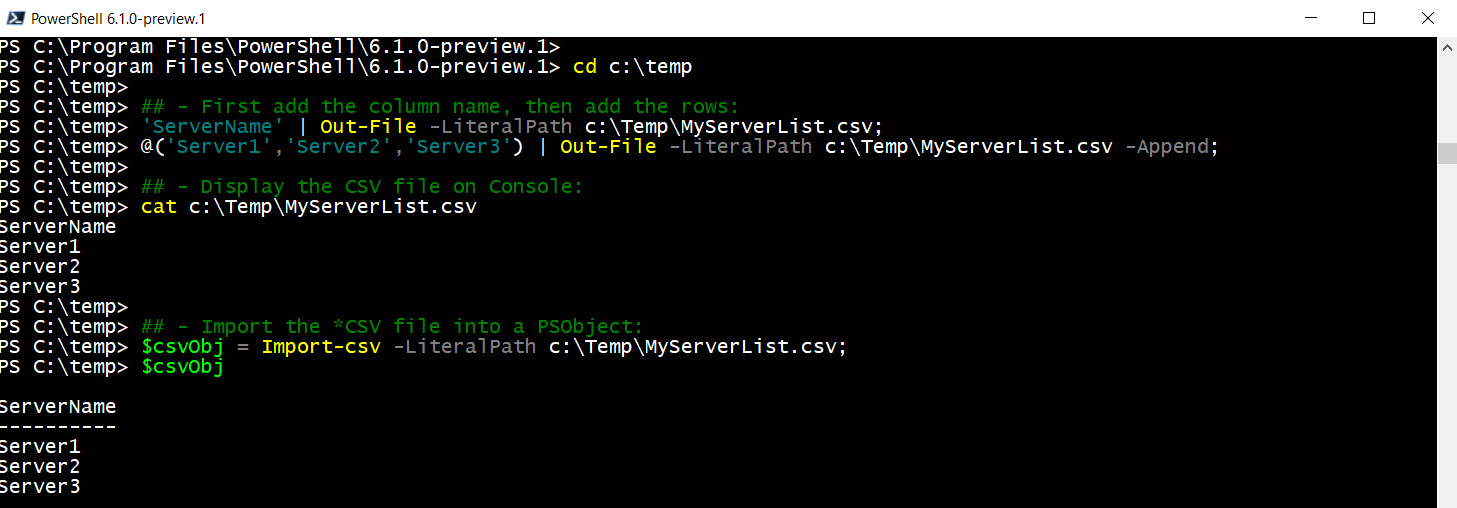
Here’s just an example of how to manually create a one column list: (PowerShell Core)
[sourcecode language=”powershell”]
## – First add the column name, then add the rows:
‘ServerName’ | Out-File -LiteralPath c:\Temp\MyServerList.csv;
@(‘Server1′,’Server2′,’Server3’) | Out-File -LiteralPath c:\Temp\MyServerList.csv -Append;
## – Display the CSV file on Console:
cat c:\Temp\MyServerList.csv
## – Import the *CSV file into a PSObject:
$csvObj = Import-Csv -LiteralPath c:\Temp\MyServerList.csv;
$csvObj
ServerName
———-
Server1
Server2
Server3
[/sourcecode]
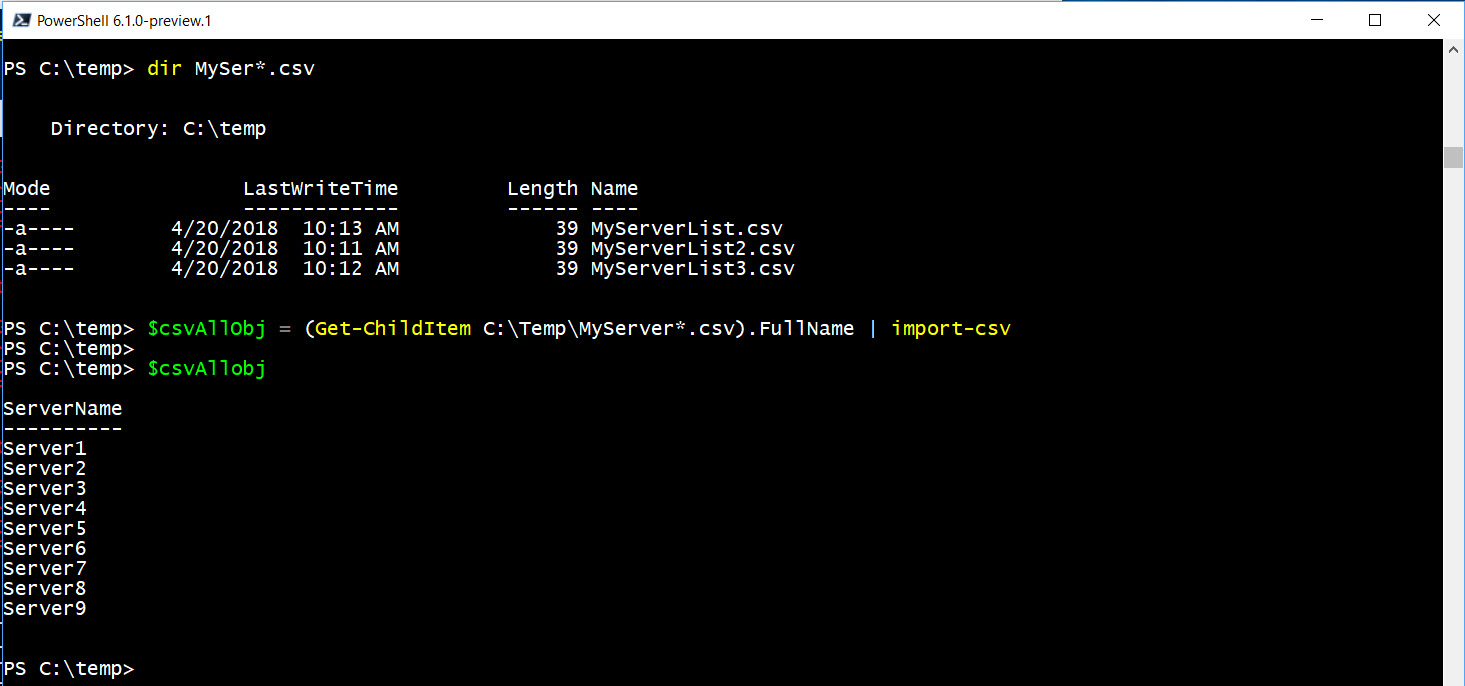
It is better to use the Out-File cmdlet in this scenario. Also, let say you got multiple *CSV file with the same data structure, meaning the same column name(s). To merge into a single object the following one-liner can solve the problem:
[sourcecode language=”powershell”]
## – Display on screen before creating the PSObject:
(Get-ChildItem C:\Temp\MyServer*.csv).FullName | import-csv
## – Build the PSObject:
$csvAllObj = (Get-ChildItem C:\Temp\MyServer*.csv).FullName | import-csv
$csvAllObj
[/sourcecode]
Export PSObject to CSV
Now, the PSObject was created, go back and use the Export-Csv to create the *CSV file.
[sourcecode language=”powershell”]
$csvAllObj | Export-csv -LiteralPath c:\Temp\MyPSObjectServerList.csv
cat c:\Temp\MyPSObjectServerList.csv
"ServerName"
"Server1"
"Server2"
"Server3"
"Server4"
"Server5"
"Server6"
"Server7"
"Server8"
"Server9"
[/sourcecode]

Finally, a *CSV file was properly created!
Bottom line
The Export-Csv is meant to be use with well-structured PSObjects and is not meant to be use from a text file.
Of course, there are many other ways to get things done with PowerShell and that’s the beauty of it.
There’s always a way!
Be Bold!! Learn PowerShell Core!!