This next version of OpenSSH bring more changes and here’s how to configured it.
So, let’s refresh the installation steps so we can remote connect from Windows to Windows, or any other non-Windows Systems using ssh protocol.
For now, this applies to Microsoft Windows [Version 10.0.16299.248].
Where To Get It
Use Chocolatey package manager for Windows to install OpenSSH-Win64. On a new windows system, it will need to be install. Make sure to open PSCore6 console “Run as administrator“.
Then, in PowerShell, execute the following command to install Chocolatey Package Manager for Windows:
[Sourcecode language=”powershell”]
Set-ExecutionPolicy Bypass -Scope Process -Force; iex ((New-Object System.Net.WebClient).DownloadString(‘https://chocolatey.org/install.ps1’))
[/Sourcecode]

When the installation is completed, make sure to exit and open again a PSCore6 console “Run as administrator”
Next, check what OpenSSH version is available by execute the following command in PowerShell:
[Sourcecode language=”powershell”]
choco info openssh
[/Sourcecode]
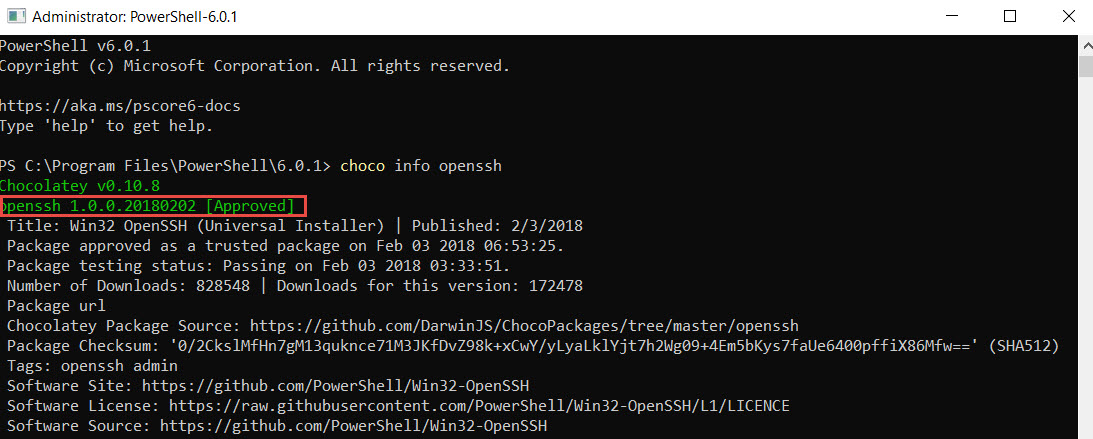
The result on screen will provide with the latest version available with the release notes for this package. One of the fixes, clears the issue with setting the ssh services permission it is set back to “Local System“.
Installing OpenSSH from Chocolatey
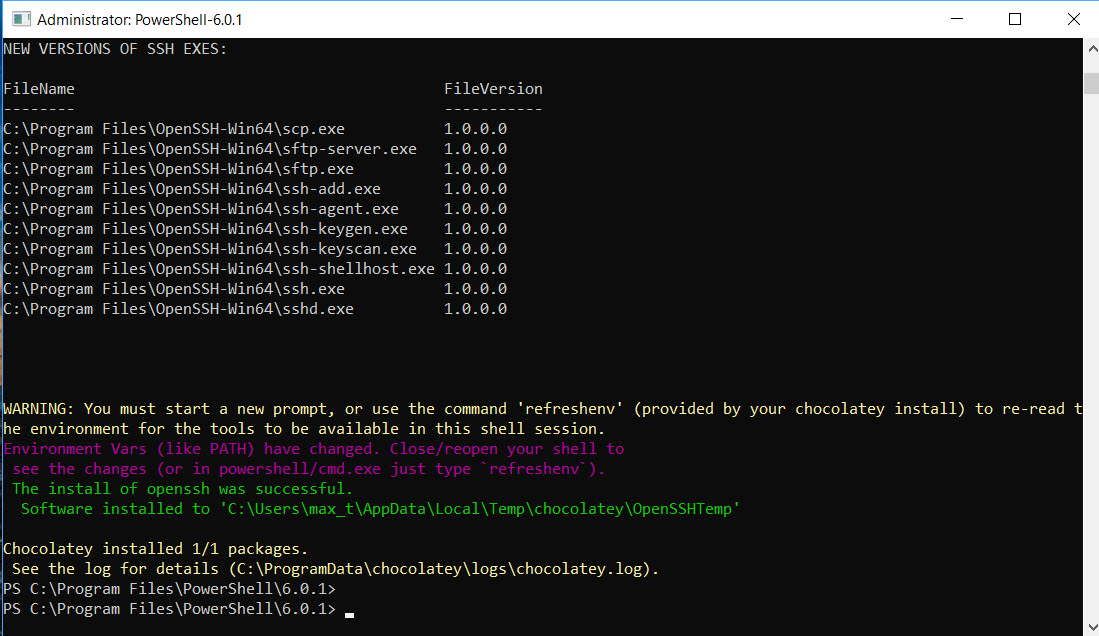
After verifying and reading the release notes, continue with installing the package. The following command will install OpenSSH-Win64 on the new system.
[Sourcecode language=”powershell”]
choco install openssh
[/Sourcecode]
Now that we got the module installed, we need to make some configuration changes before installing the ssh services.
Check Configuration settings
On this latest OpenSSH version 1.0.0.0beta there has been changes to the configuration file. There are two configuration files available:
1. sshd_config-default – located on: “C:\Program Files\OpenSSH-Win64“.
The second configuration file will be available after complete the script ssh installation:
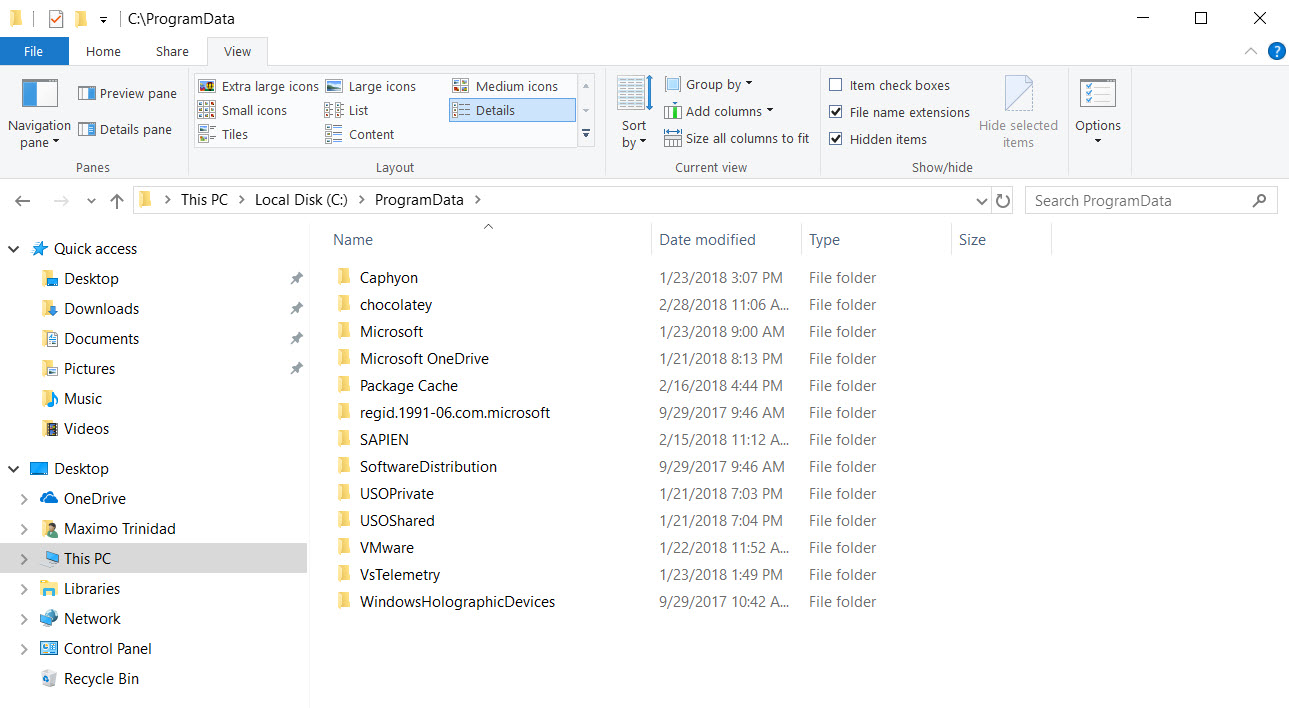
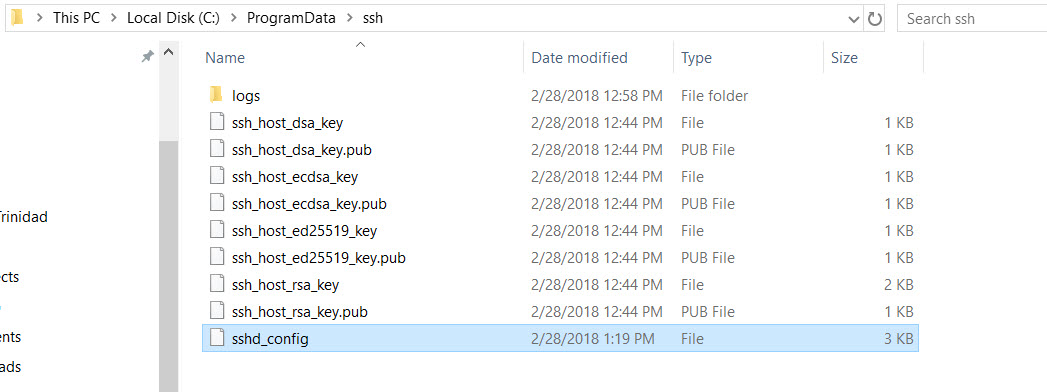
2. sshd_config – located on: “C:\ProgramData\ssh”
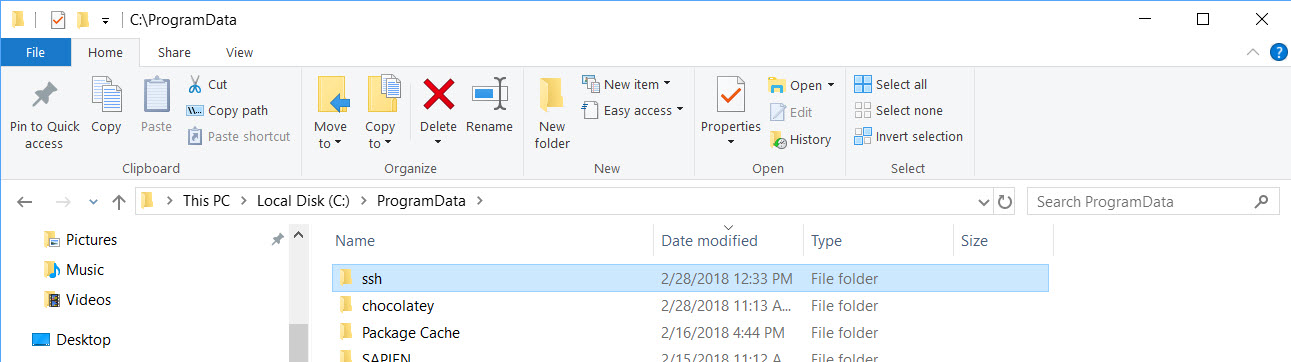
3. Also, all security key files are copied over from the “C:\Program Files\OpenSH-Win64” folder into the “C:\ProgramData\ssh“.
Remember, before the ssh services installation, the folder “C:\ProgramData\ssh” doesn’t exist.
Remember that any changes to the sshd_config file will requires both ssh services to be restarted.
Steps for Installing SSH Services
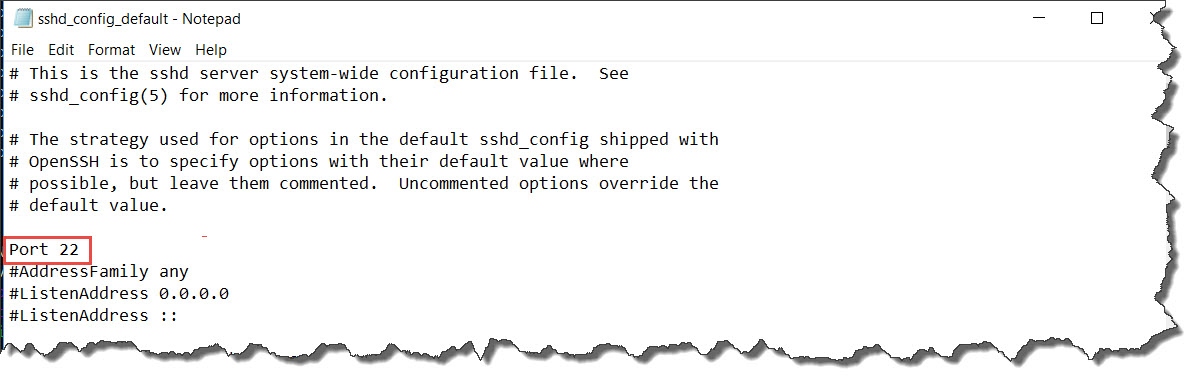
So, before executing the “Install-sshd.ps1” script. I’ll make the needed changes are in place in the sshd_config_default file using Notepad:
1. Enable: Port 22
2. Enable: PubkeyAuthentication yes
3. Enable: PasswordAuthentication yes
4. Add PSCore6 Subsystems:
[sourcecode language=”text”]
Subsystem powershell C:\Program Files\PowerShell\6.0.1\pwsh.exe -sshs -NoLogo -NoProfile
[/sourcecode]


Also, if it doesn’t already exist, add the Firewall Rule for Port 22:
[sourcecode language=”powershell”]
netsh advfirewall firewall add rule name=SSHPort22 dir=in action=allow protocol=TCP localport=22
[/sourcecode]

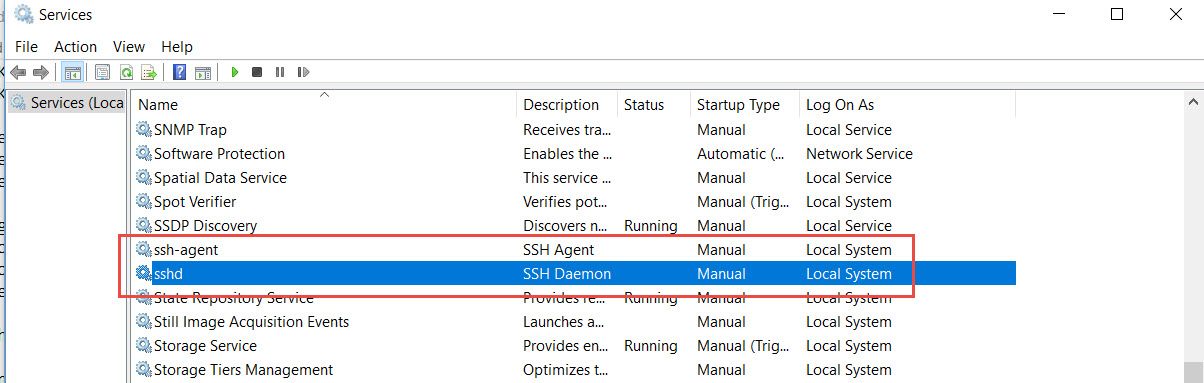
Now, we can proceed with the installation of the SSH Services. And, this installation will include the SSH-Agent Service.
[sourcecode language=”powershell”]
## – Install both ssh services: sshd and ssh-agent:
.\install-sshd.ps1 /SSHAgentFeature
[/sourcecode]
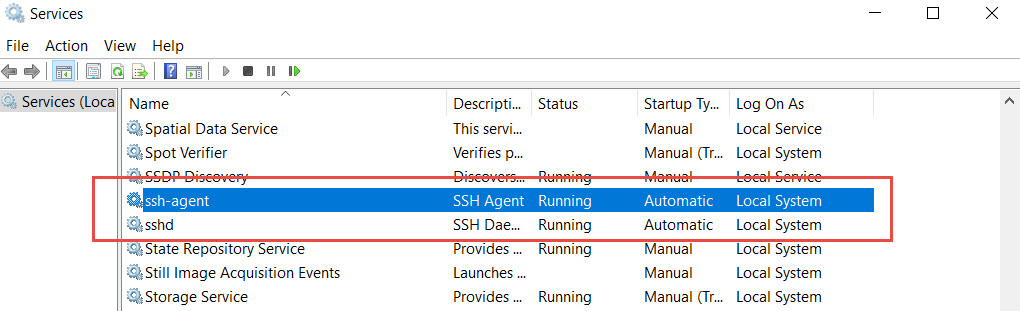
Both the ssh and the ssh-agent service are installed but remains stopped.
The installation also created a ssh folder under “C:\ProgramData” and the sshd_config file with the change we did previously to the sshd_config_default file.

Now, to complete the OpenSSH setup, we execute the following commands:
[sourcecode language=”powershell”]
## – Generate SSH keys:
./ssh-keygen -A
## – Execute both fix permissions scripts:
.\FixHostFilePermissions.ps1 -confirm:$false
.\FixUserFilePermissions.ps1
[/sourcecode]
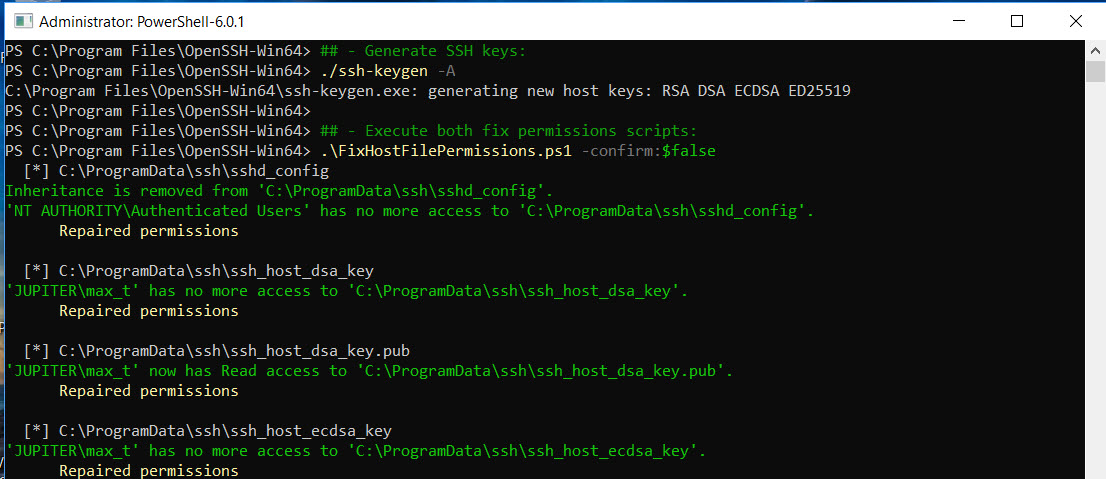
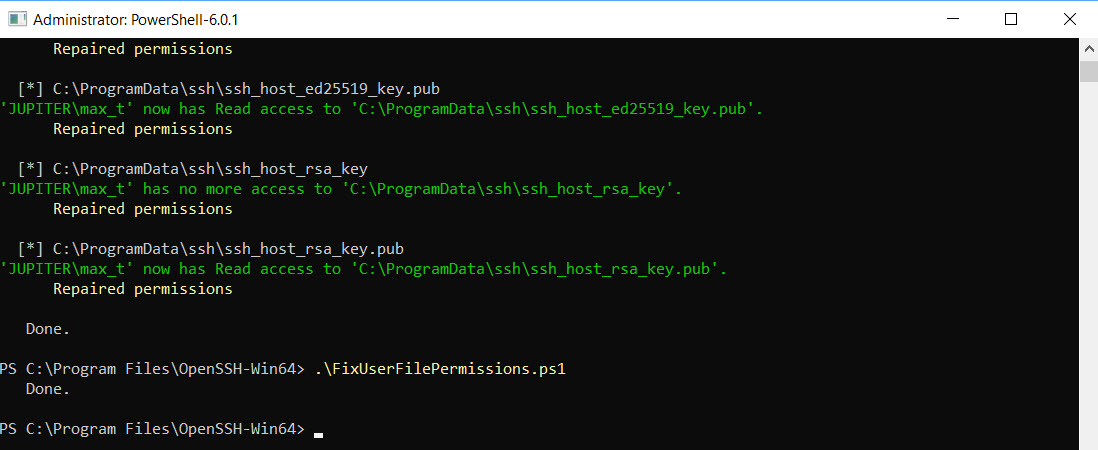
Notice, now we got the folder “C:\ProgramData\ssh” populated with all the ssh keys need for connectivity.
We are ready to work with the installed SSH Services.
Starting SSH Services
Here are some final adjustments to make sure both SSH Services will start automaticaly after the system reboots.
[sourcecode language=”powershell”]
## – Set from the Service Startup from “Manual” to “Automatic”:
Set-Service sshd -StartupType Automatic
Set-Service ssh-agent -StartupType Automatic
## – Start the SSH services:
Start-Service sshd
Start-Service ssh-agent
[/sourcecode]
Finally, we are ready to test SSH connection to another system.
Testing OpenSSH Connectivity
The installation is complete and both SSH Services are running. In order to test, we open PSCore6 console and use the “Enter-PSSession” command to connect to a Linux system or Windows system using SSH protocol.
[sourcecode language=”powershell”]
## – Connecting to Windows:
Enter-PSSession -HostName sapien01 -UserName max_t
## – Connecting to Windows:
Enter-PSSession -HostName mars -UserName maxt
[/sourcecode]
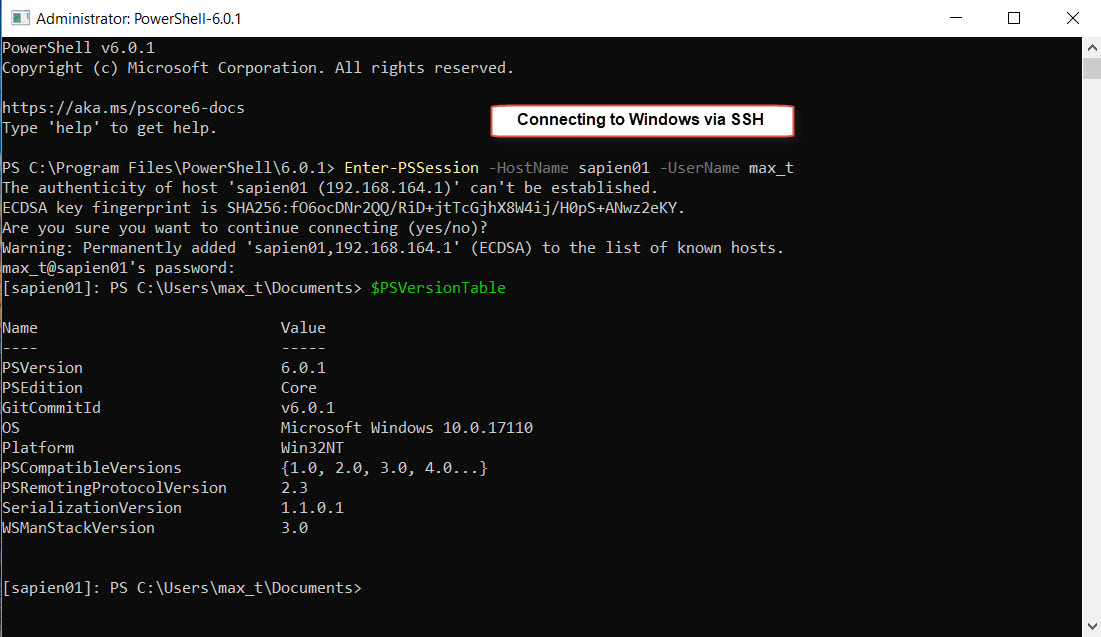
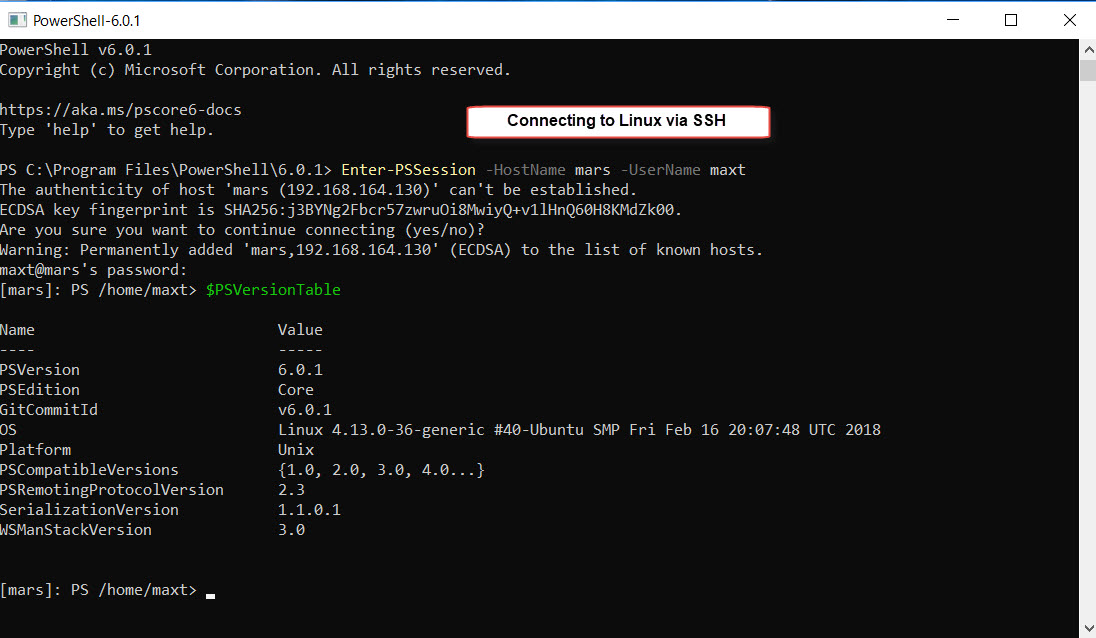
Now, we are successfully connected to another system using OpenSSH.
Word Of Caution!
All Windows System need to have the same version of OpenSSH in order to connect via ssh protocol, or the connection will failed with the following error message: “Enter-PSSession : The background process reported an error with the following message: The SSH client session has ended with error message: Connection reset by 192.168.164.128 port 22.”
Be Bold!! Learn PowerShell Core!!