Adding the code
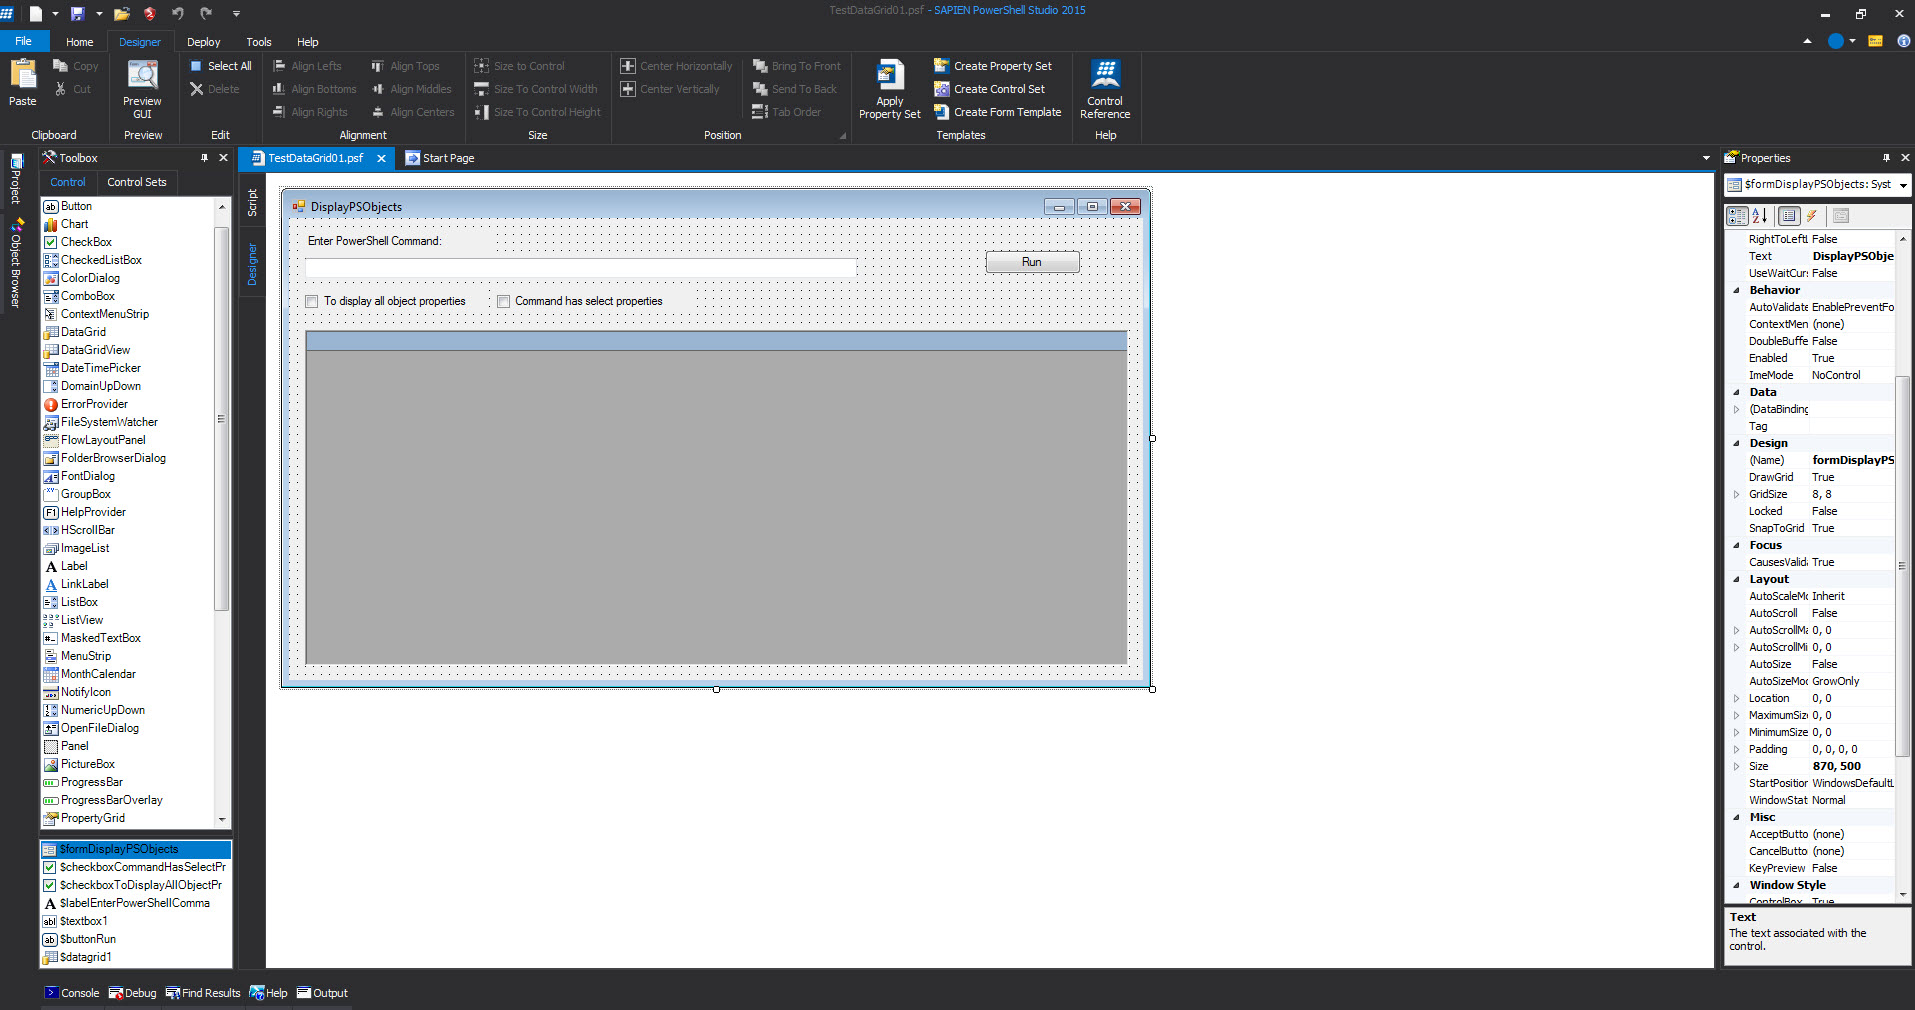
Now that we have the framework of the Windows Form built with added component, we can proceed to add the PowerShell code to make it work.
First, keep in mind, to add the code in any of the component you added to the form by just double-clicking on the component. This will take you to the editor “Script” pane and the cursor will be at the event generated code.
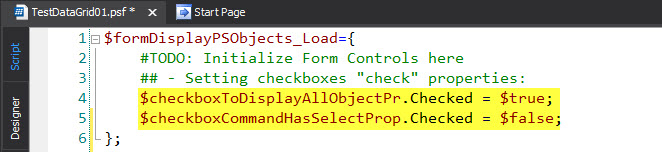
When you first create a blank Windows form, it will automatically generate the $formxxxxx_Load={..} event code. Here’s where you add any additional code before the windows form load at runtime. So, the following added code will set some “CheckBox” components properties to either “$true” or “$false”.

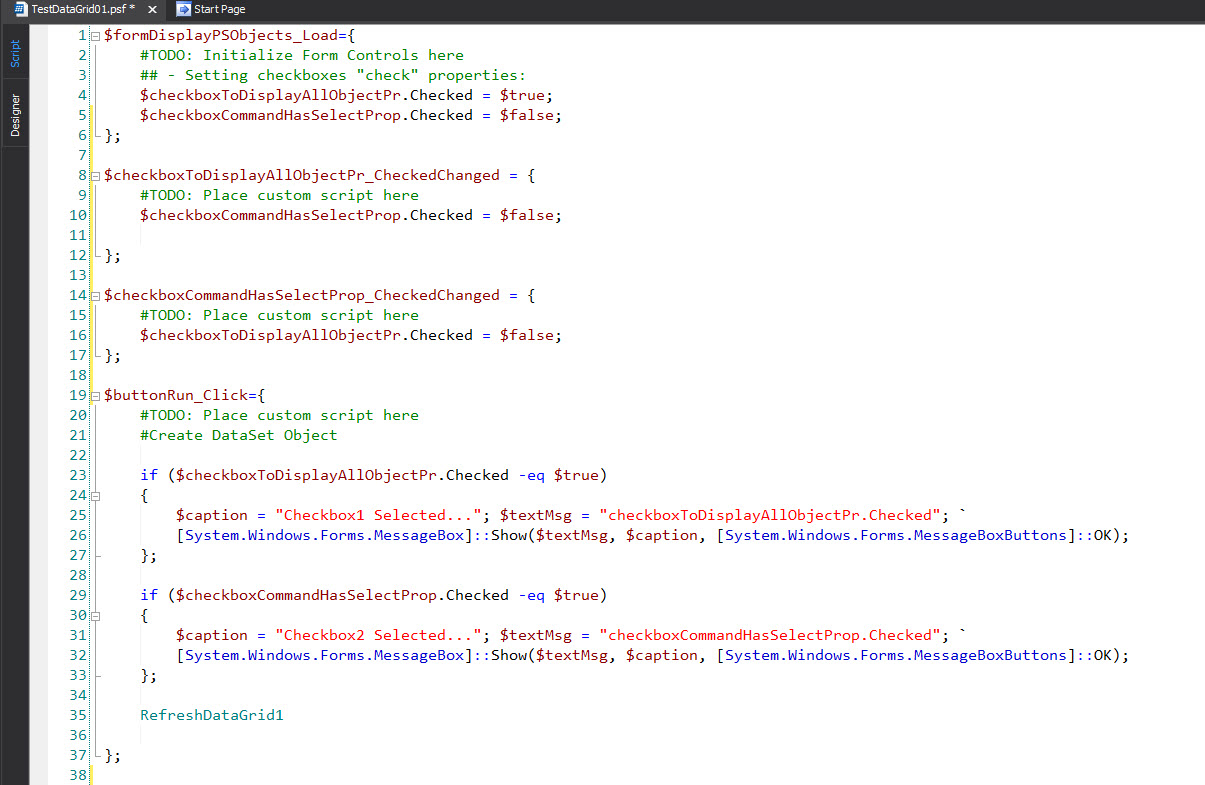
Here’s the code added to all out Windows Form components:
[sourcecode language=”powershell”]
$formDisplayPSObjects_Load={
#TODO: Initialize Form Controls here
## – Setting checkboxes “check” properties:
$checkboxToDisplayAllObjectPr.Checked = $true;
$checkboxCommandHasSelectProp.Checked = $false;
};
$checkboxToDisplayAllObjectPr_CheckedChanged = {
#TODO: Place custom script here
$checkboxCommandHasSelectProp.Checked = $false;
};
$checkboxCommandHasSelectProp_CheckedChanged = {
#TODO: Place custom script here
$checkboxToDisplayAllObjectPr.Checked = $false;
};
$buttonRun_Click={
#TODO: Place custom script here
#Create DataSet Object
if ($checkboxToDisplayAllObjectPr.Checked -eq $true)
{
$caption = “Checkbox1 Selected…”; $textMsg = “checkboxToDisplayAllObjectPr.Checked”; `
[System.Windows.Forms.MessageBox]::Show($textMsg, $caption, [System.Windows.Forms.MessageBoxButtons]::OK);
};
if ($checkboxCommandHasSelectProp.Checked -eq $true)
{
$caption = “Checkbox2 Selected…”; $textMsg = “checkboxCommandHasSelectProp.Checked”; `
[System.Windows.Forms.MessageBox]::Show($textMsg, $caption, [System.Windows.Forms.MessageBoxButtons]::OK);
};
## Function to populate the DataGrid component:
RefreshDataGrid1
};
[/sourcecode]
As you can see, just adding a few line of PowerShell code will bring your windows form to life. Please notice that in this application, both CheckBox component doesn’t really do anything except to display a Popup message.
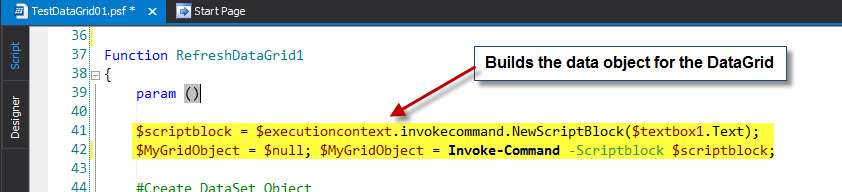
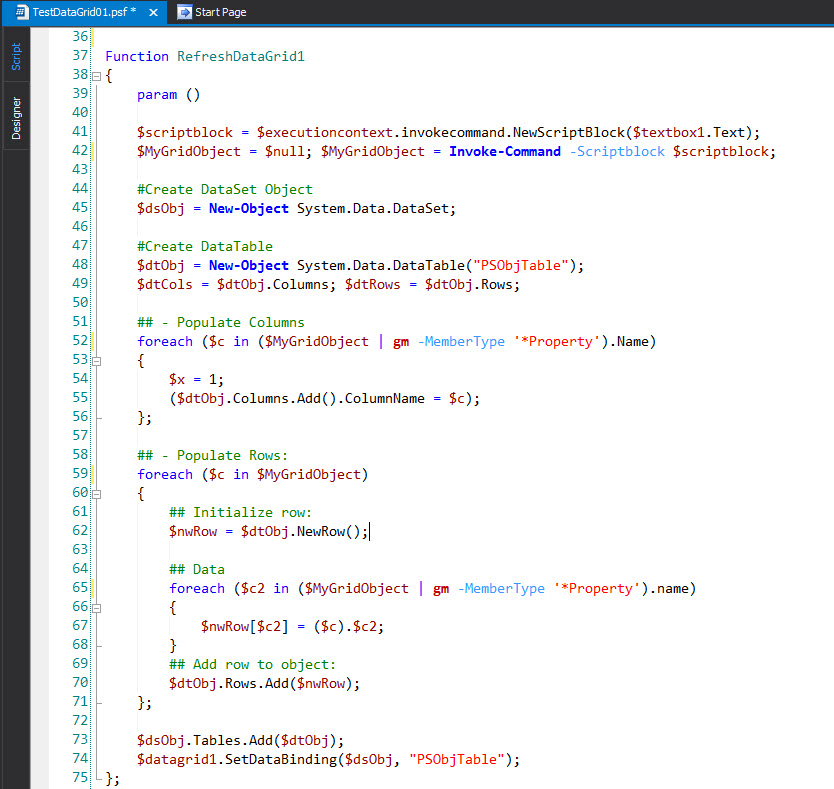
Adding the DataGrid function
The following function (“RefreshDataGrid1”) is the heart of the form which will display the data into the DataGrid. In order to build our data we need to type then execute a one-line PowerShell command in our form textbox. This is where we use the “$executioncontext.invokecommand.NewScriptBlock($textbox1.Text)” which will convert the text into a PowerShell ScriptBlock object for processing in the “Invoke-Command”.
After we got the object create, the function will proceed to:
1. Create the DataSet object and the table placeholder for columns and rows of DataGrid.
2. Then, populate columns names and data rows.
3. Finally, it binds the DataSet table into the DataGrod component.
[sourcecode language=”powershell”]
Function RefreshDataGrid1
{
param ()
$scriptblock = $executioncontext.invokecommand.NewScriptBlock($textbox1.Text);
$MyGridObject = $null; $MyGridObject = Invoke-Command -Scriptblock $scriptblock;
#Create DataSet Object
$dsObj = New-Object System.Data.DataSet;
#Create DataTable
$dtObj = New-Object System.Data.DataTable(“PSObjTable”);
$dtCols = $dtObj.Columns; $dtRows = $dtObj.Rows;
## – Populate Columns
foreach ($c in ($MyGridObject | gm -MemberType ‘*Property’).Name)
{
$x = 1;
($dtObj.Columns.Add().ColumnName = $c);
};
## – Populate Rows:
foreach ($c in $MyGridObject)
{
## Initialize row:
$nwRow = $dtObj.NewRow();
## Data
foreach ($c2 in ($MyGridObject | gm -MemberType ‘*Property’).name)
{
$nwRow[$c2] = ($c).$c2;
}
## Add row to object:
$dtObj.Rows.Add($nwRow);
};
$dsObj.Tables.Add($dtObj);
$datagrid1.SetDataBinding($dsObj, “PSObjTable”);
};
[/sourcecode]
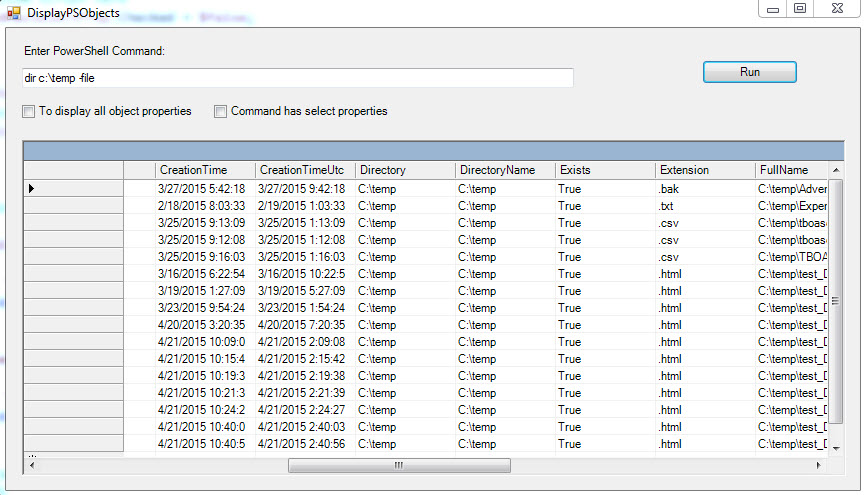
Testing the Windows Form
Following the instruction from the previous blog, run the form and type the following one-liner:
[sourcecode language=”powershell”]
dir c:\temp -file
[/sourcecode]
Then, click on the “Run” button to execute the command and view the result in the Datagrid view.
Now, type another one-liner, select one either of the CheckBox, and click on the “Run” button:
[sourcecode language=”powershell”]
dir c:\temp -file | Select name, extension, directory
[/sourcecode]
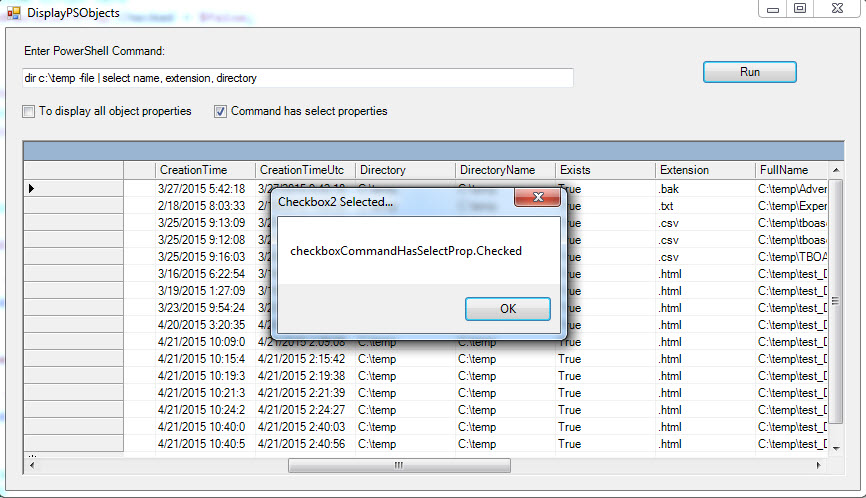
As you can see, the checkbox will display the message and the datagrid will refresh its data.

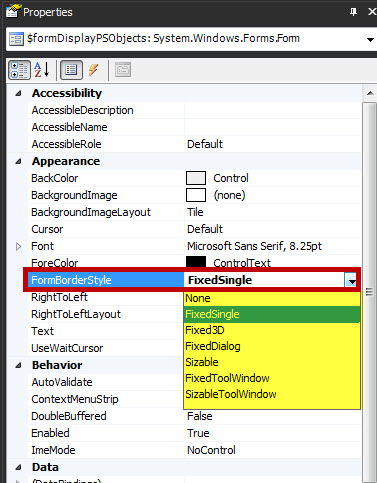
Additional tip
If you want to lock the Windows Form so it won’t resize, use the “FormBorderStyle” property. This form has the “FormBorderStyle” property set to “FixedSingle”.
After the Windows form is fully tested and working, you can proceed to either keep executing it from PowerShell Studio or go ahead to build the executable file.
Keep in mind, This sample is not perfect but shows some essentials in building the Windows forms using PowerShell Studio 2015. This tool is a GREAT tool that has a lot to offer.
If you want more information about Window Component properties, search the MSDN library online. Also, don’t forget to check SAPIEN’s Blog at: http://www.sapien.com/blog/